vue.js 构建项目
Today in this article we are going to build a full stack application with various concepts. This application is a simulator of multiplayer table top game.
今天,在本文中,我们将构建具有各种概念的全栈应用程序。 该应用程序是多人桌面游戏的模拟器。
This project contains a Phaser game that allow us to create tokens and cards on screen and move them around on a digital game board.
该项目包含一个Phaser游戏,该游戏使我们可以在屏幕上创建令牌和卡,并在数字游戏板上移动它们。
The Phaser instance in a Vue.js contains a component that is used to handle things like multiplayer chat and commands. Both the Phaser and Vue comprises our front end. We are going to use Socket.IO to communicate with other players using the front and back end of our application.
Vue.js中的Phaser实例包含一个用于处理多人聊天和命令之类的组件。 Phaser和Vue都构成了我们的前端。 我们将使用Socket.IO通过应用程序的前端和后端与其他播放器进行通信。
The back end we are going to use is a simple Express.js server that receives Socket.IO events from the client. The entire application will run on Node.js as its runtime.
我们将使用的后端是一个简单的Express.js服务器,该服务器从客户端接收Socket.IO事件。 整个应用程序将在其运行时在Node.js上运行。
You don’t need to be expert in any of these languages. For this application you have to know the basics of HTML/CSS and JavaScript to build. Make sure that you have installed Node, Git, your favourite code editor and a command line interface.
您不需要是任何一种语言的专家。 对于此应用程序,您必须了解HTML / CSS和JavaScript的基础知识。 确保已安装Node,Git,您最喜欢的代码编辑器和命令行界面。
Let’s get started.
让我们开始吧。
客户基础 (Client Basics)
Now we are going to build our client by installing the Vue CLI. It will allow us to make changes to our files without reloading our web browser.
现在,我们将通过安装Vue CLI来构建客户端。 这将使我们无需重新加载Web浏览器即可对文件进行更改。
Type the following command in your terminal to install the Vue CLI globally:
在终端中键入以下命令以全局安装Vue CLI:
npm install -g @vue/cliGo to a directory and create a new folder for our project:
转到目录并为我们的项目创建一个新文件夹:
mkdir tabletop-project
cd tabletop-project
Use the Vue CLI template to a front end project:
将Vue CLI模板用于前端项目:
vue create clientNow go to our client folder in our CLI and run the template app:
现在转到CLI中的客户端文件夹并运行模板应用程序:
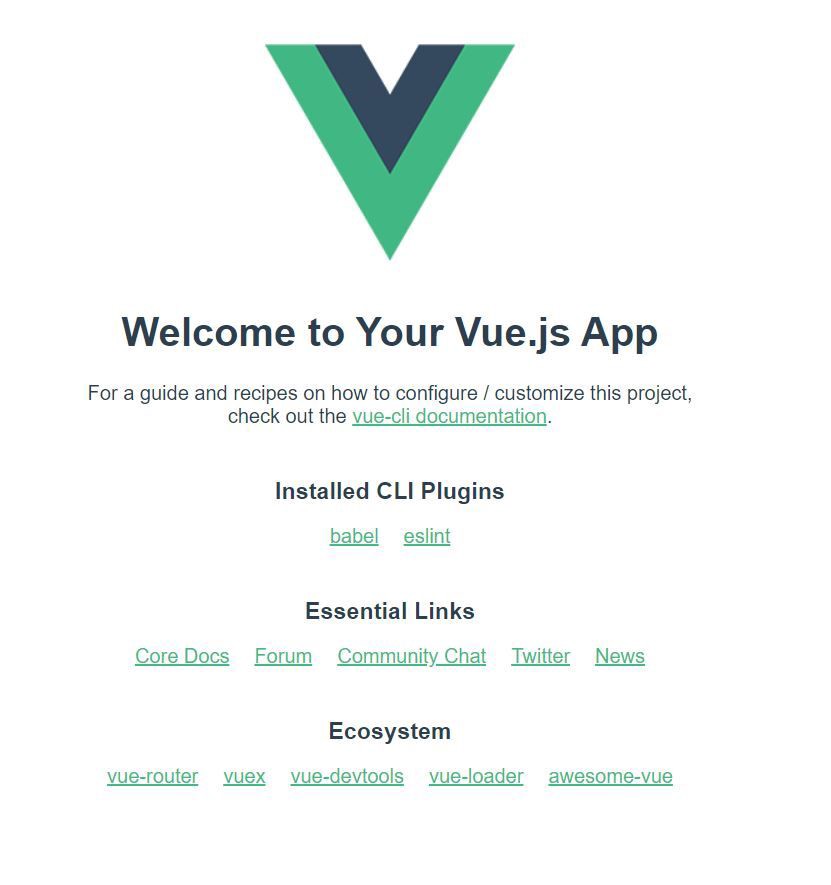
vue create clientNow our app will looks likes this in a web browser at the default http://localhost:8080
现在,我们的应用程序将在Web浏览器中的默认http:// localhost:8080上看起来像这样
Now break our code by creating two new components in the /components folder, called Game.vue and Chat.vue. Then Replace the code in App.vue with the following:
现在,通过在/ components文件夹中创建两个新组件(称为Game.vue和Chat.vue)来破坏我们的代码。 然后,用以下代码替换App.vue中的代码:
<template>
    <div id="app">
        <div id="game">
            <Game />
        </div>
        <div id="border" />
        <div id="input">
            <Chat />
        </div>
    </div>
</template><script>
    import Chat from './components/Chat.vue';
    import Game from './components/Game.vue';export default {
        name: 'App',
        components: {
            Chat,
            Game
        }
    }
</script><style>
    #app {
        font-family: 'Trebuchet MS';
        text-align: left;
        background-color: black;
        color: cyan;
        display: flex;
    }
    #game {
        width: 50vw;
        height: 100vh;
    }
    #input {
        width: 50vw;
        height: 100vh;
    }
    #border {
        border-right: 2px solid cyan;
    }
    @media (max-width: 1000px) {
        #app {
            flex-direction: column;
        }
        #game {
            width: 100vw;
            height: 50vh;
        }
        #input {
            width: 100vw;
            height: 50vh;
        }
    }
</style>
Now you will see, a Vue component contains three sections: Template, Script, and Style, any HTML, JavaScript, and CSS for that component. We are just imported our Game and Chat components and added a little styling to it for running. Now we need to set our server working.
现在您将看到,Vue组件包含三个部分:模板,脚本和样式,该组件的任何HTML,JavaScript和CSS。 我们只是导入了我们的游戏和聊天组件,并为其添加了一些样式以供运行。 现在我们需要将服务器设置为工作状态。
服务器基础 (Server Basics)
In our root directory (tabletop-project, above /client) initialize a new project by a command line interface.
在我们的根目录(/ client上方的tabletop-project)中,通过命令行界面初始化一个新项目。
npm initNow we have to install Express, Socket.IO and Nodemon to watch our server files and reboot as necessary:
现在,我们必须安装Express,Socket.IO和Nodemon来监视我们的服务器文件并根据需要重新启动:
npm install --save express socket.io nodemonNow open the package.json file in that root directory and add a “start” command in the “scripts” section:
现在,在该根目录中打开package.json文件,并在“脚本”部分中添加“开始”命令:
"scripts": {
    "start": "nodemon server.js"
  },
Let’s create a new file called server.js in this directory and add the following code:
让我们在此目录中创建一个名为server.js的新文件,并添加以下代码:
const server = require('express')();
const http = require('http').createServer(server);
const io = require('socket.io')(http);io.on('connection', function (socket) {
    console.log('A user connected: ' + socket.id);
    socket.on('send', function (text) {
        let newText = "<" + socket.id + "> " + text;
        io.emit('receive', newText);
    });socket.on('disconnect', function () {
        console.log('A user disconnected: ' + socket.id);
    });
});http.listen(3000, function () {
    console.log('Server started!');
});
When the server receives a request from a client. It will create a new text which includes the socket ID of the client and returns the response to all the clients with the text that it received with the socket ID.
服务器收到客户端的请求时。 它将创建一个包含客户端套接字ID的新文本,并将其收到的带有套接字ID的文本返回给所有客户端响应。
Now we can able to test the server by the following command in your terminal:
现在,我们可以在终端中通过以下命令测试服务器:
npm run start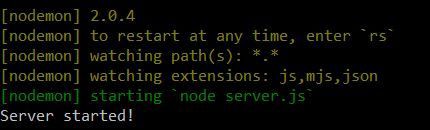
聊天室 (Chat)
Now open a separate CLI and go to the /client directory, and install the client version of Socket.IO:
现在打开一个单独的CLI并转到/ client目录,然后安装Socket.IO的客户端版本:
npm install --save socket.io-clientIn /client/src/components/Chat.vue add the following code:
在/client/src/components/Chat.vue中,添加以下代码:
<template>
    <div id="container">
        <div id="output">
            <h1>STRUCT</h1>
            <p v-for="(text, index) in textOutput" :key="index">{{text}}</p>
        </div>
        <div id="input">
            <form>
                <input type="text" v-model="textInput" :placeholder="textInput" />
                <input type="submit" value="Send" v-on:click="submitText" />
            </form>
        </div>
    </div>
</template><script>
    import io from 'socket.io-client';
    let socket = io('http://localhost:3000');export default {
        name: 'Chat',
        data: function () {
            return {
                textInput: null,
                textOutput: []
            }
        },
        methods: {
            submitText: function (event) {
                event.preventDefault();
                socket.emit('send', this.textInput);
            }
        },
        created: function () {
            socket.on('connect', () => {
                console.log('Connected!');
            });
            socket.on('receive', (text) => {
                this.textOutput.push(text);
                this.textInput = null;
            });
        }
    }
</script><style scoped>
    #container {
        text-align: left;
        display: flex;
        flex-direction: column;
        margin-left: 1vw;
        min-height: 100vh;
    }
    h1 {
        text-align: center;
    }
    .hotpink {
        color: hotpink;
    }
    #input {
        position: fixed;
        margin-top: 95vh;
    }
    input[type=text] {
        height: 20px;
        width:  40vw;
        border: 2px solid cyan;
        background-color: black;
        color: hotpink;
        padding-left: 1em;
    }
    input[type=submit]{
        height: 25px;
        width: 5vw;
        background-color: black;
        color: cyan;
        border: 2px solid cyan;
        margin-right: 2vw;
    }
    input[type=submit]:focus{
        outline: none;
    }
    input[type=submit]:hover{
        color: hotpink;
    }
    @media (max-width: 1000px) {
        #container {
            border-left: none;
            border-top: 2px solid cyan;
            min-height: 50vh;
        }
        #input {
            margin-top: 43vh;
        }
        #output {
            margin-right: 10vw;
        }
        input[type=text] {
            width: 60vw;
        }
        input[type=submit] {
            min-width: 10vw;
        }
    }
</style>
In the <style> tags add some CSS to make more functions of our chat. You can style in your favourite mode.
在<style>标记中添加一些CSS,以使我们的聊天功能更多。 您可以在自己喜欢的模式下设置样式。
In the <style> tags let’s import the Socket.IO and stored in a variable called socket that communicates through http://localhost:3000.
在<style>标记中,让我们导入Socket.IO并存储在一个名为socket的变量中,该变量通过http:// localhost:3000进行通信。
In the <template> tags that contains HTML includes input and output sections. The output section contains a header called Struct which utilizes Vue list to render the display of <p> element for each text in the textOutput array.
在包含HTML的<template>标记中,包括输入和输出部分。 输出部分包含一个名为Struct的标头,该标头利用Vue列表为textOutput数组中的每个文本呈现<p>元素的显示。
The input section contains a simple form with Vue input form and an event handler to receive text input and store in our textInput variable that triggers to send into the Socket.IO event when the button is clicked.
输入部分包含一个带有Vue输入表单的简单表单,以及一个事件处理程序,用于接收文本输入并将其存储在我们的textInput变量中,当单击按钮时,该变量触发发送到Socket.IO事件。
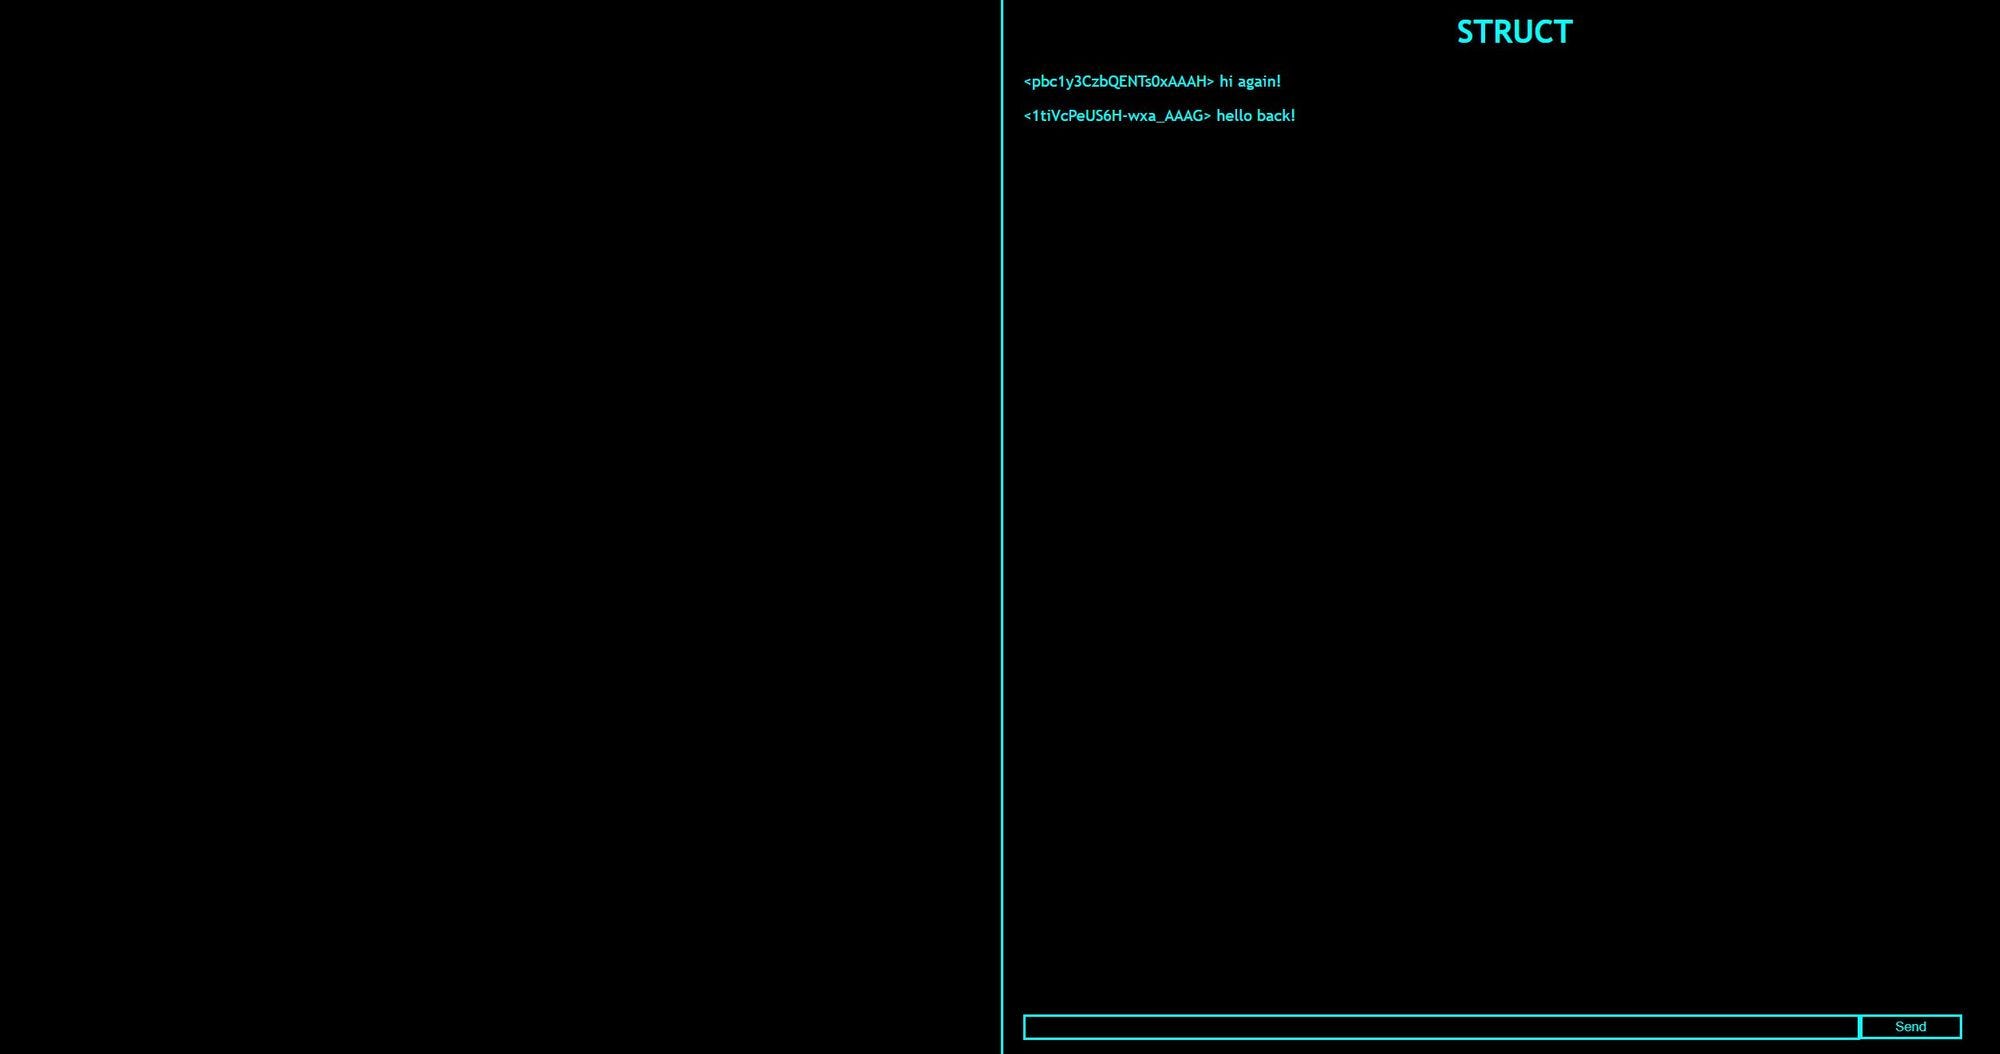
Now you can open other browser and connect to the server with a new socket ID, and the chat should begin among both the clients.
现在,您可以打开其他浏览器,并使用新的套接字ID连接到服务器,并且聊天应该在两个客户端之间开始。
桌面模拟器 (TableTop Simulator)
Now we need a Vue component for the phasor instance and a boilerplate to create a client.
现在,我们需要一个用于相量实例的Vue组件和一个用于创建客户端的样板。
In /client/src/components/Game.vue file add the following code:
在/ client / src / components / Game.vue文件中,添加以下代码:
<template>
    <div :id="containerId" v-if="downloaded" />
    <div class="placeholder" v-else>
        Downloading...
    </div>
</template><script>
    export default {
        name: 'Game',
        data: function () {
            return {
                downloaded: false,
                gameInstance: null,
                containerId: 'game-container'
            }
        },
        async mounted() {
            const game = await import(../game/game');
            this.downloaded = true;
            this.$nextTick(() => {
                this.gameInstance = game.launch(this.containerId)
            })
        },
        destroyed() {
            this.gameInstance.destroy(false);
        }
    }
</script><style scoped></style>
This component will render the game instance and a placeholder. It won’t work until created a instance of game for that.
该组件将渲染游戏实例和一个占位符。 在为此创建游戏实例之前,它不会起作用。
In a CLI at the /client directory add the following code:
在/ client目录的CLI中,添加以下代码:
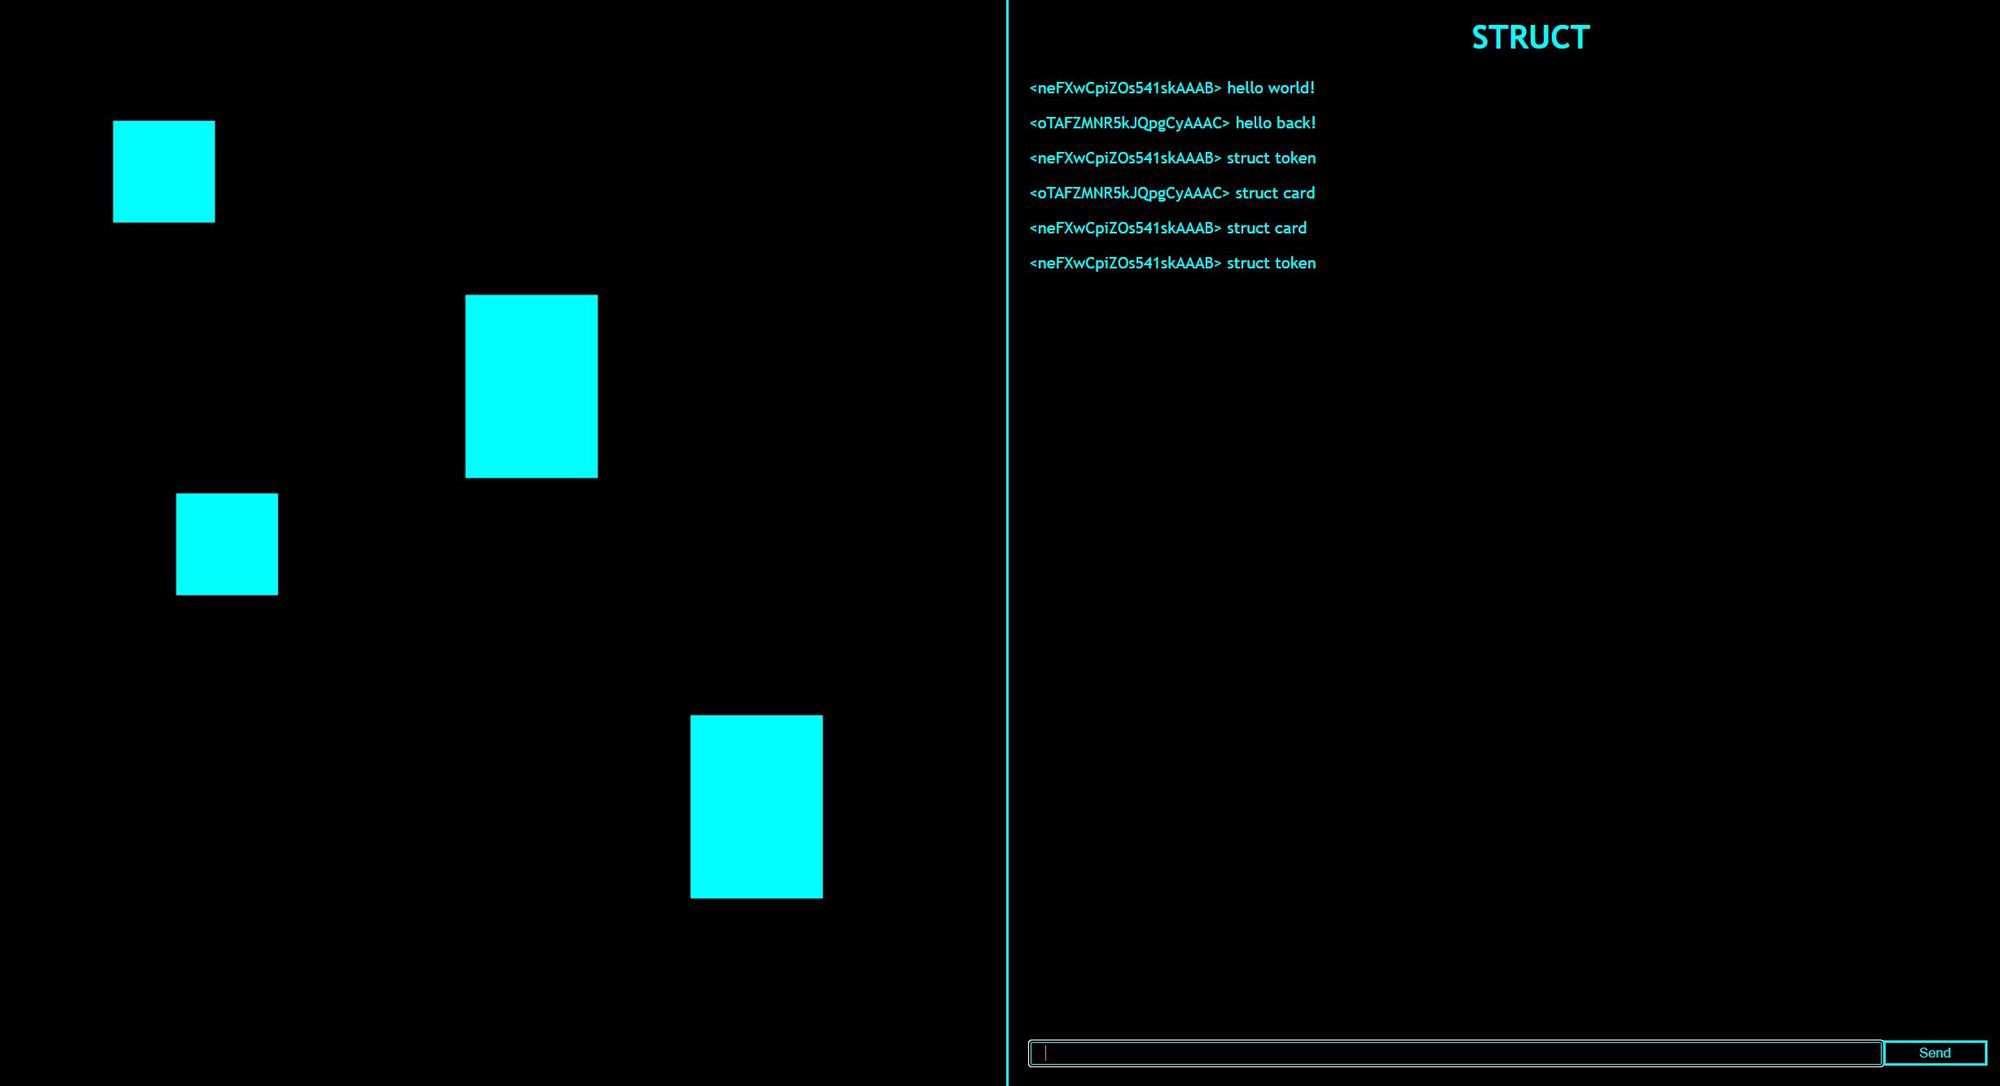
npm install --save phaserThe Phaser will handle all the rendering for our game objects like tokens and cards. We also make an interactive drag-and-drop functions.
移相器将处理游戏对象(如令牌和卡)的所有渲染。 我们还提供了交互式拖放功能。
In the /client/src folder, add a new folder called game and a subfolder called scenes.
在/ client / src文件夹中,添加一个名为game的新文件夹和一个名为scenes的子文件夹。
In the /client/src/game folder add a file called game.js and in the /client/src/game/scenes add a file called gamescene.js.
在/ client / src / game文件夹中添加一个名为game.js的文件,在/ client / src / game / scenes中添加一个名为gamecene.js的文件。
The game.js file will handle the initial setup for the Phaser instance and import our gamescene.js. This will launch our game into the containerId of our Vue component.
game.js文件将处理Phaser实例的初始设置并导入我们的gamecene.js。 这会将我们的游戏启动到Vue组件的containerId中。
import Phaser from "phaser";
import GameScene from "./scenes/gamescene";
function launch(containerId) {
    return new Phaser.Game({
        type: Phaser.AUTO,
        parent: containerId,
        scene: [
            GameScene
        ],
        scale: {
            mode: Phaser.Scale.FIT,
            width: '100%',
            height: '100%'
        }
    });
}export default launch;
export { launch }
In the main functions of simulator gamescene.js file, add the following code:
在模拟器gamecene.js文件的主要功能中,添加以下代码:
import Phaser from 'phaser';
import io from 'socket.io-client';
export default class GameScene extends Phaser.Scene {
    constructor() {
        super({
            key: 'GameScene'
        });
    }
    preload() {
    }
    create() {
        this.socket = io('http://localhost:3000');
        this.socket.on('struct create', (width, height) => {
            let token = this.add.rectangle(300, 300, width, height, 0x00ffff).setInteractive();
            this.input.setDraggable(token);
        });
        this.input.on('drag', (pointer, gameObject, dragX, dragY) => {
            gameObject.x = dragX;
            gameObject.y = dragY;
        });
    }
    update() {
    }
}
The Phaser architecture is utilize the JavaScript to create scenes. It contains three main functions preload, create, and update.
Phaser体系结构利用JavaScript来创建场景。 它包含三个主要功能,即预加载,创建和更新。
Now we have to go back into our server.js and add logic for our struct create event:
现在我们必须回到server.js并为struct create事件添加逻辑:
const server = require('express')();
const http = require('http').createServer(server);
const io = require('socket.io')(http);
io.on('connection', function (socket) {
    console.log('A user connected: ' + socket.id);
    socket.on('send', function (text) {
        let newText = "<" + socket.id + "> " + text;
        if (text === 'struct card') {
            io.emit('struct create', 130, 180)
        };
        if (text === 'struct token') {
            io.emit('struct create', 100, 100)
        };
        io.emit('receive', newText);
    });
    socket.on('disconnect', function () {
        console.log('A user disconnected: ' + socket.id);
    });
});
http.listen(3000, function () {
    console.log('Server started!');
});
Then make sure to set the height and width of the token in 100×100 pixels inside the struct event.
然后,请确保在struct事件内将标记的高度和宽度设置为100×100像素。
When you chat in one tab it appears in another tab in the opponent client side. If you run our app in the local server it looks like this.
当您在一个选项卡中聊天时,它会显示在对手客户端的另一个选项卡中。 如果您在本地服务器上运行我们的应用程序,则如下所示。
结论 (Conclusion)
I hope you enjoyed a lot and in this project we have added the chat, card and token creation functionalities. You can also add more multiple cards to make it more realistic on your own.
我希望您喜欢它,并在此项目中添加了聊天,卡片和令牌创建功能。 您还可以添加更多的多张卡片,以使其更加逼真。
Thanks for reading!
谢谢阅读!
翻译自: https://medium.com/javascript-in-plain-english/build-a-table-top-game-in-vue-js-70adb77c2447
vue.js 构建项目
相关文章
php pdo 方法,PHP之pdo操作数据库

java ooa编程,3.Java面向对象编程OOA/OOP/OOD/OOAD()/UML类图、函数式编程Scala(JVM)---类与对象、封装继承多态、构造方法、覆写/重写/override...

vue框架是ui框架么_Vue是2020年一个了不起的框架,为什么
SignalR做服务端 java,如何在android java中的signalR服务类中设置适配器?
怎么在vscode中调试_在vscode中调试nestjs

如何安装2018matlab,MATLAB 2018a软件安装教程