一、目录管理
1.1 列出目录 ls
# ls 命令
# -a 参数,查看全部的文件,包括隐藏的文件
# -l 参数,列出所有的文件,包括文件的属性和权限,不显示隐藏文件
[root@localhost /]# ls
bin  boot  dev  etc  home  lib  lib64  media  mnt  opt  proc  root  run  sbin  srv  sys  tmp  usr  var
[root@localhost /]# ls -a
.  ..  bin  boot  dev  etc  home  lib  lib64  media  mnt  opt  proc  root  run  sbin  srv  sys  tmp  usr  var
[root@localhost /]# ls -l
total 24
lrwxrwxrwx.   1 root root    7 Aug 17 01:18 bin -> usr/bin
dr-xr-xr-x.   5 root root 4096 Aug 17 01:35 boot
drwxr-xr-x.  19 root root 3280 Aug 21 20:17 dev
drwxr-xr-x. 144 root root 8192 Aug 31 23:30 etc
drwxr-xr-x.   3 root root   20 Aug 17 01:34 home
lrwxrwxrwx.   1 root root    7 Aug 17 01:18 lib -> usr/lib
lrwxrwxrwx.   1 root root    9 Aug 17 01:18 lib64 -> usr/lib64
drwxr-xr-x.   2 root root    6 Apr 10  2018 media
drwxr-xr-x.   2 root root    6 Apr 10  2018 mnt
drwxr-xr-x.   4 root root   61 Aug 17 01:45 opt
dr-xr-xr-x. 242 root root    0 Aug 21 20:16 proc
dr-xr-x---.   4 root root  287 Aug 30 19:40 root
drwxr-xr-x.  43 root root 1320 Aug 31 23:40 run
lrwxrwxrwx.   1 root root    8 Aug 17 01:18 sbin -> usr/sbin
drwxr-xr-x.   2 root root    6 Apr 10  2018 srv
dr-xr-xr-x.  13 root root    0 Aug 21 20:16 sys
drwxrwxrwt.  25 root root 4096 Aug 31 18:27 tmp
drwxr-xr-x.  13 root root  155 Aug 17 01:18 usr
drwxr-xr-x.  21 root root 4096 Aug 17 01:35 var
1.2 创建目录 mkdir
# mkdir
# -p 创建多级目录
[root@localhost home]# mkdir test1
[root@localhost home]# mkdir -p test2/test3/test4
1.3 删除目录 rmdir
# rmdir
# -p 删除多级目录
[root@localhost home]# rmdir test1
[root@localhost home]# rmdir -p test2/test3/test4
1.4 复制文件或目录 cp
# cp 文件名 文件路径
[root@localhost home]# ls
tansun  test1  test1.txt
[root@localhost home]# cp test1.txt test1
[root@localhost home]# cd test1
[root@localhost test1]# ls
test1.txt
1.5 移除文件或目录 rm
# rm
# -f 忽略不存在的文件,强制删除
# -r 递归删除目录
# -i 互动,删除时询问是否删除
[root@localhost test1]# rm -rf test1
[root@localhost test1]# rm -f test1.txt
1.6 移动文件或目录(重命名) mv
# mv
# -f 强制
# -u 只替换已经更新过的文件
[root@localhost home]# ls
tansun  test1  test1.txt
[root@localhost home]# mv test1.txt test2.txt
[root@localhost home]# ls
tansun  test1  test2.txt
二、文件内容
2.1 从第一行开始看 cat
# 由第一行开始显示文件内容,用来读取文章
[root@localhost etc]# cat networks
default 0.0.0.0
loopback 127.0.0.0
link-local 169.254.0.0
2.2 从最后一行开始看 tac
# 从最后一行开始读取文件,它是 cat 的倒写
[root@localhost etc]# tac networks
link-local 169.254.0.0
loopback 127.0.0.0
default 0.0.0.0
2.3 显示行号 nl
# 显示内容的时候顺便显示行号
[root@localhost etc]# nl networks
     1	default 0.0.0.0
     2	loopback 127.0.0.0
     3	link-local 169.254.0.0
2.4 一页一页的看 more
# 一页一页的显示文件内容
# 点击空格表示翻页
# enter 代表向下看一行
# :f 显示行号
2.5 前后翻页 less
# less 和 more 比较相似,空格翻页,
# 上下键代表翻动页面
# 输入 q 命令退出
# 查找字符串  /查找的字符  表示向下查询,输入 n 表示继续向下寻找下一个
# 查找字符串  ?查找的字符  表示向上查询,输入 N 表示继续向上寻找下一个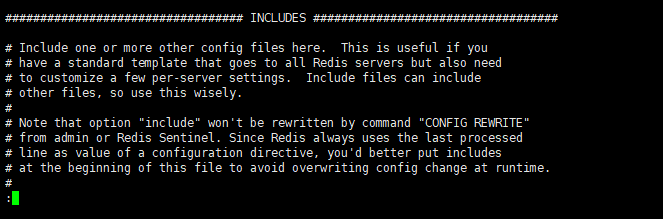
2.6 只查看前几行 head
# 只看头几行,通过 -n 来控制查看的行数
[root@localhost myredis]# head -10 redis80.conf
# Redis configuration file example.
#
# Note that in order to read the configuration file, Redis must be
# started with the file path as first argument:
#
# ./redis-server /path/to/redis.conf

# Note on units: when memory size is needed, it is possible to specify
# it in the usual form of 1k 5GB 4M and so forth:
#
2.7 只查看后几行 tail
# 只看后几行,通过 -n 来控制查看的行数
[root@localhost myredis]# tail -10 redis80.conf
# ignore-warnings ARM64-COW-BUG

# Generated by CONFIG REWRITE
latency-tracking-info-percentiles 50 99 99.9
user default on nopass sanitize-payload ~* &* +@all

replicaof 127.0.0.1 6381
save 3600 1
save 300 100
save 60 10000
三、创建文件
3.1 创建文件 touch
[root@localhost home]# ls
tansun  test1  test2.txt
[root@localhost home]# touch test3
[root@localhost home]# ls
tansun  test1  test2.txt  test3
3.2 创建文件 vim
[root@localhost home]# ls
tansun  test1
[root@localhost home]# vim test2.txt
[root@localhost home]# ls
tansun  test1  test2.txt
3.3 创建并写入文件内容 echo
# 语法:exho "文件内容" >> 文件名
[root@localhost home]# ls
tansun  test1
[root@localhost home]# echo "i love you" >> test2.txt
[root@localhost home]# ls
tansun  test1  test2.txt
四、账号管理
4.1 添加用户 useradd
# useradd -选项 用户名
# -m 自动创建这个用户的主目录为 /home/xhf
[root@localhost home]# useradd -m xhf
[root@localhost home]# ls
tansun  test1  test2.txt  xhf
4.2 删除用户 userdel
# userdel -r 删除用户的时候将他的目录也一并删掉
[root@localhost home]# ls
tansun  test1  test2.txt  xhf
[root@localhost home]# userdel -r xhf
[root@localhost home]# ls
tansun  test1  test2.txt
4.3 修改用户 usermod
# 修改 xhf 的目录到指定文件夹下
[root@localhost home]# usermod -d /home/222 xhf
4.4 切换用户 su
# 第一种情况:root 用户切换到普通用户
# root:表示当前用户
# localhost:表示主机名
# home:表示当前目录
# 只有root用户 后面才使用 # ,普通用户使用 $
# 语法为 su 用户名
[root@localhost home]# useradd -m xhf
[root@localhost home]# su xhf
[xhf@localhost home]$


# 第二种情况,普通用户切换到 root 用户
# 命令为 su
[xhf@localhost home]$ su
Password:
[root@localhost home]#
4.5