文章目录
- 绑定
- 方式一
- 方式二
- 解绑
- 解绑一个自定义事件
- 解绑多个自定义事件
- 一些坑
- 情况一
- 情况二
- 总结
- TodoList 改为自定义事件绑定
绑定
方式一
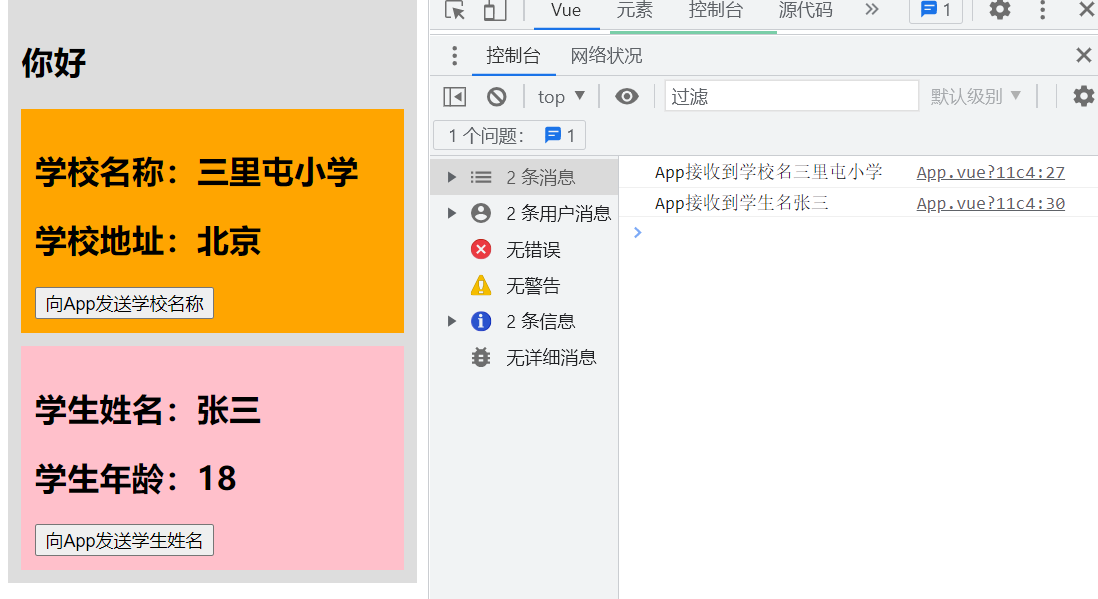
App 中有 School 组件和 Student 组件,现在我们要实现子组件向父组件传递数据,即 School 组件和 Student 组件向 App 传递数据
1、我们之前已经学过一种方式,可以通过父组件给子组件传递函数类型的props实现。也就是在 App 中先给 School 组件传递一个方法(getSchoolName),School 组件通过 props 接收到然后调用即可
2、今天我们学习另一种方式,可以通过 Student 组件用父组件给子组件绑定一个自定义事件实现。也就是给 Student 组件的实例对象 vc 上绑定了一个事件叫 atByteDance,只要触发 atByteDance 就触发 App 中的 getStudentName 方法。在 Student 组件中增加一个按钮并添加 click 事件,在事件中使用 this.$emit(atByteDance,this.name)即可触发开始绑定的事件。这么说可能不太理解,我们直接看代码:
App.vue
<template>
  <div class="app">
    <h2>{{msg}}</h2>
    <!--通过父组件给子组件传递函数类型的props实现:子给父传递数据-->
    <School :getSchoolName="getSchoolName"></School>
    <!--通过父组件给子组件绑定一个自定义事件实现:子给父传递数据(第一种写法,使用v-on或@)-->
    <Student v-on:atByteDance="getStudentName"></Student>
  </div>
</template>

<script>
//引入组件
import Student from "./components/Student"
import School from "./components/School"

export default {
  name:'App',
  components:{
    School,
    Student
  },
  data(){
    return{
      msg:"你好"
    }
  },
  methods:{
    getSchoolName(name){
      console.log("App接收到学校名"+name);
    },
    getStudentName(name){
      console.log("App接收到学生名"+name);
    }
  }
}
</script>

<style>
.app{
  background-color: #dddddd;
  padding: 10px;
}
</style>
School.vue
<template>
  <!--组件的结构-->
  <div class="school">
    <h2>学校名称:{{ name }}</h2>
    <h2>学校地址:{{ address }}</h2>
    <button @click="sendSchoolName">向App发送学校名称</button>
  </div>
</template>

<script>
//组件交互相关的代码(数据、方法等)
export default {
  name: 'School',
  props:["getSchoolName"],
  data() {
    return {
      name: "三里屯小学",
      address: "北京"
    }
  },
  methods:{
    sendSchoolName(){
      this.getSchoolName(this.name)
    }
  }
}
</script>

<style>
/*组件的样式*/
.school {
  background-color: orange;
  padding: 10px;
}
</style>
Student.vue
<template>
  <!--组件的结构-->
  <div class="student">
    <h2>学生姓名:{{ name }}</h2>
    <h2>学生年龄:{{ age }}</h2>
    <button @click="sendStudentName">向App发送学生姓名</button>
  </div>
</template>

<script>
//组件交互相关的代码(数据、方法等)
export default {
  name: 'Student',
  data() {
    return {
      name: "张三",
      age: 18
    }
  },
  methods:{
    sendStudentName(){
      //触发Student组件实例身上的 atByteDance 事件
      this.$emit("atByteDance",this.name)
    }
  }
}
</script>

<style>
/*组件的样式*/
.student {
  background-color: pink;
  padding: 10px;
  margin-top: 10px;
}
</style>
方式二
也可以换一种实现方式
修改 App.vue
<!--通过父组件给子组件绑定一个自定义事件实现:子给父传递数据(第二种写法,使用ref)-->
    <Student ref="student"></Student>
<script>
......
export default {
 ......
  methods:{
    ......
    getStudentName(name){
      console.log("App接收到学生名"+name);
    }
  },
  mounted() {
    //APP挂载完毕 student的组件实例对象 当"atByteDance"被调用时执行一个回调
    this.$refs.student.$on("atByteDance",this.getStudentName)
  }
}
</script>
情况一: 3s 后再给 Student 绑定事件
mounted() {
    //APP挂载完毕 student的组件实例对象 当"atByteDance"被调用时执行一个回调
    setTimeout(()=>{
      this.$refs.student.$on("atByteDance",this.getStudentName)
    },3000)
  }
情况二:只触发一次
this.$refs.student.$once("atByteDance",this.getStudentName)
或者使用第一种写法后边增加 .once
<Student v-on:atByteDance.once="getStudentName"></Student>
情况三:传多个参数
Student.vue 中
methods:{
    sendStudentName(){
     //直接在后边传入参数
     this.$emit("atByteDance",this.name,111,222)
    }
  }
App.vue 中直接接收
getStudentName(name,x,y){
	console.log("App接收到学生名"+name+x+y);
}
或
getStudentName(name,...params){
      console.log("App接收到学生名"+name+params);
    }
或者
Student.vue 中把参数放在一个对象中
sendStudentName(){
      //触发Student组件实例身上的 atByteDance 事件
      this.$emit("atByteDance",this.name,{x:111,y:222})
    }
App.vue 中直接接收
getStudentName(name,obj){
      console.log("App接收到学生名"+name+obj.x+obj.y);
    }
解绑
解绑一个自定义事件

修改 Student.vue
<button @click="unbind">解绑</button>
unbind(){
	this.$off("atByteDance")//解绑一个事件
}
解绑多个自定义事件
修改 App.vue 给 Student 再绑定一个自定义事件
<Student v-on:atByteDance="getStudentName" @demo="m1"></Student>
 methods:{
    ......
    getStudentName(name){
      console.log("App接收到学生名"+name);
    },
    m1(){
      console.log("demo事件被触发了");
    }
  }
修改 Student,使用 this.$off(数组) 或 直接使用 this.$off() 来解绑多个
methods:{
    sendStudentName(){
      //触发Student组件实例身上的 atByteDance 事件
      this.$emit("atByteDance")
      this.$emit("demo")
    },
    unbind(){
      //this.$off("atByteDance")//解绑一个事件
      this.$off(["atByteDance","demo"])//解绑多个事件
      //this.$off()//解绑所有事件
    }
  }

一些坑
情况一
现在需要把 Student 传过来学生姓名显示在页面上,修改 App.vue,现在使用刚才讲的第一种绑定自定义事件的方式来实现
<h2>{{ msg }}:{{ studentName }}</h2>
<!--通过父组件给子组件绑定一个自定义事件实现:子给父传递数据(第一种写法,使用v-on或@)-->
<Student v-on:atByteDance="getStudentName"></Student>

data() {
    return {
      msg: "你好",
      studentName: ""
    }
  },
  methods: {
    ......
    getStudentName(name) {
      console.log("App接收到学生名" + name);
      this.studentName = name
    }
  }
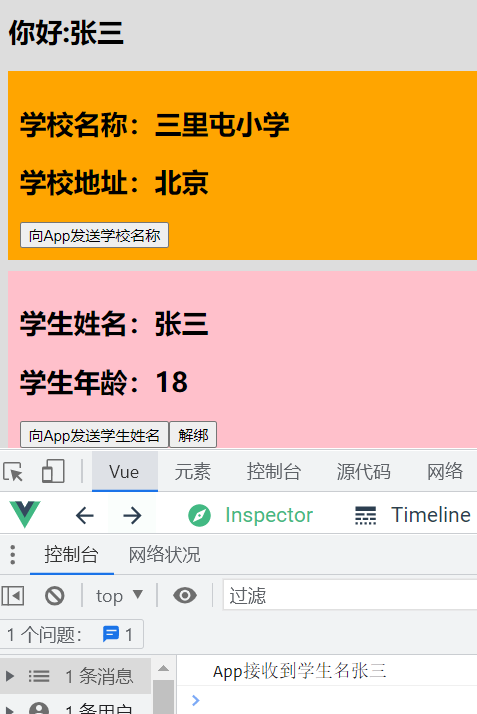
现在使用第二种绑定自定义事件的方式来实现
<!--通过父组件给子组件绑定一个自定义事件实现:子给父传递数据(第二种写法,使用ref)-->
<Student ref="student"></Student>

methods: {
    ......
    getStudentName(name) {
      console.log("App接收到学生名" + name);
      this.studentName = name
    }
  },
  mounted() {
    //APP挂载完毕 student的组件实例对象 当"atByteDance"被调用时执行一个回调
      this.$refs.student.$once("atByteDance",this.getStudentName)
  }
这里会有一个坑,有些同学可能认为this.$refs.student.$once("atByteDance",this.getStudentName)中既然调用的是 methods 中的方法,为何不直接拿过来?可能会写成这样:
	this.$refs.student.$once("atByteDance",function(name){
        console.log("App接收到学生名" + name);
        this.studentName = name
      })
这是错误❌写法,虽然会打印接收到的姓名,但是页面上并没有展示,因为这里的this是vc,正确✔写法是写成箭头函数:
this.$refs.student.$once("atByteDance",(name)=>{
	console.log("App接收到学生名" + name);
	this.studentName = name
})
情况二
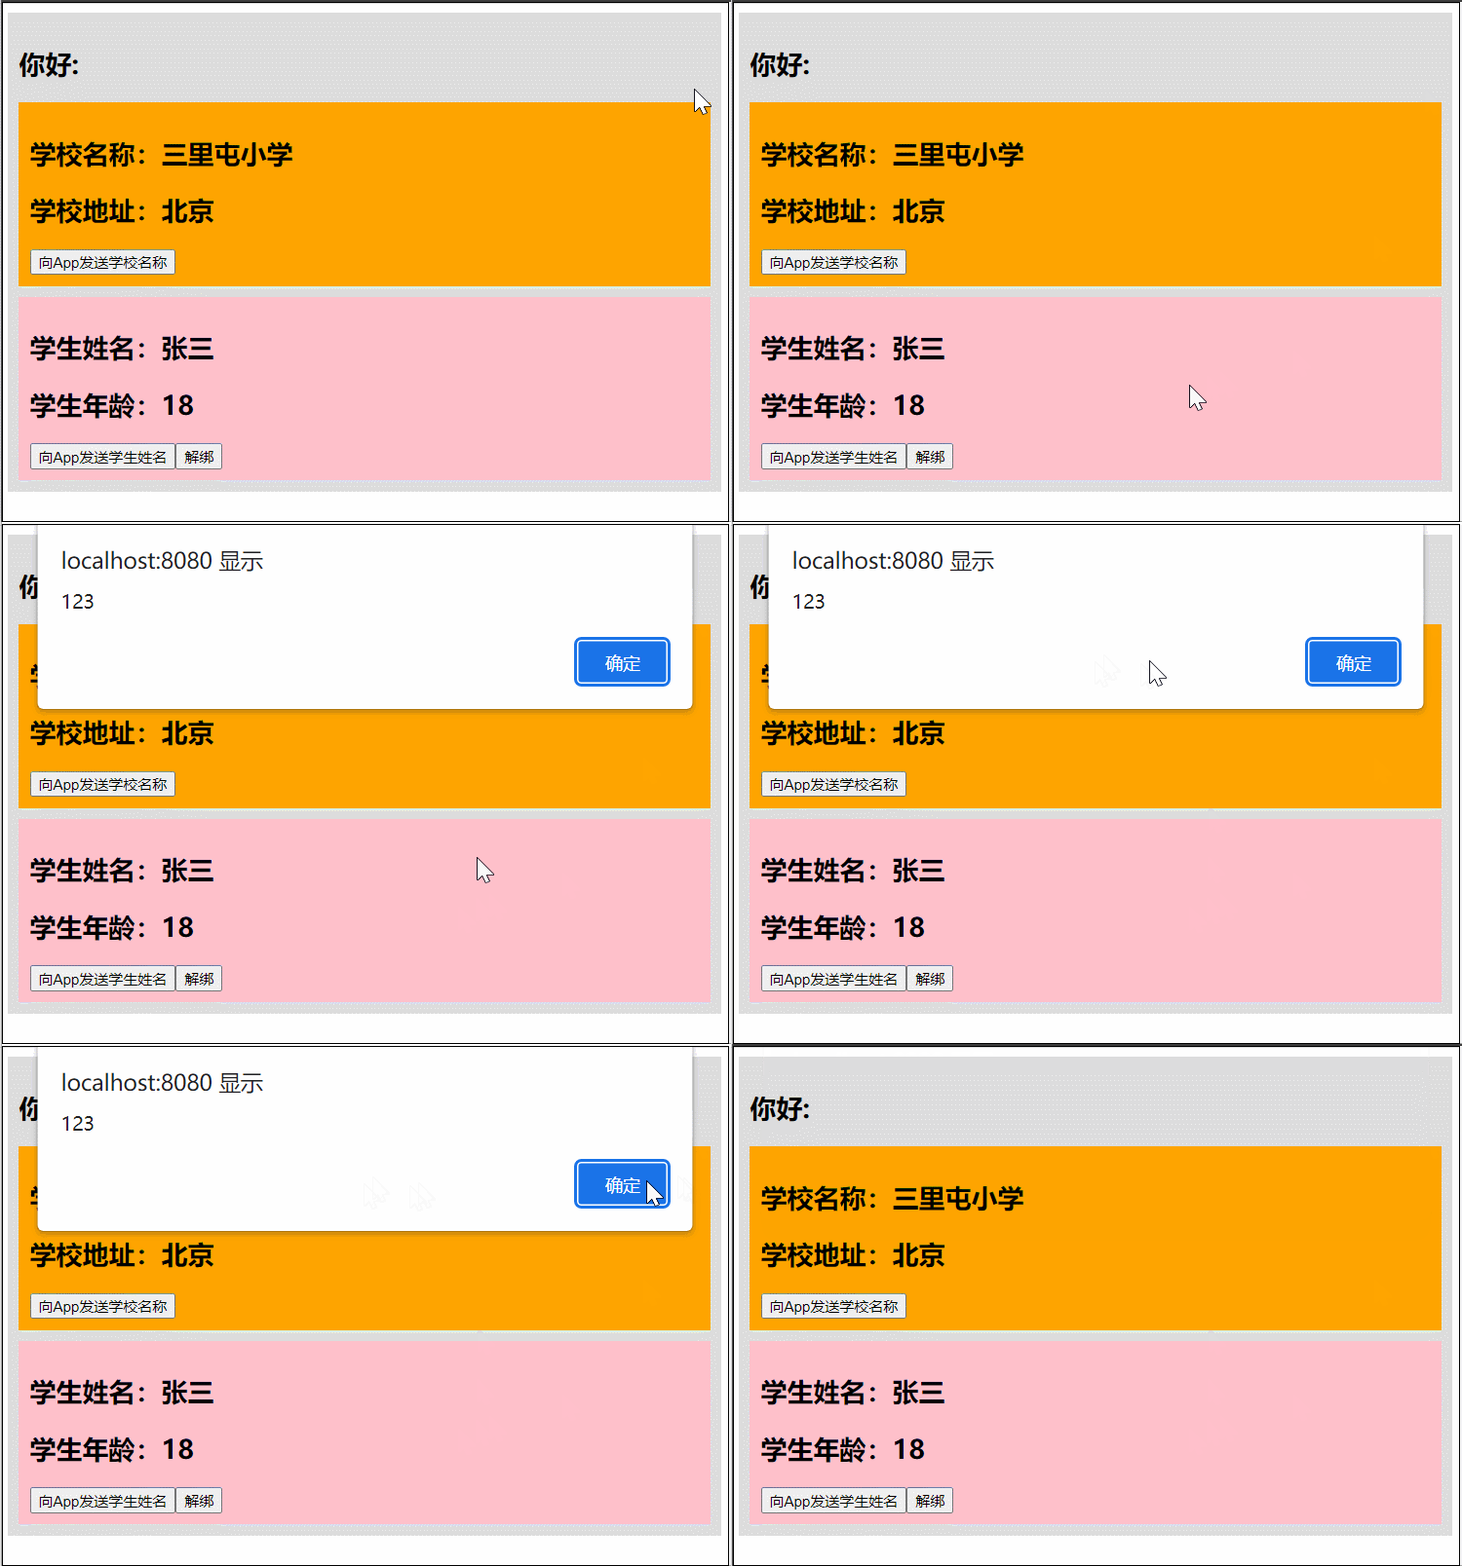
刚才讲的都是给组件绑定自定义事件,如果想绑定原生事件,必须增加关键字.native
<Student ref="student" @click.native="demo"></Student>

methods: {
    ...
    demo(){
      alert(123)
    }
  }
总结
1、自定义事件是一种组件间通信的方式,适用于:子组件==>父组件
2、使用场景:A是父组件,B是子组件,B想给A传数据,那么就要在A中给B绑定自定义事件(事件的回调在A中)
3、绑定自定义事件:
1.第一种方式,在父组件中:<Demo @atByteDance="test"/>或<Demo v-on:atByteDance="test"/>
2.第二种方式,在父组件中:
<Demo ref="demo" />
......
mounted(){
	this.$refs.demo.$on("atByteDance",this.test)}
}
3.若想让自定义事件只能触发一次,可以使用once修饰符,或$once方法
4、触发自定义事件:this.$emit("atByteDance",数据)
5、解绑自定义事件this.$off('atByteDance')
6、组件上也可以绑定原生 DOM 事件,需要使用native修饰符
7、注意:通过 this.$refs.xx.$on('atByteDance',回调)绑定自定义事件时,回调要么配置在methods中,要么用箭头函数,否则this指向会出问题
TodoList 改为自定义事件绑定
当增加任务、选中或清除任务时,都是子组件向父组件传递内容(任务列表todos在 App.vue 中,增加、选中、清除任务都是操作todos,所以都是子组件向父组件传递内容)
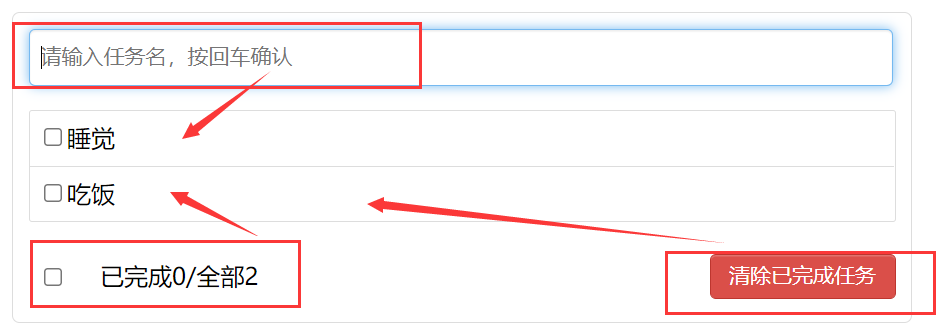
修改 App.vue,给 Header 绑定一个自定义事件addTodo,这个事件的回调也叫addTodo,可以同名
<Header @addTodo="addTodo"/>
在 Header 中就不需要用 props 接收了,使用 $emit来触发
<script>
import {nanoid} from 'nanoid'
export default {
  name: "Header",
  //props:['addTodo'],
  methods: {
    add(e) {
      ......
      //this.addTodo(todoObj)
      this.$emit("addTodo",todoObj)
      ......
    }
  }
}
</script>
同样的方法修改 Footer 相关的代码,修改 App.vue 中 Footer 组件部分
<Footer :todos="todos" @checkAllTodo="checkAllTodo" @clearAllTodo="clearAllTodo"/>
修改 Footer.vue
<script>
export default {
  name: "Footer",
  //props: ["todos","checkAllTodo","clearAllTodo"],
  props: ["todos"],
  computed: {
    ......
    isAll:{
      ......
      set(value){
        //this.checkAllTodo(value)
        this.$emit("checkAllTodo",value)
      }
    }
  },
  methods:{
    clearAll(){
      //this.clearAllTodo()
      this.$emit("clearAllTodo")
    }
  }
}
</script>

