目录
1、开发项目流程
2、开发环境
3、初始化项目
图形界面 UI 创建项目
4、ElmentUI 安装与配置
5、网络请求
6、富文本编辑器
Vue%20%E4%B8%AD%E7%9A%84%C2%A0%20%40%C2%A0%20%E7%AC%A6%20%E6%8F%90%E7%A4%BA%20%E6%96%87%E4%BB%B6%E9%85%8D%E7%BD%AE%C2%A0-toc" style="margin-left:40px;">7、Vue 中的 @ 符 提示 文件配置
8、自动化 导入 路由 配置 文件 :
Vuex%C2%A0%20%E6%A8%A1%E5%9D%97%E5%8C%96%E9%85%8D%E7%BD%AE%20%E6%96%87%E4%BB%B6%20%3A%C2%A0-toc" style="margin-left:40px;">9、自动化 导入 Vuex 模块化配置 文件 :
10、项目目录层级
11、项目环境配置
12、项目命名规范
1、开发项目流程
产品立项 ( 需求分析、技术选型、项目人员确定 )
产品原型 ( 设计产品原型图 — 进行 UI 设计 )
项目开发 ( 前端 与 后端 )
项目测试
项目上线 ( 后端,运维,测试 )
2、开发环境
开发工具:Vscode ( 开源 ) / Webstorm ( 收费 )
开发环境:Window / Linux / Mac
项目运行环境:node v10.x 以上版本 ( nvm nrm npm i -g yarn yrm )
小白进了公司 , 分配了电脑 和 显示器 ( 询问要一个 ), 先打开电脑 , 把软件 VSCode 下载安装好 ( 下载地址 : Visual Studio Code - Code Editing. Redefined )
把 NodeJS 下载安装好 ( 下载地址 : Node.js )
NodeJs 内 安装好 ( nvm / nrm )
推荐用下面的手动选择进行项目的创建


Vue 脚手架: vue-cli 4.x
代码版本工具:Git
图形工具 :
TortoiseGit – Windows Shell Interface to Git ( 小乌龟 ) 只支持 window

Sourcetree | Free Git GUI for Mac and Windows 支持 : window / mac
3、初始化项目
Vue 工程化 :

使用 Vue 脚手架创建项目
使用 命令行 创建项目 => 选择手动模式 :
安装 Vue 扩展
路由模式
css 预处理 ( 推荐 with dart-sass )
每个配置都用单文件设置
不保存刚刚的安装配置
创建完成后,cd 进入到项目中


图形界面 UI 创建项目
=> 使用 Vue 的客户端 UI 来完成项目的 创建 和 管理 :
vue ui

( 1 ) + 创建 => ( 2 ) 选择到你需要创建项目的目录文件夹下 => ( 3 ) 点击 + 在此创建新项目


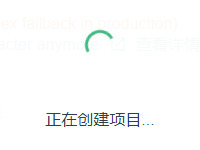 等待项目创建成功 loading ... ...


项目配置 : 关于项目的一些配置 , 可以进行二次设置


vue-cli4.x 构建的项目的执行顺序详解 :
vue-cli4.x构建的项目的执行顺序详解 - it610.com


4、ElmentUI 安装与配置
Element UI 组件库 :
Element - The world's most popular Vue UI framework

ElementUI 组件库,此组件库只针对于 pc 端 ,一般用于 后台管理系统
npm i element-ui -S"element-ui" : "^2.15.6"


npm install babel-plugin-component -D"babel-plugin-component" : "^1.1.1"


将我们 根目录 下的 babel.config.js 修改如下 :

module.exports = {
  presets: [
    '@vue/cli-plugin-babel/preset'
  ],
  plugins: [
    [
      "component",
      {
        "libraryName": "element-ui",
        "styleLibraryName": "theme-chalk"
      }
    ]
  ]
}


然后在 main.js 文件内 导入我们刚刚创建好的 组件文件 element.js


配置 OK => 启动服务器 ( npm run serve )

下面让我们先来简单上手测试一下 :

先用简单的按钮来进行测试一下看是否成功 ,


5、网络请求
项目中使用 axios 进行网络请求,vue 脚手架默认没有安装,需要自行安装才能使用。
- 安装 ( 生产环境依赖 ) "axios": "^0.24.0"
npm i -S axios
- 设置统一请求域名
- 反向代理 可以进行 跨域 解决
在项目根目录下面创建一个 vue.config.js 文件,写下如下代码
module.exports = {
  devServer: {
    overlay: false,
    // vue 项目代理请求
    proxy: {
      // 规则
      // axios 中相对地址开头的字符串
      '/api': {
        // 把相对地址中的域名 映射到 目标地址中
        // localhost:8080 => localhost:3000
        target: 'http://localhost:3000',
        // 修改 host 请求的域名为目标域名
        changeOrigin: true,
        // 请求 uri 和目标 uri 有一个对应关系
        // 请求 /api/login ==> 目标 /v1/api/login
        pathRewrite: {
          '^/api': '/v1/api'
        }
      }
    }
  }
}
代理配置 :
这里 , 此处 配置 反向代理 文件内 会有一个 小坑 :
因为 匹配 的 规则 为 express.use 模糊匹配 , 匹配成功后就会停止向下匹配了 ,
所以匹配的 请求前缀 尽量 不要一样 ,
比如 你写的 ' / api ' , 只要你的请求地址内存在 / api , 它在匹配上之后就会走对象内的程序代码了 , 就不会再向下执行 ,
所以为了预防此问题 , 所以 最好是把 你的 请求前缀 改成 ' ^/api ' ( 以 /api 开头的 )
这样的写法会更严谨 , 防止模糊匹配钻了漏洞
否则即使你下面 再怎么写的 pathRewrite ( 路径重写 ) , 也会失去效果 , 将你的重写路径依旧会带在你的请求地址里 , 并没有给过滤掉 , 导致请求一直 404 失败
所以 , 就是最后我们一是要注意咱们的 请求前缀不要一样 ,
二就是我们 最好 将前缀的写法写的更加严谨一些
网络请求模块化 :


6、富文本编辑器
基本使用 · wangEditor 用户文档
可以简单的理解为 在线 Word , 有图有文字 , 实现如下操作步骤 :

"wangeditor": "^4.7.9"


使用 :


module.exports = {
  lintOnsave: false
}


<template>
  <div id="div1">
    <p>请输入内容</p>
  </div>
</template>

<script>
// Web 富文本编辑器
import E from "wangeditor";
export default {
  data() {
    return {
      editor: null,
      userinfo: {
        introduce: "",
      },
    };
  },
  mounted() {
    this.editor = new E("#div1");
    // 或者 const editor = new E( document.getElementById('div1') )
    // 监听编辑器的变化
    this.editor.config.onchange = (newHtml) => {
      this.userinfo.introduce = newHtml;
      // console.log(newHtml);
    };
    this.editor.create();
  },
  beforeDestroy() {
    this.editor = null;
  },
};
</script>

<style lang="scss" scoped>
  @import "./scss/index.scss";
</style>Vue%20%E4%B8%AD%E7%9A%84%C2%A0%20%40%C2%A0%20%E7%AC%A6%20%E6%8F%90%E7%A4%BA%20%E6%96%87%E4%BB%B6%E9%85%8D%E7%BD%AE%C2%A0">7、Vue 中的 @ 符 提示 文件配置

jsconfig.json
{
  "compilerOptions": {
    "baseUrl": "./",
    "paths": {
        "@/*": ["src/*"]
    }
  },
  "exclude": ["node_modules", "dist"]
}
8、自动化 导入 路由 配置 文件 :
// vue-cli 中脚手架工具(webpack工具)提供一个api方法完成对于模块的自动加载
// 参数1:要去检索的目录
// 参数2:是否递归检索,true是,false否
// 参数3:指定要检索的文件类型  用正则来完成
// 返回值:是一个函数,且此函数有一个方法为keys返回一个检索到的文件列表(数组)
// 正则的 i不区分大小写 g全局 u支持中文
// const moduleFn = require.context('./routes', false, /\.(js|txt)$/i)
const moduleFn = require.context('./routes', false, /\.js$/i)
/* const routes = []
moduleFn.keys().forEach(file => {
  // 动态得到当前导入的对象,可能为对象也可能为数组
  let module = moduleFn(file).default
  // es6提供一个api
  if (Array.isArray(module)) {
    routes.push(...module)
  } else {
    routes.push(module)
  }
}) */
const routes = moduleFn.keys().reduce((prev, curr) => {
  // 动态得到当前导入的对象,可能为对象也可能为数组
  let module = moduleFn(curr).default
  // es6提供一个api
  if (Array.isArray(module)) {
    prev.push(...module)
  } else {
    prev.push(module)
  }
  return prev
}, [])
Vuex%C2%A0%20%E6%A8%A1%E5%9D%97%E5%8C%96%E9%85%8D%E7%BD%AE%20%E6%96%87%E4%BB%B6%20%3A%C2%A0">9、自动化 导入 Vuex 模块化配置 文件 :

let moduleFn = require.context('./module', false, /\.js$/i)
let modules = moduleFn.keys().reduce((prev, curr) => {
  let value = { ...moduleFn(curr).default, namespaced: true }
  // 字符串方法和正则表达式中的分组
  let key = curr.match(/\.\/(\w+)\.js/i)[1]
  prev[key] = value
  return prev
}, {})
10、项目目录层级
开源项目 ( vue-element-admin )目录层级
src 根目录 层级


11、项目环境配置
配置项目 : 开发环境 , 生产环境 , 测试环境
vue.config.js
开源项目 ( vue-element-admin )=> vue.config.js
'use strict'
const path = require('path')
const defaultSettings = require('./src/settings.js')

function resolve(dir) {
  return path.join(__dirname, dir)
}

const name = defaultSettings.title || 'vue Element Admin' // page title

// If your port is set to 80,
// use administrator privileges to execute the command line.
// For example, Mac: sudo npm run
// You can change the port by the following method:
// port = 9527 npm run dev OR npm run dev --port = 9527
const port = process.env.port || process.env.npm_config_port || 9527 // dev port

// All configuration item explanations can be find in https://cli.vuejs.org/config/
module.exports = {
  /**
   * You will need to set publicPath if you plan to deploy your site under a sub path,
   * for example GitHub Pages. If you plan to deploy your site to https://foo.github.io/bar/,
   * then publicPath should be set to "/bar/".
   * In most cases please use '/' !!!
   * Detail: https://cli.vuejs.org/config/#publicpath
   */
  publicPath: '/',
  outputDir: 'dist',
  assetsDir: 'static',
  lintOnSave: process.env.NODE_ENV === 'development',
  productionSourceMap: false,
  devServer: {
    port: port,
    open: true,
    overlay: {
      warnings: false,
      errors: true
    },
    before: require('./mock/mock-server.js')
  },
  configureWebpack: {
    // provide the app's title in webpack's name field, so that
    // it can be accessed in index.html to inject the correct title.
    name: name,
    resolve: {
      alias: {
        '@': resolve('src')
      }
    }
  },
  chainWebpack(config) {
    // it can improve the speed of the first screen, it is recommended to turn on preload
    // it can improve the speed of the first screen, it is recommended to turn on preload
    config.plugin('preload').tap(() => [
      {
        rel: 'preload',
        // to ignore runtime.js
        // https://github.com/vuejs/vue-cli/blob/dev/packages/@vue/cli-service/lib/config/app.js#L171
        fileBlacklist: [/\.map$/, /hot-update\.js$/, /runtime\..*\.js$/],
        include: 'initial'
      }
    ])

    // when there are many pages, it will cause too many meaningless requests
    config.plugins.delete('prefetch')

    // set svg-sprite-loader
    config.module
      .rule('svg')
      .exclude.add(resolve('src/icons'))
      .end()
    config.module
      .rule('icons')
      .test(/\.svg$/)
      .include.add(resolve('src/icons'))
      .end()
      .use('svg-sprite-loader')
      .loader('svg-sprite-loader')
      .options({
        symbolId: 'icon-[name]'
      })
      .end()

    config
      .when(process.env.NODE_ENV !== 'development',
        config => {
          config
            .plugin('ScriptExtHtmlWebpackPlugin')
            .after('html')
            .use('script-ext-html-webpack-plugin', [{
            // `runtime` must same as runtimeChunk name. default is `runtime`
              inline: /runtime\..*\.js$/
            }])
            .end()
          config
            .optimization.splitChunks({
              chunks: 'all',
              cacheGroups: {
                libs: {
                  name: 'chunk-libs',
                  test: /[\\/]node_modules[\\/]/,
                  priority: 10,
                  chunks: 'initial' // only package third parties that are initially dependent
                },
                elementUI: {
                  name: 'chunk-elementUI', // split elementUI into a single package
                  priority: 20, // the weight needs to be larger than libs and app or it will be packaged into libs or app
                  test: /[\\/]node_modules[\\/]_?element-ui(.*)/ // in order to adapt to cnpm
                },
                commons: {
                  name: 'chunk-commons',
                  test: resolve('src/components'), // can customize your rules
                  minChunks: 3, //  minimum common number
                  priority: 5,
                  reuseExistingChunk: true
                }
              }
            })
          // https:// webpack.js.org/configuration/optimization/#optimizationruntimechunk
          config.optimization.runtimeChunk('single')
        }
      )
  }
}
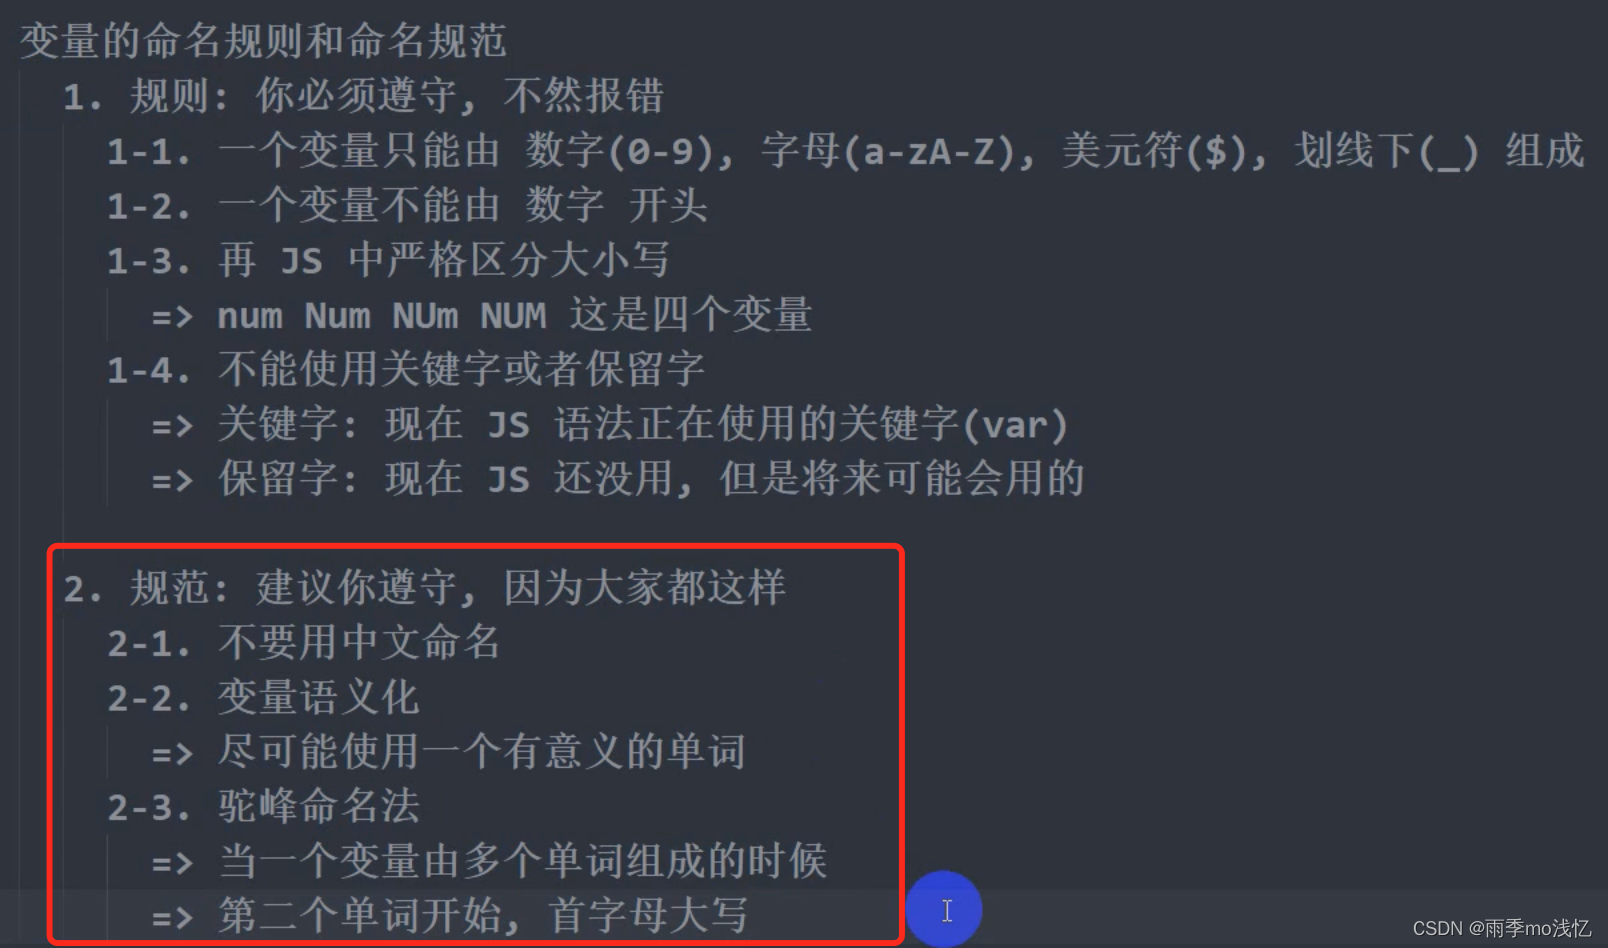
12、项目命名规范
# 项目命名规范
## 文件命名: 小写开头 驼峰命名

## 目录命名: 全小写

## js 命名规范

### 变量: 小驼峰 maxCount 单个名称 num

### 常量: 全大写 MAX_COUNT

### 方法名称: 小驼峰 testFunction() {}