1.下载驱动
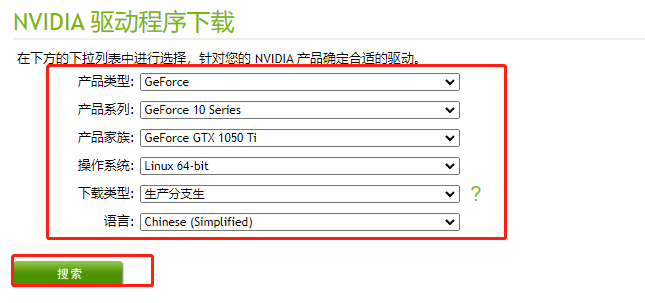
a.查看显卡版本,版本是1050Ti,需要在官网下载该型号驱动
[root@localhost ~]# lspci|grep -i nvidia
00:10.0 VGA compatible controller: NVIDIA Corporation GP107 [GeForce GTX 1050 Ti] (rev a1)
00:10.1 Audio device: NVIDIA Corporation GP107GL High Definition Audio Controller (rev a1)
进入官网官方驱动 | NVIDIA,选择符合自己显卡版本驱动
安装
chmod a+x NVIDIA-Linux-x86_64-515.76.run
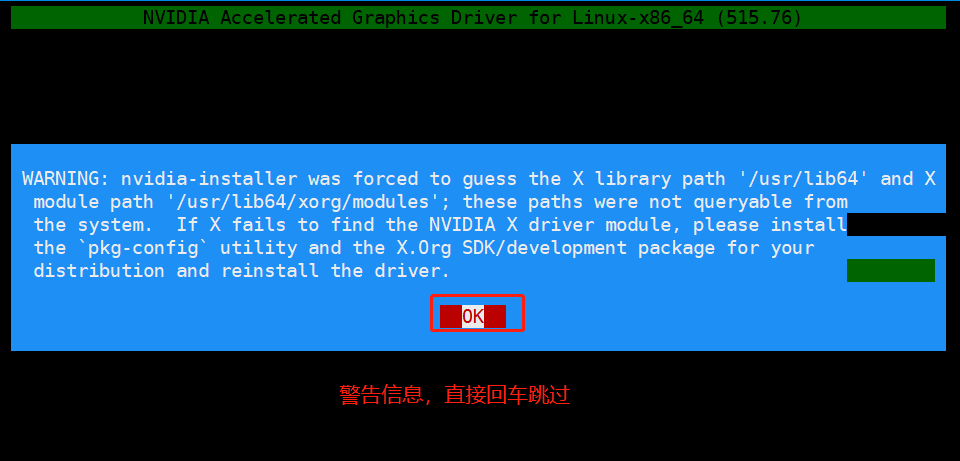
./NVIDIA-Linux-x86_64-515.76.run a.该错误提示有内置驱动存在系统,不用管它,点击回车继续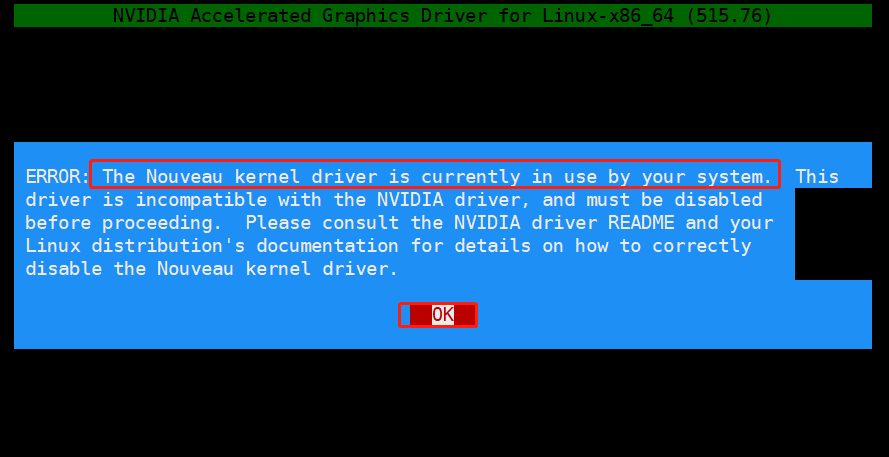
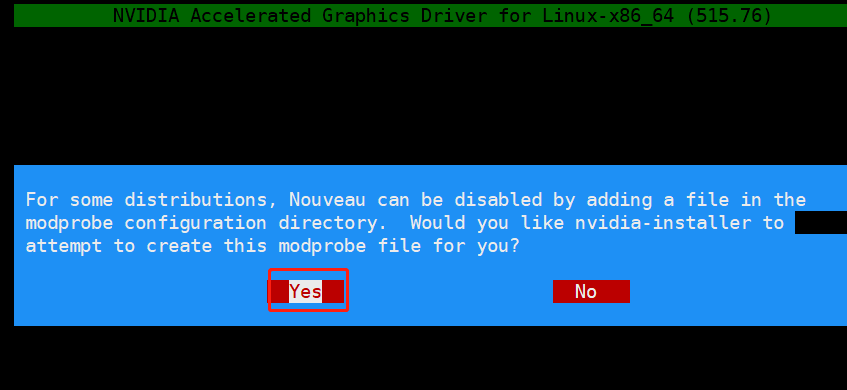
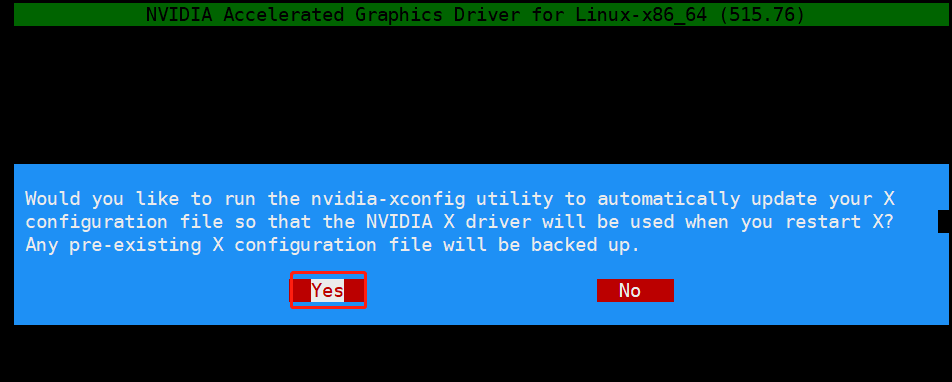
b.禁用内置驱动,是否自动创建禁用配置,通知table选中Yes,然后点击回车
然后一直回车,等待报错退出。
cat /usr/lib/modprobe.d/nvidia-installer-disable-nouveau.conf
cat /etc/modprobe.d/nvidia-installer-disable-nouveau.conf
[root@localhost ~]# cat /usr/lib/modprobe.d/nvidia-installer-disable-nouveau.conf
# generated by nvidia-installer
blacklist nouveau
options nouveau modeset=0
[root@localhost ~]# cat /etc/modprobe.d/nvidia-installer-disable-nouveau.conf
# generated by nvidia-installer
blacklist nouveau
options nouveau modeset=0c.重启系统,使配置生效,进入系统安装依赖程序
dnf install -y tar bzip2 make automake gcc gcc-c++ pciutils elfutils-libelf-devel libglvnd-devel
dnf install -y epel-release
dnf install -y kernel-devel-$(uname -r) kernel-headers-$(uname -r)
dnf install -y kernel kernel-core kernel-modules重新再次执行显卡驱动安装
./NVIDIA-Linux-x86_64-515.76.run 

查看显卡信息
[root@localhost ~]# nvidia-smi
Mon Oct 24 20:36:20 2022
+-----------------------------------------------------------------------------+
| NVIDIA-SMI 515.76       Driver Version: 515.76       CUDA Version: 11.7     |
|-------------------------------+----------------------+----------------------+
| GPU  Name        Persistence-M| Bus-Id        Disp.A | Volatile Uncorr. ECC |
| Fan  Temp  Perf  Pwr:Usage/Cap|         Memory-Usage | GPU-Util  Compute M. |
|                               |                      |               MIG M. |
|===============================+======================+======================|
|   0  NVIDIA GeForce ...  Off  | 00000000:00:10.0 Off |                  N/A |
| 20%   38C    P0    N/A /  75W |      0MiB /  4096MiB |      0%      Default |
|                               |                      |                  N/A |
+-------------------------------+----------------------+----------------------+

+-----------------------------------------------------------------------------+
| Processes:                                                                  |
|  GPU   GI   CI        PID   Type   Process name                  GPU Memory |
|        ID   ID                                                   Usage      |
|=============================================================================|
|  No running processes found                                                 |
+-----------------------------------------------------------------------------+
可以看到,内核中已经有显卡模块
[root@localhost ~]# lsmod|grep nvidia
nvidia_drm             69632  0
nvidia_modeset       1142784  1 nvidia_drm
nvidia              40812544  1 nvidia_modeset
drm_kms_helper        266240  5 drm_vram_helper,bochs_drm,nvidia_drm
drm                   585728  8 drm_kms_helper,drm_vram_helper,bochs_drm,nvidia,drm_ttm_helper,nvidia_drm,ttm
安装docker-ce,支持容器内GPU使用
dnf install -y tar bzip2 make automake gcc gcc-c++ vim pciutils elfutils-libelf-devel libglvnd-devel iptables设置docker-ce仓库
dnf config-manager --add-repo=https://download.docker.com/linux/centos/docker-ce.repo安装docker-ce
dnf install docker-ce docker-ce-cli containerd.io docker-compose-plugin -y启动docker并设置开机自启动
sudo systemctl --now enable docker测试docker是否正常
sudo docker run --rm hello-world输出内容大致如下
Unable to find image 'hello-world:latest' locally
latest: Pulling from library/hello-world
2db29710123e: Pull complete
Digest: sha256:18a657d0cc1c7d0678a3fbea8b7eb4918bba25968d3e1b0adebfa71caddbc346
Status: Downloaded newer image for hello-world:latest

Hello from Docker!
This message shows that your installation appears to be working correctly.

To generate this message, Docker took the following steps:
 1. The Docker client contacted the Docker daemon.
 2. The Docker daemon pulled the "hello-world" image from the Docker Hub.
    (amd64)
 3. The Docker daemon created a new container from that image which runs the
    executable that produces the output you are currently reading.
 4. The Docker daemon streamed that output to the Docker client, which sent it
    to your terminal.

To try something more ambitious, you can run an Ubuntu container with:
 $ docker run -it ubuntu bash

Share images, automate workflows, and more with a free Docker ID:
 https://hub.docker.com/

For more examples and ideas, visit:
 https://docs.docker.com/get-started/
安装NVIDIA容器支持套件
设置仓库
distribution=$(. /etc/os-release;echo $ID$VERSION_ID) \
   && curl -s -L https://nvidia.github.io/libnvidia-container/$distribution/libnvidia-container.repo | sudo tee /etc/yum.repos.d/nvidia-container-toolkit.repo
安装并重启容器服务
dnf install -y nvidia-docker2
systemctl restart docker
测试容器是否支持GPU
sudo docker run --rm --gpus all nvidia/cuda:11.0.3-base-ubuntu20.04 nvidia-smi输出内容如下
[root@localhost ~]# sudo docker run --rm --gpus all nvidia/cuda:11.0.3-base-ubuntu20.04 nvidia-smi
Mon Oct 24 12:59:21 2022
+-----------------------------------------------------------------------------+
| NVIDIA-SMI 515.76       Driver Version: 515.76       CUDA Version: 11.7     |
|-------------------------------+----------------------+----------------------+
| GPU  Name        Persistence-M| Bus-Id        Disp.A | Volatile Uncorr. ECC |
| Fan  Temp  Perf  Pwr:Usage/Cap|         Memory-Usage | GPU-Util  Compute M. |
|                               |                      |               MIG M. |
|===============================+======================+======================|
|   0  NVIDIA GeForce ...  Off  | 00000000:00:10.0 Off |                  N/A |
| 20%   39C    P0    N/A /  75W |      0MiB /  4096MiB |      0%      Default |
|                               |                      |                  N/A |
+-------------------------------+----------------------+----------------------+

+-----------------------------------------------------------------------------+
| Processes:                                                                  |
|  GPU   GI   CI        PID   Type   Process name                  GPU Memory |
|        ID   ID                                                   Usage      |
|=============================================================================|
|  No running processes found                                                 |
+-----------------------------------------------------------------------------+
测试
启动一个GPU的容器,跑一下测试
docker run -it --gpus all -p 8888:8888 tensorflow/tensorflow:latest-gpu-jupyter输出如下
[root@localhost ~]# docker run -it --gpus all -p 8888:8888 tensorflow/tensorflow:latest-gpu-jupyter
[I 01:39:15.201 NotebookApp] Writing notebook server cookie secret to /root/.local/share/jupyter/runtime/notebook_cookie_secret
jupyter_http_over_ws extension initialized. Listening on /http_over_websocket
[I 01:39:16.364 NotebookApp] Serving notebooks from local directory: /tf
[I 01:39:16.364 NotebookApp] Jupyter Notebook 6.4.12 is running at:
[I 01:39:16.364 NotebookApp] http://b6f4b9f884f9:8888/?token=5dbb788fda348efc71e58ed07407d83a1ad0b26c5496fdaf
[I 01:39:16.364 NotebookApp]  or http://127.0.0.1:8888/?token=5dbb788fda348efc71e58ed07407d83a1ad0b26c5496fdaf
[I 01:39:16.364 NotebookApp] Use Control-C to stop this server and shut down all kernels (twice to skip confirmation).
[C 01:39:16.384 NotebookApp]
1.新开一个窗口,输入命令,监听显卡信息
watch -n1 nvidia-smi
# nvidia-smi -l 1 # 该命令输出刷屏比较严重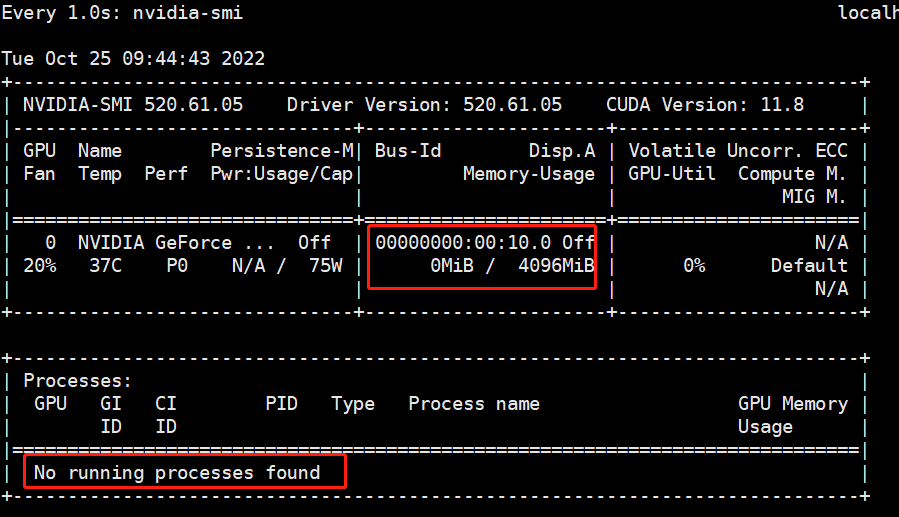
2.在浏览器输入服务器的地址:8888,然后输入token测试
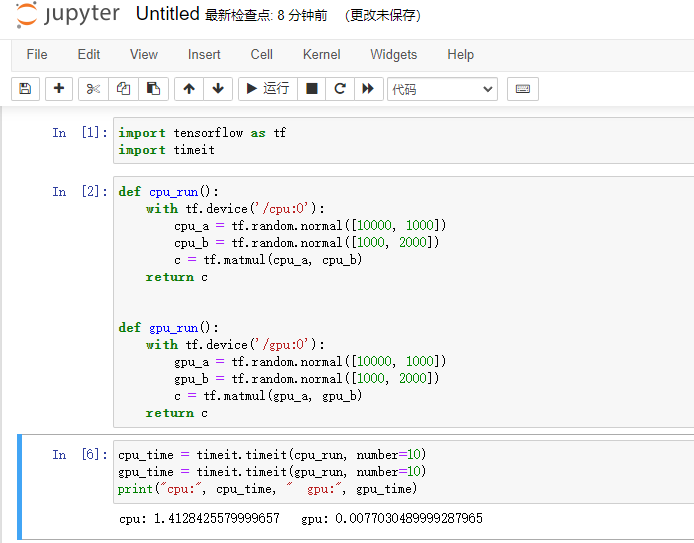
新建一个文件,内容如下
import tensorflow as tf
import timeit

def cpu_run():
    with tf.device('/cpu:0'):
        cpu_a = tf.random.normal([10000, 1000])
        cpu_b = tf.random.normal([1000, 2000])
        c = tf.matmul(cpu_a, cpu_b)
    return c


def gpu_run():
    with tf.device('/gpu:0'):
        gpu_a = tf.random.normal([10000, 1000])
        gpu_b = tf.random.normal([1000, 2000])
        c = tf.matmul(gpu_a, gpu_b)
    return c


cpu_time = timeit.timeit(cpu_run, number=10)
gpu_time = timeit.timeit(gpu_run, number=10)
print("cpu:", cpu_time, "  gpu:", gpu_time)
当执行运行的时候,可以看到GPU使用
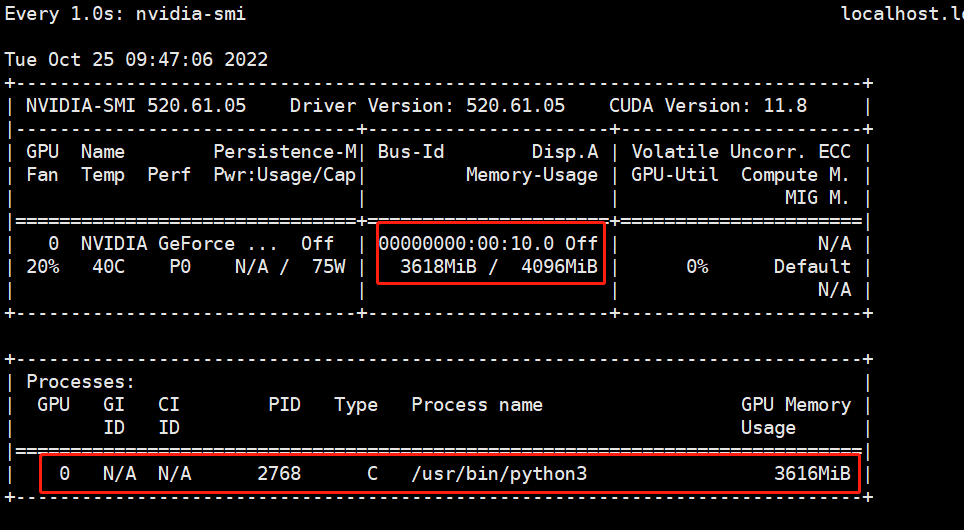
容器使用tensorflow已经可以正常使用
查看物理设备信息
>>> import tensorflow as tf
>>> tf.config.experimental.list_physical_devices()
[PhysicalDevice(name='/physical_device:CPU:0', device_type='CPU'), PhysicalDevice(name='/physical_device:GPU:0', device_type='GPU')]
>>>
遇到的错误
1.kvm虚机安装的系统,导致CPU识别失败报错,Python进程直接挂了
Aborted (core dumped)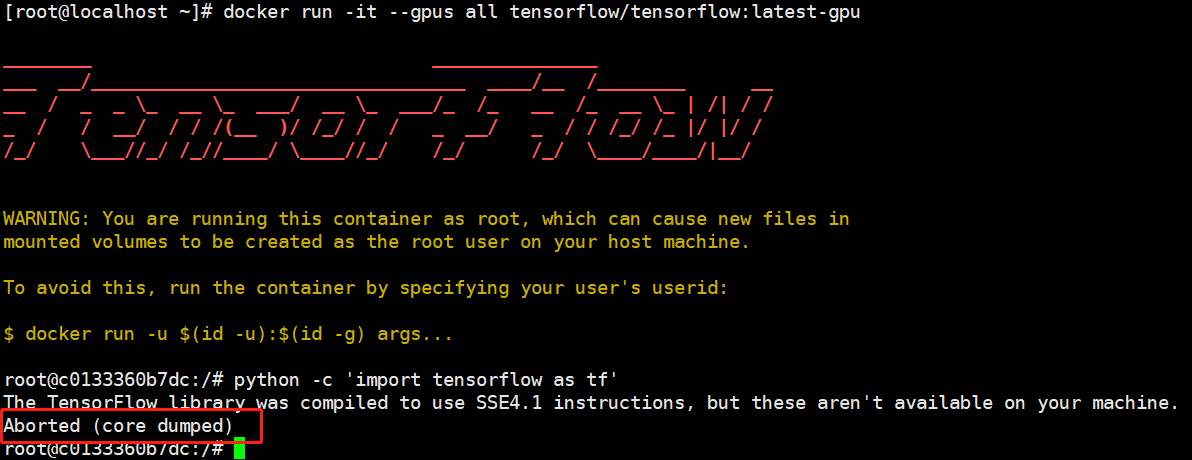
[root@localhost ~]# lscpu |grep 'Model name'
Model name:          Common KVM processor
BIOS Model name:     pc-i440fx-6.2
应该是tensorflow不识别该类型CPU,导致失败
解决:需要将虚拟机的CPU设置为host
[root@localhost ~]# lscpu |grep 'Model name'
Model name:          Intel(R) Core(TM) i5-8400 CPU @ 2.80GHz
BIOS Model name:     pc-i440fx-6.2