依赖版本信息如下:
"vue": "^3.2.45"
"typescript": "~4.7.4"
"vite": "^4.0.0"
"less": "^4.1.3"
"terser": "^5.16.4"
npm: 8.1.0
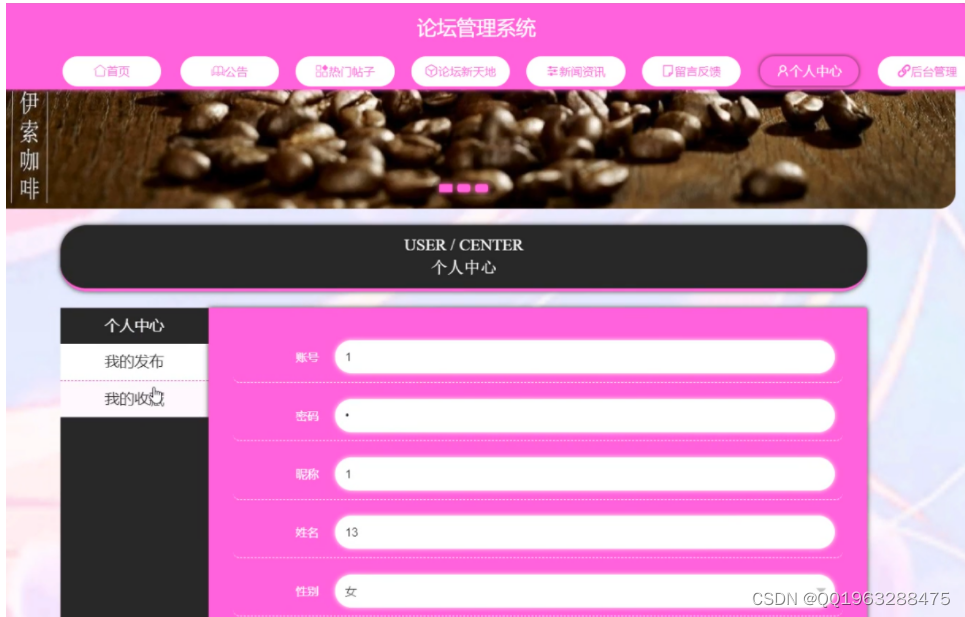
node: 16.13.0目标:创建 vue-amazing-ui 组件库,并发布到npm,效果如下图:
目前拥有的组件(面包屑和分页器):

①创建vue3+ts+vite项目:
npm init vue@latest(输入项目名称,并依次选择需要安装的依赖项)
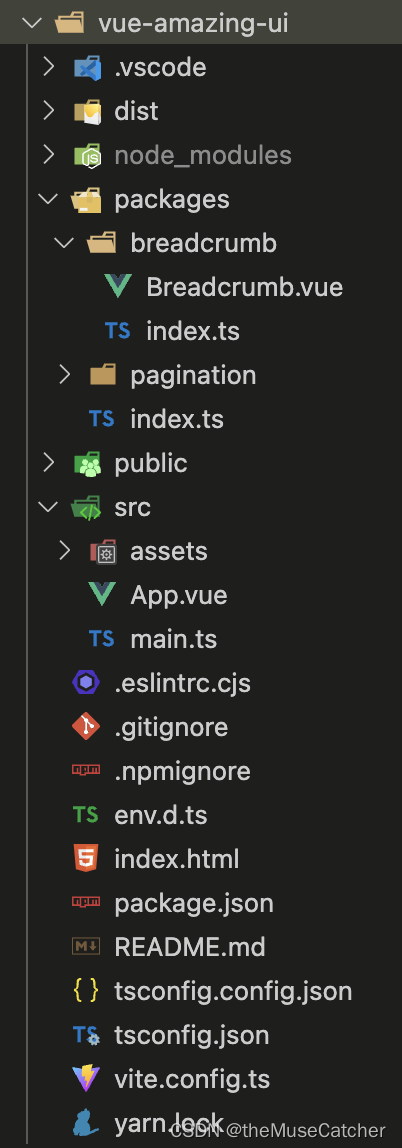
②项目目录结构截图如下:
③在项目根目录新建 packages/ 文件夹用于存放组件
④在项目根目录中的 vite.config.ts 中写入相关配置项:
import { fileURLToPath, URL } from 'node:url'

import { resolve } from 'path'
import { defineConfig } from 'vite'
import vue from '@vitejs/plugin-vue'

// https://vitejs.dev/config/
export default defineConfig({
  plugins: [vue()],
  resolve: {
    alias: {
      '@': fileURLToPath(new URL('./src', import.meta.url))
    }
  },
  css: {
    preprocessorOptions: {
      less: {
        modifyVars: { // 或者globalVars
          // `themeColor` is global variables fields name
          themeColor: '#1890FF'
        },
        javascriptEnabled: true
      },
    },
  },
  // 配置打包入口
  build: {
    lib: { // 构建为库。如果指定了 build.lib,build.cssCodeSplit 会默认为 false。
      // __dirname的值是vite.config.ts文件所在目录
      entry: resolve(__dirname, 'packages/index.ts'),  // entry是必需的,因为库不能使用HTML作为入口。
      name: 'VueAmazingUI', // 暴露的全局变量
      fileName: 'vue-amazing-ui' // 输出的包文件名,默认是package.json的name选项
    },
    rollupOptions: { // 自定义底层的Rollup打包配置
      // https://rollupjs.org/configuration-options/
      // 确保外部化处理那些你不想打包进库的依赖
      external: ['vue'],
      output: {
        exports: 'named',
        // 在 UMD 构建模式下为这些外部化的依赖提供一个全局变量
        globals: {
          vue: 'Vue'
        }
      }
    },
    /** 设置为 false 可以禁用最小化混淆,或是用来指定使用哪种混淆器。
        默认为 Esbuild,它比 terser 快 20-40 倍,压缩率只差 1%-2%。
        注意,在 lib 模式下使用 'es' 时,build.minify 选项不会缩减空格,因为会移除掉 pure 标注,导致破坏 tree-shaking。
        当设置为 'terser' 时必须先安装 Terser。(yarn add terser -D)
    */
    minify: 'terser', // Vite 2.6.x 以上需要配置 minify: "terser", terserOptions 才能生效
    terserOptions: { // 在打包代码时移除 console.log、debugger 和 注释
      compress: {
        drop_console: false,
        drop_debugger: true,
        pure_funcs: ['console.log']
      },
      format: {
        comments: false // 删除注释
      }
    }
  }
})
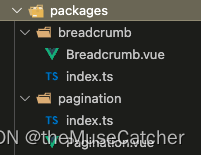
⑤在 packages/ 文件夹下创建UI组件,例如:新建 breadcrumb/ 和 pagination/ 文件夹,截图如下:

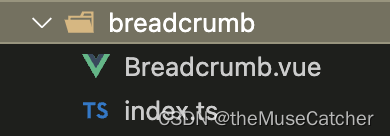
⑥在 breadcrumb/ 文件夹下新建 Breadcrumb.vue 组件文件和 index.ts 文件,截图如下:
⑦在Breadcrumb.vue 中编写组件代码:
<script lang="ts">
export default { // 导出组件name
  name: 'Breadcrumb'
}
</script>
<script setup lang="ts">
import { computed } from 'vue'
import { useRouter } from 'vue-router'
export interface Props {
  routes: object[], // router的路由数组,没有 ? 时,即表示 required: true
  height?: number, // 面包屑高度
  separator?: string // 自定义分隔符
}
interface Route {
  path: string,
  query: object,
  name: string
}
const props = withDefaults(defineProps<Props>(), {
  routes: () => [],
  height: 60,
  separator: ''
})

const len = computed(() => {
  return props.routes.length
})

const router = useRouter()
function goRouter (route: Route):void {
  // @ts-ignore (忽略下一行中产生的错误)
  router.push({ path: route.path, query: route.query || {} })
}
</script>
<template>
  <div class="m-breadcrumb" :style="`height: ${height}px;`">
    <div class="m-bread" v-for="(route, index) in routes" :key="index">
      <a
        :class="['u-route',{ active: index===len-1 }]"
        @click="index === len - 1 ? ($event:any) => $event.preventDefault() : goRouter(route)"
        :title="route.name">
        {{ route.name || '--' }}
      </a>
      <template v-if="index !== len - 1">
        <span v-if="separator" class="u-separator">{{ separator }}</span>
        <svg v-else class="u-arrow" viewBox="64 64 896 896" data-icon="right" aria-hidden="true" focusable="false"><path d="M765.7 486.8L314.9 134.7A7.97 7.97 0 0 0 302 141v77.3c0 4.9 2.3 9.6 6.1 12.6l360 281.1-360 281.1c-3.9 3-6.1 7.7-6.1 12.6V883c0 6.7 7.7 10.4 12.9 6.3l450.8-352.1a31.96 31.96 0 0 0 0-50.4z"></path></svg>
      </template>
    </div>
    <div class="assist"></div>
  </div>
</template>
<style lang="less" scoped>
.m-breadcrumb {
  .m-bread {
    display: inline-block;
    vertical-align: middle;
    .u-route {
      height: 22px;
      font-size: 16px;
      font-weight: 400;
      line-height: 22px;
      color: #333;
      display: inline-block;
      vertical-align: middle;
      max-width: 240px;
      overflow: hidden;
      white-space: nowrap;
      text-overflow: ellipsis;
      cursor: pointer;
      &:hover {
        color: @themeColor;
      }
    }
    .active {
      color: @themeColor;
      cursor: default;
    }
    .u-separator {
      display: inline-block;
      vertical-align: middle;
      margin: 0 6px;
    }
    .u-arrow {
      .u-separator();
      margin: 0 5px;
      width: 12px;
      height: 12px;
    }
  }
  .assist {
    height: 100%;
    width: 0;
    display: inline-block;
    vertical-align: middle;
  }
}
</style>
⑧在 breadcrumb/index.ts 中导出组件
import type { App } from 'vue'
import Breadcrumb from './Breadcrumb.vue'

// 使用install方法,在app.use挂载
Breadcrumb.install = (app: App) => {
  app.component(Breadcrumb.name, Breadcrumb)
}

export default Breadcrumb
⑨在 packages/index.ts 文件中对整个组件库进行导出:
import type { App } from 'vue'
import Pagination from './pagination'
import Breadcrumb from './breadcrumb'

// 所有组件列表
const components = [
  Pagination,
  Breadcrumb
]

// 定义 install 方法
const install = (app: App): void => {
  // 遍历注册所有组件
  components.forEach(component => app.component(component.name, component))
}

const VueAmazingUI = {
  install
}

export { // 方便按需导入
  Pagination,
  Breadcrumb
}

export default VueAmazingUI
⑩在 src/main.ts 中导入刚创建的组件,检测是否正常可用
import { Pagination, Breadcrumb } from '../packages/index'
// import { Pagination, Breadcrumb } from '../dist/vue-amazing-ui.js'
// import '../dist/style.css'
const app = createApp(App)
app.use(Pagination).use(Breadcrumb)

app.mount('#app')
⑪在终端执行 npm init 初始化包,选填并配置package.json:
{
  "name": "vue-amazing-ui",
  "version": "0.0.0",
  "private": false,
  "type": "module",
  "files": [
    "dist"
  ],
  "main": "./dist/vue-amazing-ui.umd.cjs",
  "module": "./dist/vue-amazing-ui.js",
  "exports": {
    ".": {
      "import": "./dist/vue-amazing-ui.js",
      "require": "./dist/vue-amazing-ui.umd.cjs"
    }
  },
  "scripts": {
    "dev": "vite --port 9000 --open --force",
    "build": "run-p type-check build-only",
    "preview": "vite preview",
    "build-only": "vite build --watch",
    "type-check": "vue-tsc --noEmit",
    "lint": "eslint . --ext .vue,.js,.jsx,.cjs,.mjs,.ts,.tsx,.cts,.mts --fix --ignore-path .gitignore"
  },
  "dependencies": {
    "vue": "^3.2.45"
  },
  "devDependencies": {
    "@rushstack/eslint-patch": "^1.1.4",
    "@types/node": "^18.11.12",
    "@vitejs/plugin-vue": "^4.0.0",
    "@vue/eslint-config-typescript": "^11.0.0",
    "@vue/tsconfig": "^0.1.3",
    "eslint": "^8.22.0",
    "eslint-plugin-vue": "^9.3.0",
    "less": "^4.1.3",
    "npm-run-all": "^4.1.5",
    "terser": "^5.16.4",
    "typescript": "~4.7.4",
    "vite": "^4.0.0",
    "vue-tsc": "^1.0.12"
  },
  "description": "This template should help get you started developing with Vue 3 in Vite.",
  "repository": {
    "type": "git",
    "url": "git+https://github.com/themusecatcher/vue-amazing-ui.git"
  },
  "keywords": [
    "Vue3",
    "TS",
    "Vite",
    "UI",
    "components"
  ],
  "author": "theMuseCatcher",
  "license": "ISC",
  "bugs": {
    "url": "https://github.com/themusecatcher/vue-amazing-ui/issues"
  },
  "homepage": "https://github.com/themusecatcher/vue-amazing-ui#readme"
}
name: 包名,该名字是唯一的。可在 npm 官网搜索名字,不可重复。
version: 版本号,每次发布至 npm 需要修改版本号,不能和历史版本号相同。
private:是否私有,需要修改为 false 才能发布到 npm
description: 关于包的描述。
main: 入口文件,需指向最终编译后的包文件。
keywords:关键字,以空格分离希望用户最终搜索的词。
author:作者
license: 开源协议
type: module:如果 package.json 不包含 "type": "module",Vite 会生成不同的文件后缀名以兼容 Node.js。.js 会变为 .mjs 而 .cjs 会变为 .js
files: ["dist/*"]:检测dist打包目录的所有文件
vite build --watch:当启用 --watch 标志时(启用 rollup 的监听器),对 vite.config.ts 的改动,以及任何要打包的文件,都将触发重新构建
vite --port 9000 --open --force:指定端口9000,启动时打开浏览器,强制优化器忽略缓存并重新构建。
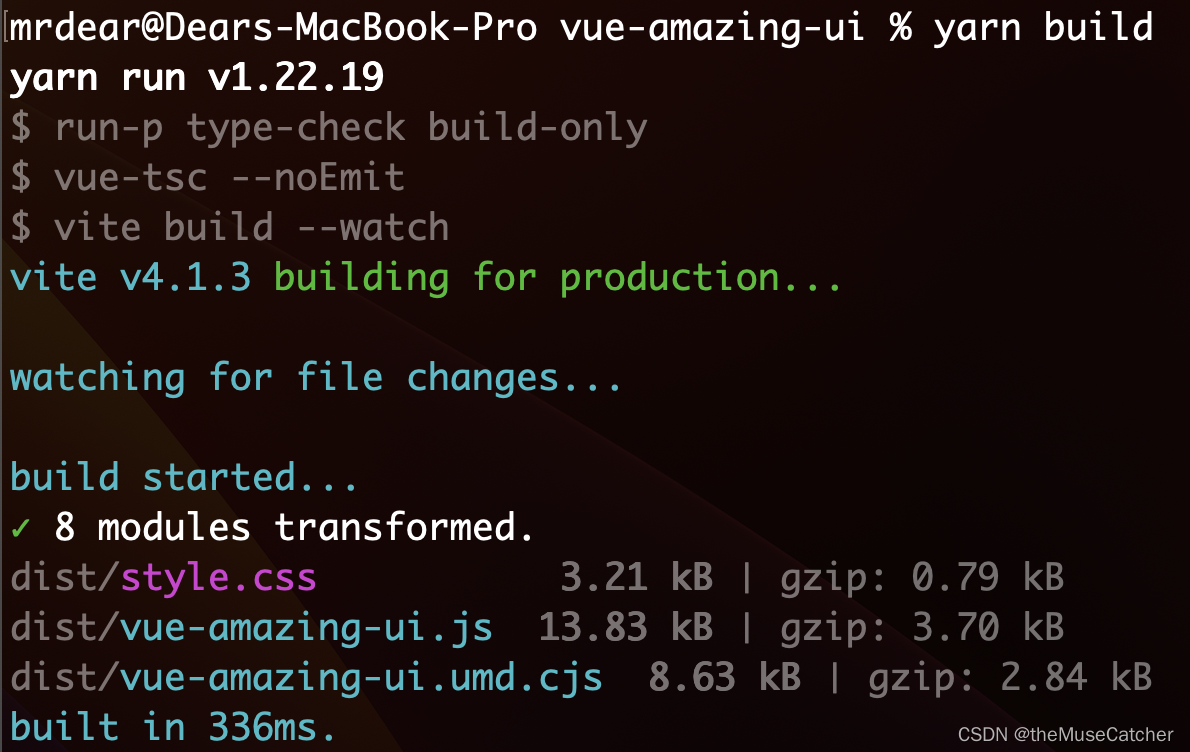
⑫执行编译命令
yarn build(或num run build)
执行结果如下图:
⑬在项目根目录创建 .npmignore 文件,设置忽略发布的文件,类似 .gitignore 文件
只有编译后的 dist 目录、package.json、README.md是需要被发布的
# 忽略目录
.DS_Store
.vscode/
node_modules
packages/
public/
src/

# 忽略指定文件
.eslintrc.cjs
.gitignore
.nomignore
.env.d.ts
index.html
tsconfig.config.json
tsconfig.json
vite.config.ts
yarn.lock
⑭编写README.md文件(使用markdown格式)
参考文档: http://markdown.p2hp.com/index.html
# vue-amazing-ui

## 安装插件

```
npm install vue-amazing-ui
或:yarn add vue-amazing-ui
```

## 引入并注册插件

```
import VueAmazingUI from 'vue-amazing-ui'
import '../node_modules/vue-amazing-ui/dist/style.css'

app.use(VueUi)

// 或者
import { Pagination, Breadcrumb } from 'vue-amazing-ui'
import '../node_modules/vue-amazing-ui/dist/style.css'

app.use(Pagination).use(Breadcrumb)
```

## 在项目中使用(示例)

```
<Breadcrumb :routes="routes" :height="60" />
```⑮登录npm
如果没有npm账号,可以去npm官网( npm) 注册一个账号
注册成功后在本地查看npm镜像:
npm config get registry
输出:http://registry.npmjs.org 即可
如果不是则需要设置为npm镜像:
npm config set registry https://registry.npmjs.org
然后在终端执行:
npm login
依次输入用户名,密码,邮箱
输出Logged in as…即可
npm whoami // 查看当前用户是否已登录
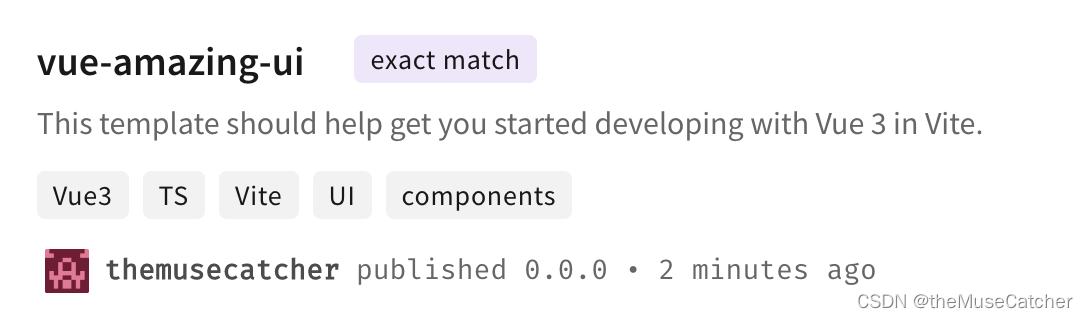
⑯发布组件到npm
在终端执行:npm publish
发布成功后即可在npm官网搜索到该组件,如下图;并可以通过 npm install vue-amazing-ui(或yarn add vue-amazing-ui)进行安装
⑰在要使用的项目中安装并注册插件:
yarn add vue-amazing-ui
然后在 main.ts 文件中引入并注册:
import VueAmazingUI from 'vue-amazing-ui'
// 或者 import { Pagination, Breadcrumb } from 'vue-amazing-ui'
import '../node_modules/vue-amazing-ui/dist/style.css'

app.use(VueAmazingUI)
在要使用组件的页面直接使用即可:
<Breadcrumb :routes="routes" :height="60" />
![[MySQL]基本数据类型及表的基本操作](https://img-blog.csdnimg.cn/img_convert/cb75587e0710f47888e68e907eb130f2.gif)