1、演示说明
1-1、先来看看最终效果:
2-1、说明
这并不是真正的支付,是支付宝提供的一个测试。之所以没有使用正式的支付,是因为支付宝(微信也是)不提供个人开发者功能,只有商户审核通过了才可以有这个功能。所有这里使用的是沙箱测试。
2、环境准备
2-1、我们要去支付申请一个沙箱测试账号 https://openhome.alipay.com/platform/appDaily.htm?tab=info
2-2、生成 RSA2,这里是需要下载一个支付宝提供的客户端 https://docs.open.alipay.com/291/105971
2-3、下载 【沙箱版支付宝】
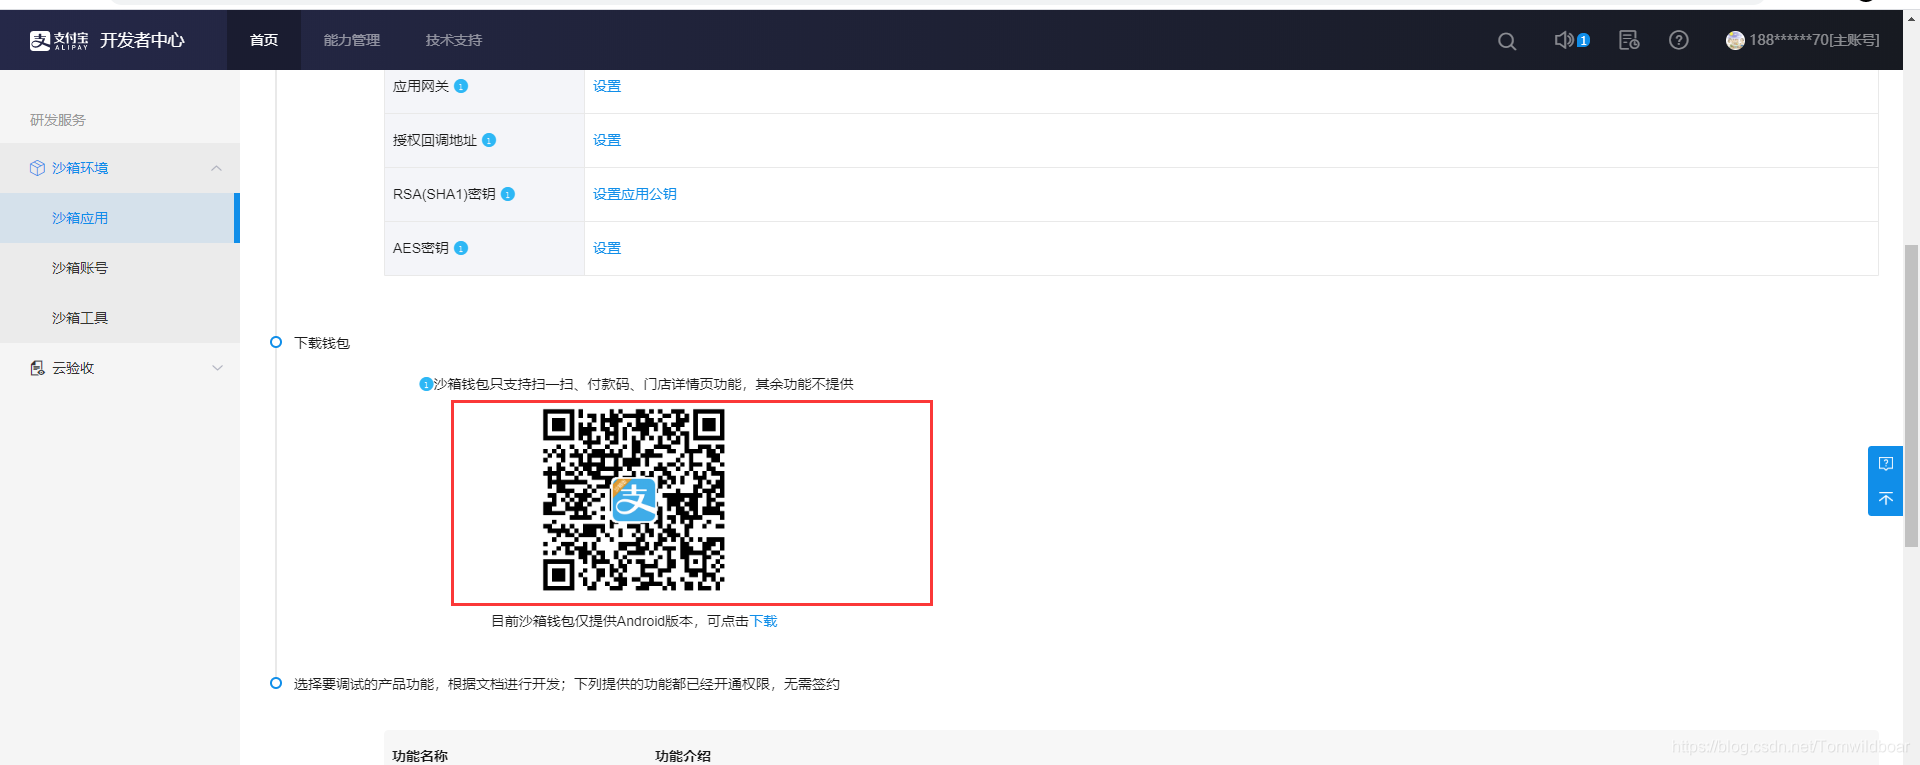
因为这是测试环境,所有所有的金额都是测试。不可以使用我们正式的支付宝。
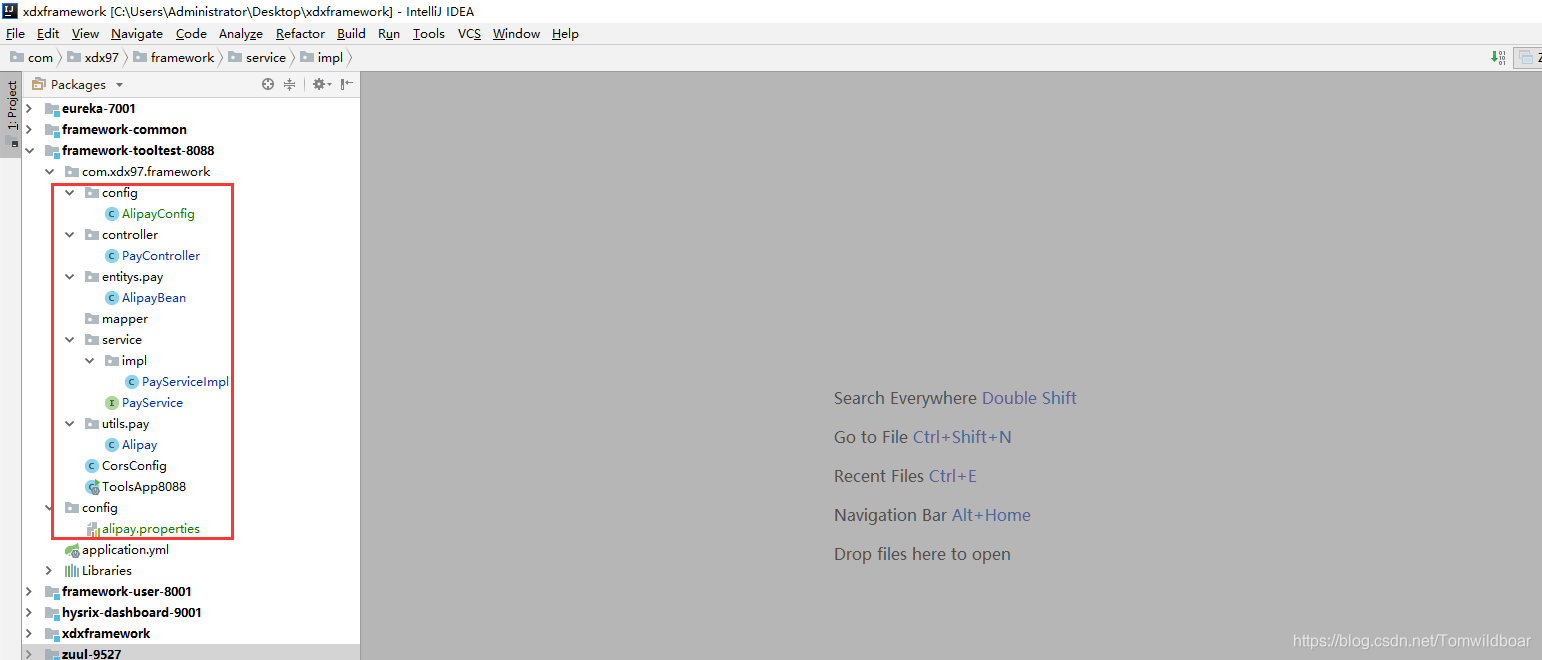
3、环境搭建
3-1:前端环境搭建
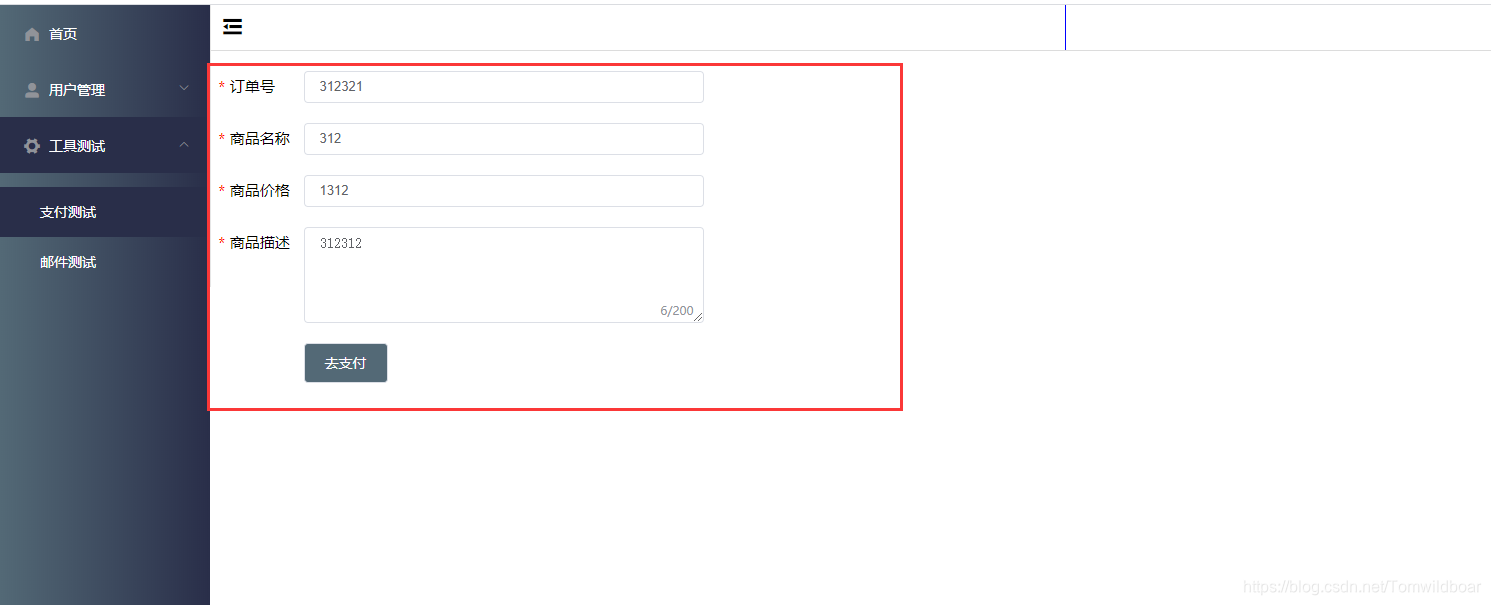
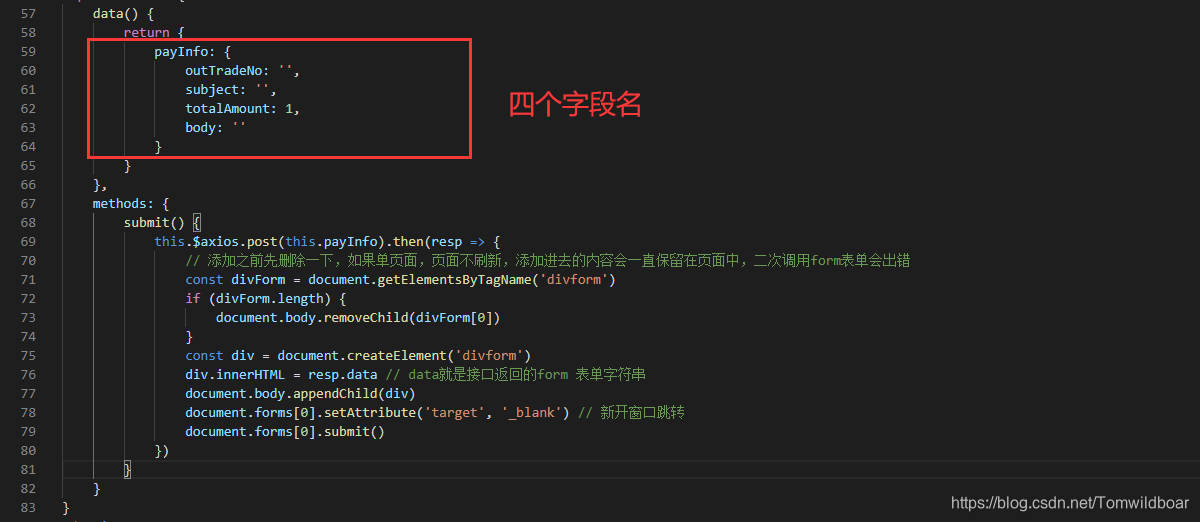
1、首先你只需要写一个这样的页面就好了,提供四个参数
this.$axios.post('url',this.payInfo).then(resp => {
                // 添加之前先删除一下,如果单页面,页面不刷新,添加进去的内容会一直保留在页面中,二次调用form表单会出错
                const divForm = document.getElementsByTagName('div')
                if (divForm.length) {
                    document.body.removeChild(divForm[0])
                }
                const div = document.createElement('div')
                div.innerHTML = resp.data // data就是接口返回的form 表单字符串
                document.body.appendChild(div)
                document.forms[0].setAttribute('target', '_blank') // 新开窗口跳转
                document.forms[0].submit()
            })
3-2:后端环境搭建
主要的pom
  <!-- 支付宝支付jar包 -->
        <dependency>
            <groupId>com.alipay.sdk</groupId>
            <artifactId>alipay-sdk-java</artifactId>
            <version>3.1.0</version>
        </dependency>
        <!-- fastjson -->
        <dependency>
            <groupId>com.alibaba</groupId>
            <artifactId>fastjson</artifactId>
			<version>1.2.48</version>
        </dependency>
AlipayConfig
package com.xdx97.framework.config;

import lombok.Data;
import org.springframework.boot.context.properties.ConfigurationProperties;
import org.springframework.context.annotation.Configuration;
import org.springframework.context.annotation.PropertySource;
import org.springframework.stereotype.Component;

/**
 * 配置文件读取
 *
 * @author 小道仙
 * @date 2020年2月18日
 */
@Configuration
@ConfigurationProperties
@PropertySource("classpath:config/alipay.properties")
@Data
@Component
public class AlipayConfig {

    /**
     * 应用ID,您的APPID,收款账号既是您的APPID对应支付宝账号
     */
    private String appId;

    /**
     * 商户私钥,您的PKCS8格式RSA2私钥
     */
    private String privateKey;

    /**
     * 支付宝公钥,
     */
    private String publicKey;

    /**
     * 服务器异步通知页面路径需http://格式的完整路径,不能加?id=123这类自定义参数
     */
    private String notifyUrl;

    /**
     * 页面跳转同步通知页面路径 需http://格式的完整路径,不能加?id=123这类自定义参数
     */
    private String returnUrl;

    /**
     * 签名方式
     */
    private String signType;

    /**
     * 字符编码格式
     */
    private String charset;

    /**
     * 支付宝网关
     */
    private String gatewayUrl;

    /**
     * 支付宝网关
     */
    private String logPath;
}
PayController
import com.alipay.api.AlipayApiException;
import com.xdx97.framework.service.PayService;
import com.xdx97.framework.entitys.pay.AlipayBean;
import org.springframework.beans.factory.annotation.Autowired;
import org.springframework.web.bind.annotation.PostMapping;
import org.springframework.web.bind.annotation.RestController;

/**
 * 支付宝沙箱测试
 *
 * @author 小道仙
 * @date 2020年2月17日
 */
@RestController
public class PayController {

    @Autowired
    private PayService payService;

    /**
     * 阿里支付
     * @param tradeNo
     * @param subject
     * @param amount
     * @param body
     * @return
     * @throws AlipayApiException
     */
    @PostMapping(value = "order/alipay")
    public String alipay(String outTradeNo, String subject, String totalAmount, String body) throws AlipayApiException {
        AlipayBean alipayBean = new AlipayBean();
        alipayBean.setOut_trade_no(outTradeNo);
        alipayBean.setSubject(subject);
        alipayBean.setTotal_amount(totalAmount);
        alipayBean.setBody(body);
        return payService.aliPay(alipayBean);
    }

}
AlipayBean
/**
 * 支付实体对象
 * 根据支付宝接口协议,其中的属性名,必须使用下划线,不能修改
 * @author 小道仙
 * @date 2020年2月18日
 */
public class AlipayBean {

    /**
     * 商户订单号,必填
     *
     */
    private String out_trade_no;
    /**
     * 订单名称,必填
     */
    private String subject;
    /**
     * 付款金额,必填
     * 根据支付宝接口协议,必须使用下划线
     */
    private String total_amount;
    /**
     * 商品描述,可空
     */
    private String body;
    /**
     * 超时时间参数
     */
    private String timeout_express= "10m";
    /**
     * 产品编号
     */
    private String product_code= "FAST_INSTANT_TRADE_PAY";

    public String getOut_trade_no() {
        return out_trade_no;
    }
    public void setOut_trade_no(String out_trade_no) {
        this.out_trade_no = out_trade_no;
    }
    public String getSubject() {
        return subject;
    }
    public void setSubject(String subject) {
        this.subject = subject;
    }
    public String getTotal_amount() {
        return total_amount;
    }
    public void setTotal_amount(String total_amount) {
        this.total_amount = total_amount;
    }
    public String getBody() {
        return body;
    }
    public void setBody(String body) {
        this.body = body;
    }
    public String getTimeout_express() {
        return timeout_express;
    }
    public void setTimeout_express(String timeout_express) {
        this.timeout_express = timeout_express;
    }
    public String getProduct_code() {
        return product_code;
    }
    public void setProduct_code(String product_code) {
        this.product_code = product_code;
    }

}
PayService
import com.alipay.api.AlipayApiException;
import com.xdx97.framework.entitys.pay.AlipayBean;


/**
 * 支付服务
 * @author Louis
 * @date Dec 12, 2018
 */
public interface PayService {

    /**
     * 支付宝支付接口
     * @param alipayBean
     * @return
     * @throws AlipayApiException
     */
    String aliPay(AlipayBean alipayBean) throws AlipayApiException;

}
PayServiceImpl
import com.xdx97.framework.service.PayService;
import com.xdx97.framework.utils.pay.Alipay;
import com.xdx97.framework.entitys.pay.AlipayBean;
import org.springframework.beans.factory.annotation.Autowired;
import org.springframework.stereotype.Service;

import com.alipay.api.AlipayApiException;

@Service
public class PayServiceImpl implements PayService {

    @Autowired
    private Alipay alipay;

    @Override
    public String aliPay(AlipayBean alipayBean) throws AlipayApiException {
        return alipay.pay(alipayBean);
    }
}
Alipay
import com.xdx97.framework.config.AlipayConfig;
import com.xdx97.framework.entitys.pay.AlipayBean;
import org.springframework.beans.factory.annotation.Autowired;
import org.springframework.stereotype.Component;

import com.alibaba.fastjson.JSON;
import com.alipay.api.AlipayApiException;
import com.alipay.api.AlipayClient;
import com.alipay.api.DefaultAlipayClient;
import com.alipay.api.request.AlipayTradePagePayRequest;

/**
 * 支付宝支付接口
 * @author 小道仙
 * @date 2020年2月18日
 */
@Component
public class Alipay {

    @Autowired
    private AlipayConfig alipayConfig;

    /**
     * 支付接口
     * @param alipayBean
     * @return
     * @throws AlipayApiException
     */
    public String pay(AlipayBean alipayBean) throws AlipayApiException {
        // 1、获得初始化的AlipayClient
        String serverUrl = alipayConfig.getGatewayUrl();
        String appId = alipayConfig.getAppId();
        String privateKey = alipayConfig.getPrivateKey();
        String format = "json";
        String charset = alipayConfig.getCharset();
        String alipayPublicKey = alipayConfig.getPublicKey();
        String signType = alipayConfig.getSignType();
        String returnUrl = alipayConfig.getReturnUrl();
        String notifyUrl = alipayConfig.getNotifyUrl();
        AlipayClient alipayClient = new DefaultAlipayClient(serverUrl, appId, privateKey, format, charset, alipayPublicKey, signType);
        // 2、设置请求参数
        AlipayTradePagePayRequest alipayRequest = new AlipayTradePagePayRequest();
        // 页面跳转同步通知页面路径
        alipayRequest.setReturnUrl(returnUrl);
        // 服务器异步通知页面路径
        alipayRequest.setNotifyUrl(notifyUrl);
        // 封装参数
        alipayRequest.setBizContent(JSON.toJSONString(alipayBean));
        // 3、请求支付宝进行付款,并获取支付结果
        String result = alipayClient.pageExecute(alipayRequest).getBody();
        // 返回付款信息
        return result;
    }
}
alipay.properties
下面需要配置你的沙箱账号和,密钥
# 应用ID,您的APPID,收款账号既是您的APPID对应支付宝账号
appId:
# 商户私钥,您的PKCS8格式RSA2私钥
privateKey:
# 支付宝公钥,查看地址:https://openhome.com/platform/keyManage.htm 对应APPID下的支付宝公钥。
publicKey:
# 服务器异步通知页面路径需http://格式的完整路径,不能加?id=123这类自定义参数
notifyUrl:
# 页面跳转同步通知页面路径 需http://格式的完整路径,不能加?id=123这类自定义参数
returnUrl: http://localhost:8080/#/pay/success
# 签名方式
signType: RSA2
# 字符编码格式
charset: utf-8
# 支付宝网关
gatewayUrl: https://openapi.alipaydev.com/gateway.do
# 支付宝网关
logPath: "C:\\"
这篇文章被很多人问到,写了个Demo,希望可以帮到你。
关注公众号回复: PayDemo