表单渲染中, 有些表单的显示有不同条件, 比如需要上一个表单的开关打开,或者文本内容为 xxxx, 或者需要大于或等于或小于指定值, 或者需要选中某个选项, 或者需满足以上多个条件或在满足多个条件中的一个, 有 n 种场景选择, 这样就需要条件显示配置功能, 来满足多样化需求
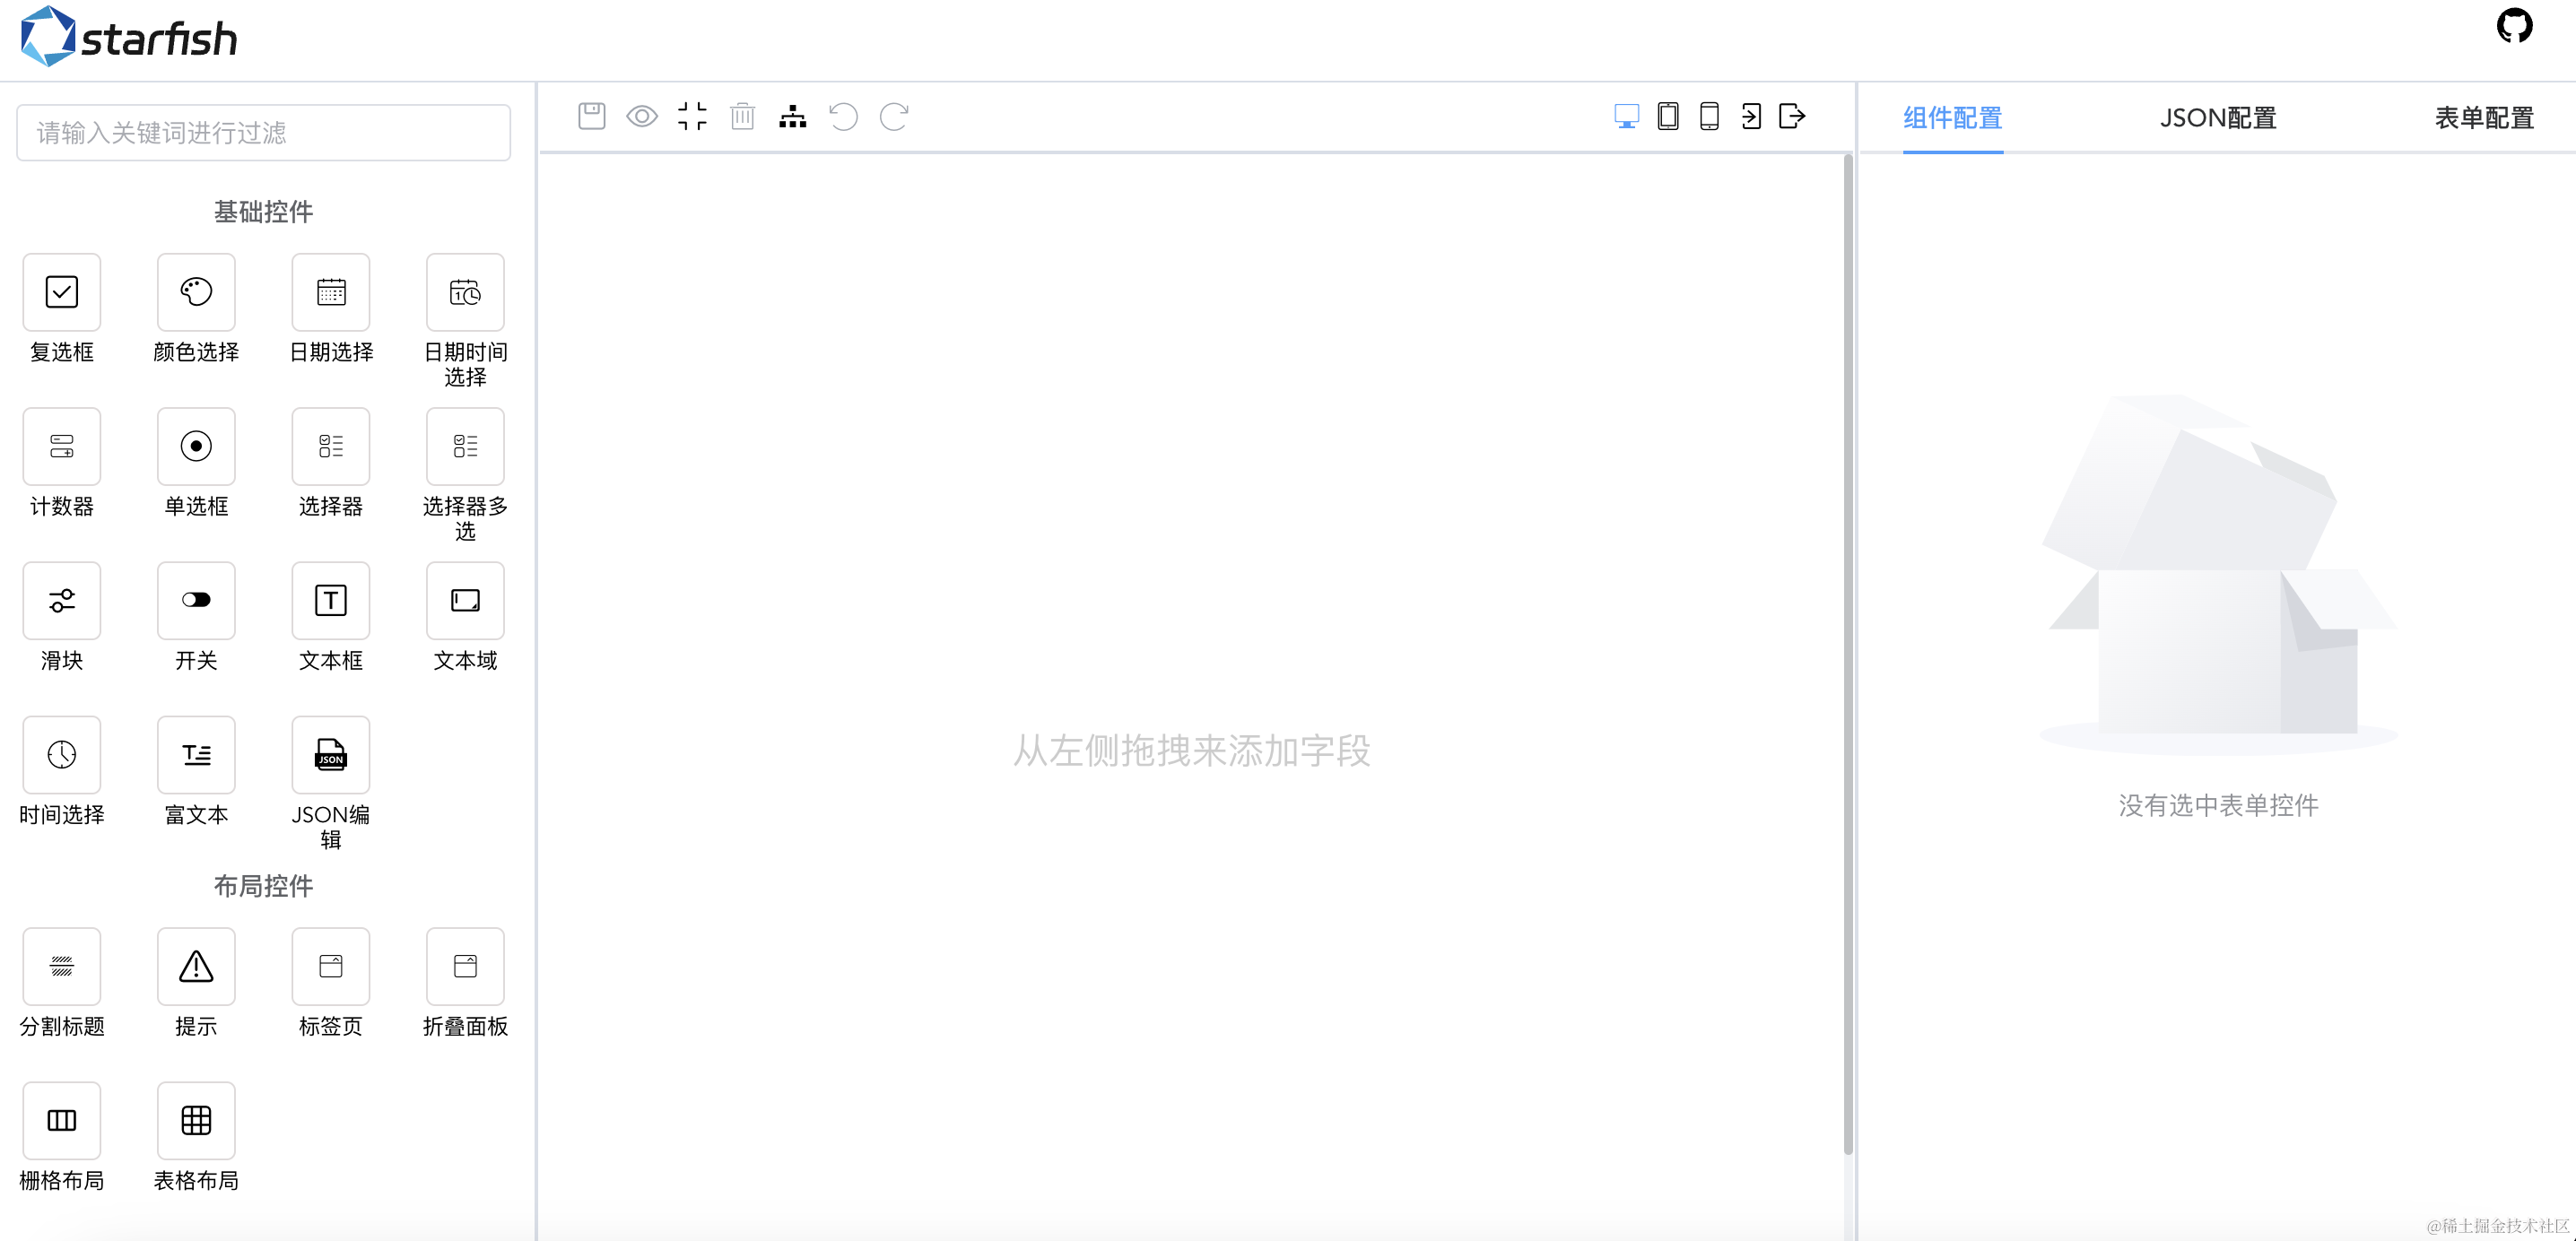
预览

架构实现
条件显示,其实就是该表单和其他表单的逻辑关系,我们可以合理的利用或(||)且(&&)逻辑运算符来实现
如
(A && B) || (A && (B || C || D && (F && (G || H && (L && O && P)))) && E) && D
实现出能匹配出以上等不同复杂类型表达式的组件, 差不多条件显示功能难点没有了
思考
观察以上表达式, 有以下几个特点
- 只有且或两个逻辑表达式
- 关系层级嵌套多, 可能会嵌套 n 层, 层数不确定
综合以上两个原因, 可以利用两个按钮来表示并和或, 然后使用 vue 的递归组件来实现关系的层级嵌套, 这样就能在不同层级下的组件样式保持一致
实现
递归组件
定义: 组件是可以在它们自己的模板中调用自身的。不过它们只能通过 name 选项来做这件事:
如:
{
  "name": "stack-overflow", // 组件名称
  "template": "<div><stack-overflow></stack-overflow></div>" // 模板内部调用自身
}
步骤原理
我们首先来实现下如下的表达式:
如:
A || (B && C)
上文说过, 只有两个逻辑运算符, 且、或, 观察 A || (B && C), 除了逻辑运算符外, 还有条件 A、B、C, 这个条件具有多样性, 且可配
我们可以定义一个下拉框(不使用按钮,不然后面循环嵌套按钮太多,样式太丑), 包含并组、或组、条件, 可以理解并组和或组就是一个数组, 数组内有不同的条件, 并组就是每个条件必须满足,或组就是不同条件满足其中一个即可
<el-select v-model="result.type" placeholder="请选择" @change="onChange">
  <el-option v-for="item in groupSelect" :key="item.value" :label="item.label" :value="item.value"> </el-option>
</el-select>
export default {
  data() {
    return {
      groupSelect: [
        {
          value: "andgroup",
          label: "+并组",
        },
        {
          value: "orgroup",
          label: "+或组",
        },
        {
          value: "data",
          label: "条件",
        },
      ],
    };
  },
};
样式如下
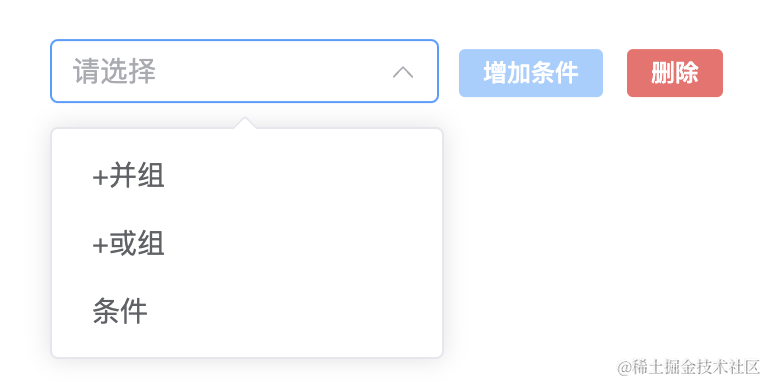
一个下拉框, 一个增加条件按钮和一个删除按钮
上文也说过下拉框的作用, 增加条件按钮其实和下拉框的条件按钮功能一致的, 不过为了方便新增条件做的快捷按钮, 删除按钮指的是删除当前条件或子条件
观察如 A || (B && C)表达式, 满足 A 或者满足 B 且满足 C, 整体是一个或组, 相信大家通过我对或和且命名为或组和且组就能理解到, 或组和且组都是一个数组.或组数组内部有两条数据, 一个是条件 A, 一个是并组, 并组数组内部有两条数据, 条件 B 和条件 C
综合以上分析, 递归组件的使用场景就是在并组和或组内部配置子条件, 子条件包括条件、或组、并组, 然后子条件内部的并组和或组又有子条件, 只要有子条件就可能会有或组和并组, 不断递归下去,直到最底层的是条件, 不能再有子条件为止
所以可以设计成如下数据格式:
{
  "showRule": {
    "type": "orgroup",
    "result": [
      {
        "type": "data",
        "data": "A"
      },
      {
        "type": "andgroup",
        "result": [
          {
            "type": "data",
            "data": "B"
          },
          {
            "type": "data",
            "data": "C"
          }
        ]
      }
    ]
  }
}
以上数据转换为表达式就是:
(
    'A' or ('B' and 'C')
)
来分析下该数据格式, 其中 type 字段, 值有 orgroup、andgroup、data, 代表或组、并组、条件, 或组和并组是一个数组 result, 数组内部可以是或组、并组、条件, 如果 type 为 data, 则没有 result, 为 data 对象,即条件
那我们根据以上数据接口来实现递归组件
子组件 ConditionGroup
template
<Transition>
  <div v-show="result.type && result.type !== 'data'">
    <div v-for="(item, index) in result.result" :key="index">
      <ConditionGroup :result="item" @update="handleUpdateForce" @delete="handleDelete" :index="index" :fieldList="fieldList" />
    </div>
    <div v-if="result.result && result.result.length >= 2"></div>
  </div>
</Transition>
<div v-show="result.type && result.type == 'data'">
  <ConditionTanc ref="ConditionTanc" :data="result.data" @end="handleUpdateForce" :fieldList="fieldList"></ConditionTanc>
</div>
script
export default {
  name: "ConditionGroup",
  props: {
    result: {
      type: Object,
      default() {
        return {};
      },
    },
    fieldList: {
      type: Array,
      default() {
        return [];
      },
    },
  },
};
父组件 ConditionModule
template
<ConditionGroup :result="result" @update="handleUpdateForce" />
script
export default {
  data() {
    return {
      result: {},
    };
  },
};
通过不断的向子组件或递归组件传递 result, 利用 vue 的双向数据绑定, 来实现配置
其中需要注意一点
因为是数据是通过配置的形式, 不知道是并组、或组还是条件, 所以在最顶层的时候是只透传了空对象, 我们需要在增加并组、或组还是条件的时候判断类型然后生成对应字段
如:
if (!this.result.type) return;
if (!this.result.result && this.result.type != "data") {
  this.result.result = [];
}
if (this.result.type == "data" && !this.result.data) {
  this.result.data = {};
}
this.result.control = true;

switch (this.result.type) {
  case "orgroup":
    this.result.result.push({ typ: "orgroup", result: [] });
    break;
    e;
  case "andgroup":
    this.result.result.push({ type: "andgroup", result: [] });
    break;
  case "data":
    this.result.result.push({ type: "data", data: {} });
    break;
}
这样就能生成 n 层嵌套的数据
条件生成
这个条件是什么, 是需要其他表单达到什么条件, 比如大于等于某个值, 选择某个选项等
所以要有三个条件
- 获取其他表单的数据
- 判断是等于不等于、包含不包含逻辑运算
- 表单的值是固定的还是用户输入的, 比如下拉选择框是固定的几个选项, 不可能让用户随意配置, 必须在固定几个选项的基础上进行选择
获取数据
我相信大家应该也看到上面代码的 fieldList 字段, 该字段就是全局表单列表, 该数据列表我是通过 reative 进行数据的状态管理, 配置的数据就能在全局(所有组件)共享(访问), 这样就能获取其他表单配置
const allFormList = formStore?.get("allFormList");
const fieldResult = [];
// 获取显示条件所有字段列表(详情请看源代码)
toRaw(allFormList)?.forEach((item) => {
  window.VueContext.$Flex.getFormDataList(item, fieldResult, this.data.fieldName);
});
this.leftField = fieldResult;
动态生成逻辑运算符
是确定表单显示条件值是否满足, 如 a 是否包含字符串 c, a.includes(‘c’), b 是否不等于 2, b != 2
export default {
  data() {
    return {
      logicList: [
        { value: "=", label: "等于" },
        { value: "!=", label: "不等于" },
      ],
    };
  },
  methods: {
    getLogic() {
      const item = this.fieldList.find((item) => {
        if (this.table && this.table.length > 0) {
          if (item.value == this.table[0].field) {
            return item;
          }
        }
      });
      if (item && item.options && item.multiple) {
        return [
          { value: "in", label: "包含" },
          { value: "not in", label: "不包含" },
        ];
      }
      if (item && item.switch) {
        return [
          {
            value: "=",
            label: "等于",
          },
        ];
      }
      return this.logicList;
    },
  },
};
值类型
默认情况下是常量, 然后用户输入指定值, 如果是选择框,下拉框等, 就是选项,获取该表单配置固定选项值,作为最后的条件值, 如果是 switch, 则是布尔, 值只能为 true 或 false
{
    data(){
       return {
        typeList: [
            {
            rule: [],
            value: "常量",
            label: "常量",
            },
        ],
       }
    },
    computed: {
        newtypeList() {
            const item = this.fieldList.find((item) => {
                if (this.table && this.table.length > 0) {
                if (item.value == this.table[0].field) {
                    return item;
                }
                }
            });
            if (item && item.options) {
                return [
                {
                    rule: [],
                    value: "选项",
                    label: "选项",
                },
                ];
            }
            if (item && item.switch) {
                return [
                {
                    value: "布尔",
                    label: "布尔",
                },
                ];
            }
            return this.typeList;
        },
  }
}
这样就能保证数据的准确性和安全性, 规范规则, 否则会出现要求 switch(开关)的值为’abc’, 要求下拉框(固定值 a,b,c)的值等于 7, 会出现各种牛头不对马嘴的情况
具体的选项值的获取等请移步到源码中
表达式
数据生成后, 如果嵌套递归很多, 我相信大家很难准确的知道其中的逻辑关系, 想在某个地方添加一个或组, 可能都很难找对, 所以为了方便查看其中的逻辑关系, 程序实时生成表达式
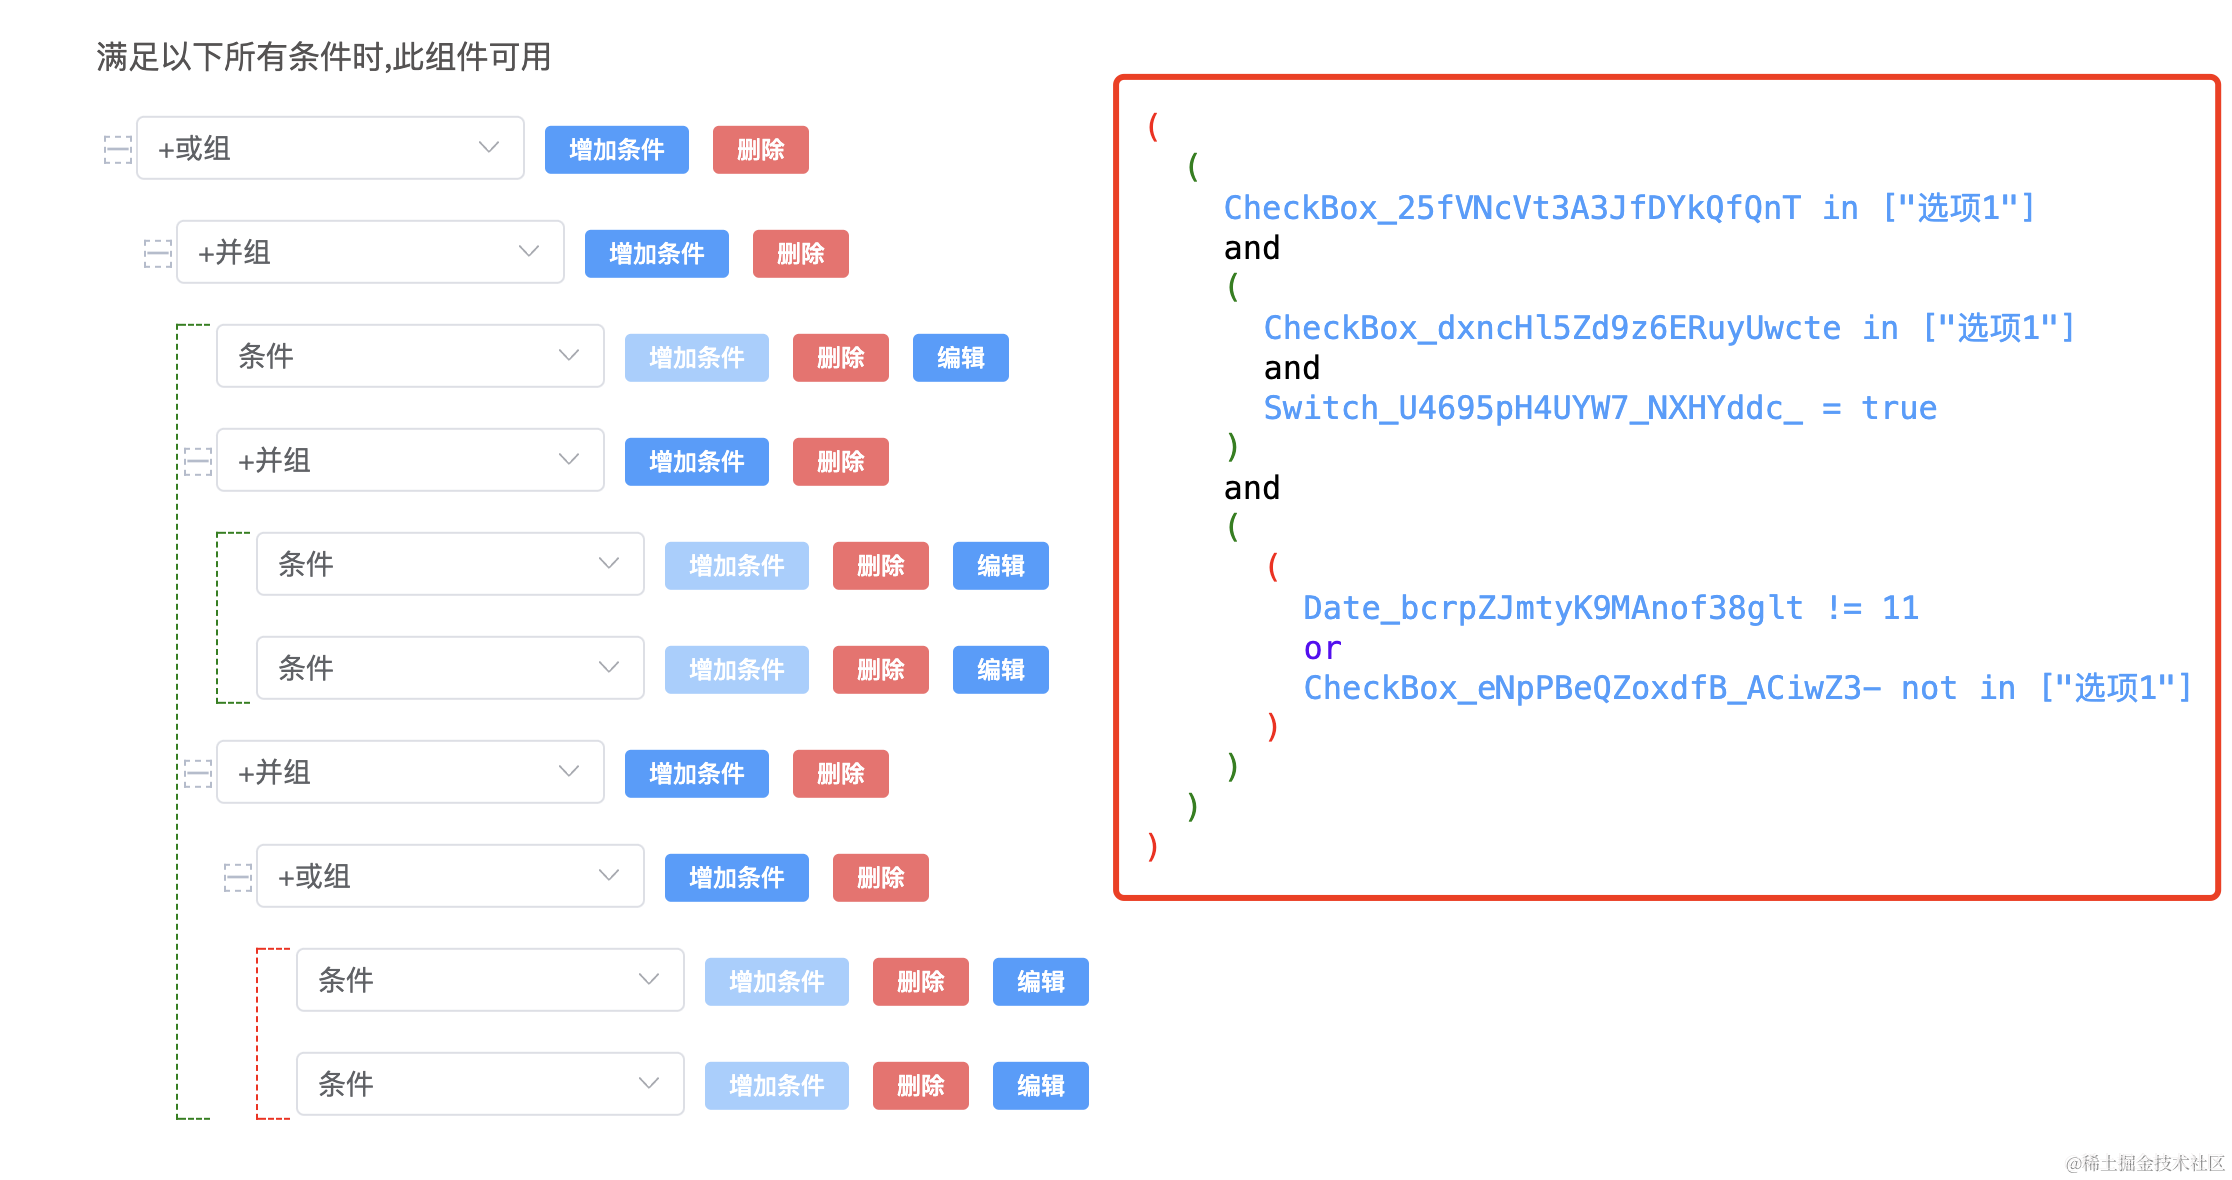
function filterCondition(result) {
  if (result.type == "andgroup" || result.type == "orgroup") {
    const b = result.result.map((item) => filterCondition(item)).join(result.type == "andgroup" ? '<span class="and">and</span>' : '<span class="or">or</span>');
    const a = `<span class='kh ${result.type}'>(${b})</span>`;
    return a;
  } else if (result.type == "data") {
    return `<span class='data kh'>${getDataConditionRelate(result)}</span>`;
  } else {
    return "";
  }
}
function getDataConditionRelate(data) {
  if (Object.keys(data.data).length == 0) return "空";
  const fieldData = data.data;
  const field = fieldData.field;
  let value;
  if (fieldData.type == "选项") {
    const rightField = fieldData.value;
    value = `${JSON.stringify(rightField)}`;
  } else if (fieldData.type == "常量" || fieldData.type == "布尔") {
    value = fieldData.value;
  }
  return `${field} ${fieldData.logic} ${value}`;
}
显示条件
通过以上方式我们能生成每个表单的显示条件配置数据, 那如何来实际控制表单的显示隐藏?
首先我们需要监听表单值的改变, 这样才能实时来实现显示与隐藏
定义了一个 hooks
import { watch, getCurrentInstance, ComponentInternalInstance } from "vue";

function useWatch(props: any) {
  const vm = getCurrentInstance() as ComponentInternalInstance;
  // 预览模式下才有效
  if (!props.data.fieldName && !props.item.controlItems) {
    watch(
      () => props.data[props.item.data.fieldName],
      (val, oldVal) => {
        if (props.item.data.action && props.item.data.action.onChange) {
          window.VApp.$Flex.funcExec(props.item.data.action.onChange, vm.proxy, [val, oldVal, props.data]);
        }
        vm.emit("change");
      },
      {
        deep: true,
      }
    );
  }
}

export { useWatch };
然后在每个表单组件中这样引用, 就不需要多余的逻辑来实现数据的改变
import { useWatch } from "../../utils/customHooks";
export default defineComponent{
    setup(props){
         useWatch(props);
    }
}
所以组件改变的时候会触发 change 方法, 我们就可以写组件的显示隐藏逻辑
下面是核心代码, 详细代码请看源码
function conditionChange(data: any) {
  if (data.type == "andgroup") {
    const result = data.result
      .map((item: any) => {
        const r = conditionChange(item);
        return r;
      })
      .find((item: boolean) => {
        return item == false;
      });
    return result === undefined ? true : result;
  } else if (data.type == "orgroup") {
    const result = data.result
      .map((item: any) => {
        const r = conditionChange(item);
        return r;
      })
      .find((item: boolean) => {
        return item == true;
      });
    return result === undefined ? false : result;
  } else if (data.type == "data") {
    const result = data.data;
    const formResults: any = props.formResult;
    const value = formResults[result.field];
    let isShow = false;
    switch (result.logic) {
      case "=":
        isShow = value == result.value;
        break;
      case "!=":
        isShow = value != result.value;
        break;
      case "in":
        if (Array.isArray(value)) {
          value.find((item) => {
            if (result.value.include(item)) {
              isShow = result.value.includes(item);
              return item;
            }
          });
        } else {
          isShow = result.value.includes(value);
        }
        break;
      case "not in":
        if (Array.isArray(value)) {
          value.find((item) => {
            if (!result.value.include(item)) {
              isShow = !result.value.includes(item);
              return item;
            }
          });
        } else {
          isShow = !result.value.includes(value);
        }
        break;
    }
    return isShow;
  }
}
总结
通过以上剖丝薄茧, 我相信大家对动态表单显示与隐藏的判断应该了如指掌了, 如果要阅读源码, 请移步
github 地址
预览