eltable 合计行添加tooltip
-
问题描述:
eltable 合计行单元格内容过长会换行,需求要求合计行数据超长显示 … ,鼠标 hover 时显示提示信息。
-
解决方案:eltable合计行没有对外的修改接口,想法是 自己实现一个tooltip, 为合计行单元添加鼠标移入移出事件,移入显示tooltip,移出隐藏tooltip,tooltip的定位和内容通过移入时拿到单元格位置和内容。
-
实现代码 (最后有优化代码)
<template>
  <div class="content">
    <el-table show-summary :data="data">
      <el-table-column
        v-for="item in header"
        v-bind="item"
        :show-overflow-tooltip="true"
      >
      </el-table-column>
    </el-table>

    <!-- 自定义tooltip -->
    <Transition name="el-fade-in">
      <div v-show="toolTipVisble" id="customTooltip" ref="customTooltip">
        {{ tipMsg }}
        <div class="popper__arrow"></div>
      </div>
    </Transition>
  </div>
</template>
<script>
export default {
components: {},
data() {
return {
//合计行提示
toolTipVisble: false,
tipMsg: "",
header: [
{ label: "列1", prop: "col1", width: "70px" },
{ label: "列2", prop: "col2", width: "70px" },
{ label: "列3", prop: "col3", width: "70px" },
{ label: "列4", prop: "col4", minWidth: "70px" },
],
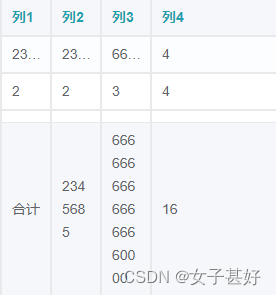
data: [
{
col1: "23333333333333",
col2: "2345679",
col3: "66666666666666",
col4: "4",
},
{ col1: "2", col2: "2", col3: "3", col4: "4" },
{ col1: "2", col2: "2", col3: "3", col4: "4" },
{ col1: "2", col2: "2", col3: "3", col4: "4" },
{ col1: "2", col2: "2", col3: "3", col4: "4" },
],
};
},
mounted() {
this.setSummaryListener();
},
methods: {
setSummaryListener() {
let that = this;
let table = document.querySelector(".el-table__footer-wrapper>table");
this.$nextTick(() => {
for (let rowIndex = 0; rowIndex < table.rows.length; rowIndex++) {
let row = table.rows[rowIndex].cells;
for (let colIndex = 0; colIndex < row.length; colIndex++) {
let col = row[colIndex];
let cells = col.getElementsByClassName("cell");
if (cells && cells.length > 0) {
let cell = cells[0];
if (cell.scrollWidth > cell.offsetWidth) {
cell.onmouseenter = function () {
that.setTooltip(true, rowIndex, colIndex, cell);
};
cell.onmouseleave = function () {
that.setTooltip(false, rowIndex, colIndex, cell);
};
}
}
}
}
});
},
setTooltip(isShow, rowIndex, columnIndex, colEl) {
this.toolTipVisble = isShow;
if (isShow) {
this.tipMsg = colEl.innerText || colEl.textContent;
let toolTip = this.$refs.customTooltip;
let rect = colEl.getBoundingClientRect();
//向上偏移量
const offsetTop = 50;
toolTip.style.top = rect.top - offsetTop + "px";
this.$nextTick(() => {
const cellBorderWidth = 1;
toolTip.style.left =
rect.left -
(toolTip.offsetWidth / 2 -
(colEl.offsetWidth + cellBorderWidth * 2) / 2) +
"px";
});
}
},
},
};
</script>
<style>
/* 合计行单元格样式 */
.el-table__footer-wrapper .el-table__footer .el-table__cell .cell {
  overflow: hidden;
  text-overflow: ellipsis;
  word-break: break-all;
  white-space: nowrap;
}
</style>

<style lang="scss" scoped>
#customTooltip {
  position: absolute;
  transform-origin: center bottom;
  background: #303133;
  color: #fff;
  border-radius: 4px;
  padding: 10px;
  font-size: 12px;
  line-height: 1.2;
  word-wrap: break-word;

  .popper__arrow {
    position: absolute;
    display: block;
    width: 0px;
    height: 0px;
    bottom: -12px;
    left: 42%;

    border-left: 6px solid transparent;
    border-right: 6px solid transparent;
    border-bottom: 6px solid transparent;
    border-top: 6px solid #303133;
  }
}
.content {
  display: flex;
  flex-direction: column;
  width: 100%;
  height: 500px;
}
</style>
- 实现效果

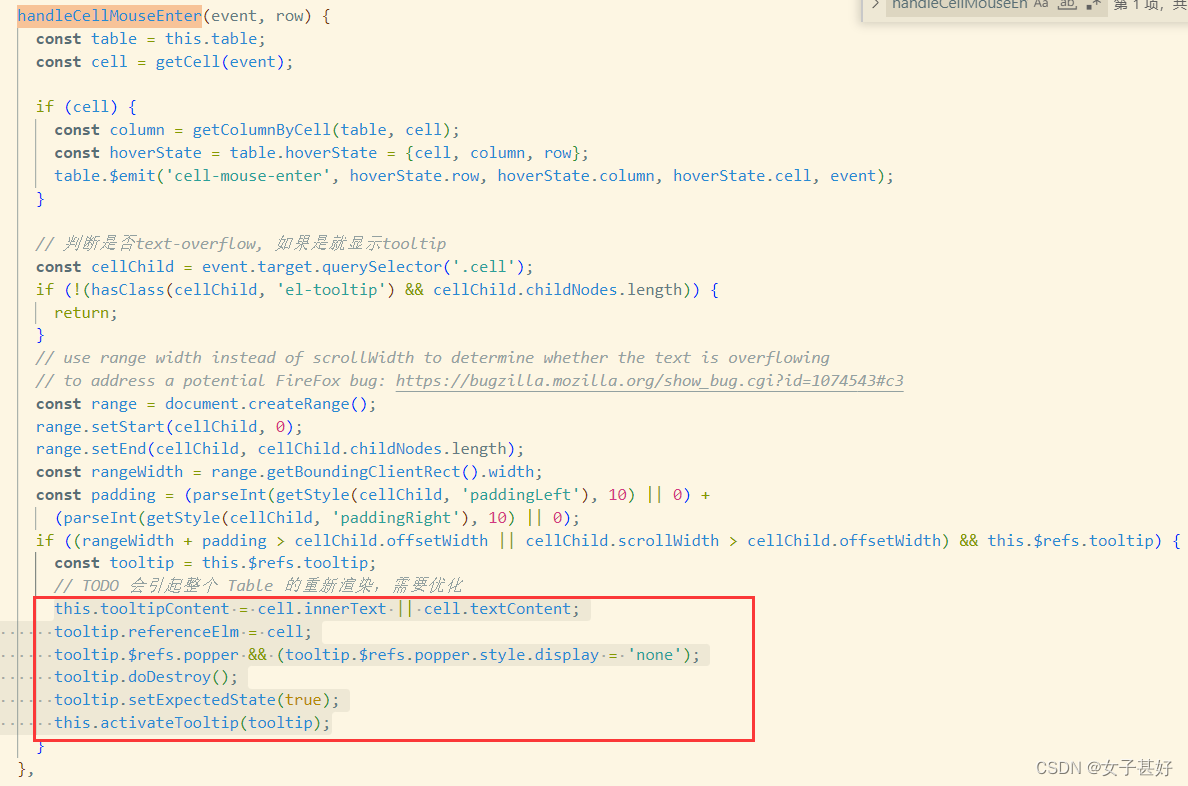
- 瞅瞅源码
eltable 数据行单元格提示信息show-overflow-tooltip源码实现思路跟上面差不多。
单元格的提示信息也是绑定鼠标移入移出事件,提示信息用的el-tooltip。
el-tooltip:这里el-tooltip标签里面没有内容,之后通过鼠标移入事件绑定。
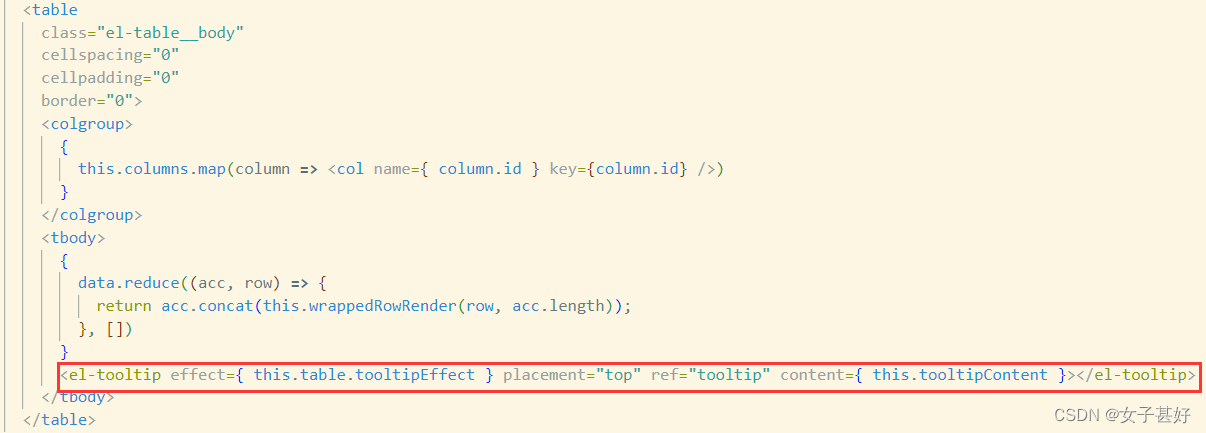
单元格绑定鼠标事件

referenceElm绑定目标对象(提示信息定位对象)。
- 优化一下我自己写的tooltip,用el-tooltip实现。
vue"><template>
  <div class="all-overview-content">
    <el-table show-summary :data="data">
      <el-table-column
        v-for="item in header"
        v-bind="item"
        :show-overflow-tooltip="true"
      >
      </el-table-column>
    </el-table>

    <!-- 自定义tooltip -->
    <!-- <Transition name="el-fade-in">
      <div v-show="toolTipVisble" id="customTooltip" ref="customTooltip">
        {{ tipMsg }}
        <div class="popper__arrow"></div>
      </div>
    </Transition> -->

    <el-tooltip
      placement="top"
      ref="tooltip"
      :content="tooltipContent"
    ></el-tooltip>
  </div>
</template>

<script>
export default {
  components: {},

  data() {
    return {
      tooltipContent: "",

      header: [
        { label: "列1", prop: "col1", width: "70px" },
        { label: "列2", prop: "col2", width: "70px" },
        { label: "列3", prop: "col3", width: "70px" },
        { label: "列4", prop: "col4", minWidth: "500px" },
      ],
      data: [
        {
          col1: "23333333333333",
          col2: "2345679",
          col3: "66666666666666",
          col4: "4",
        },
        { col1: "2", col2: "2", col3: "3", col4: "4" },
        { col1: "2", col2: "2", col3: "3", col4: "4" },
        { col1: "2", col2: "2", col3: "3", col4: "4" },
        { col1: "2", col2: "2", col3: "3", col4: "4" },
      ],
    };
  },

  mounted() {
    this.setSummaryListener();
  },
  methods: {
    setSummaryListener() {
      let that = this;
      let table = document.querySelector(".el-table__footer-wrapper>table");

      this.$nextTick(() => {
        for (let rowIndex = 0; rowIndex < table.rows.length; rowIndex++) {
          let row = table.rows[rowIndex].cells;
          for (let colIndex = 0; colIndex < row.length; colIndex++) {
            let col = row[colIndex];
            let cells = col.getElementsByClassName("cell");

            if (cells && cells.length > 0) {
              let cell = cells[0];
              if (cell.scrollWidth > cell.offsetWidth) {
                cell.onmouseenter = function () {
                  that.setTooltip(true, rowIndex, colIndex, cell);
                };
                cell.onmouseleave = function () {
                  that.setTooltip(false, rowIndex, colIndex, cell);
                };
              }
            }
          }
        }
      });
    },
    setTooltip(isShow, rowIndex, columnIndex, colEl) {
      const tooltip = this.$refs.tooltip;
      if (isShow) {
        this.tooltipContent = colEl.innerText || colEl.textContent;
        tooltip.referenceElm = colEl;
        tooltip.$refs.popper && (tooltip.$refs.popper.style.display = "none");
        tooltip.doDestroy();
        tooltip.setExpectedState(true);
        tooltip.handleShowPopper();
      } else {
        tooltip.setExpectedState(false);
        tooltip.handleClosePopper();
      }
    },
  },
};
</script>

<style>
/* 合计行单元格样式 */
.el-table__footer-wrapper .el-table__footer .el-table__cell .cell {
  overflow: hidden;
  text-overflow: ellipsis;
  word-break: break-all;
  white-space: nowrap;
}
</style>

<style lang="scss" scoped>
.all-overview-content {
  display: flex;
  flex-direction: column;
  width: 100%;
  height: 500px;
}
</style>