零、实现原理与应用案例设计
1、原理
基础实例 Demo 可以参照以下这篇博文,
基于.Net CEF 实现 Vue 等前端技术栈构建 Windows 窗体应用-CSDN博客文章浏览阅读291次。基于 .Net CEF 库,能够使用 Vue 等前端技术栈构建 Windows 窗体应用https://blog.csdn.net/weixin_47560078/article/details/133974513原理非常简单,基于 .Net CEF 实现,用到的库为 CefSharp。
2、优势
- 可以使用Vue/React等前端技术美化页面,提升用户友好度
- 可以调度操作系统资源,例如打印机,命令行,文件
- 前后端开发可以并行
3、劣势
- 损失部分性能,占用系统资源更高
- 调试需要前后端分开调试,对开发人员要求高,需要懂前后端技术栈
- 非跨平台,仅支持Window
4、应用案例
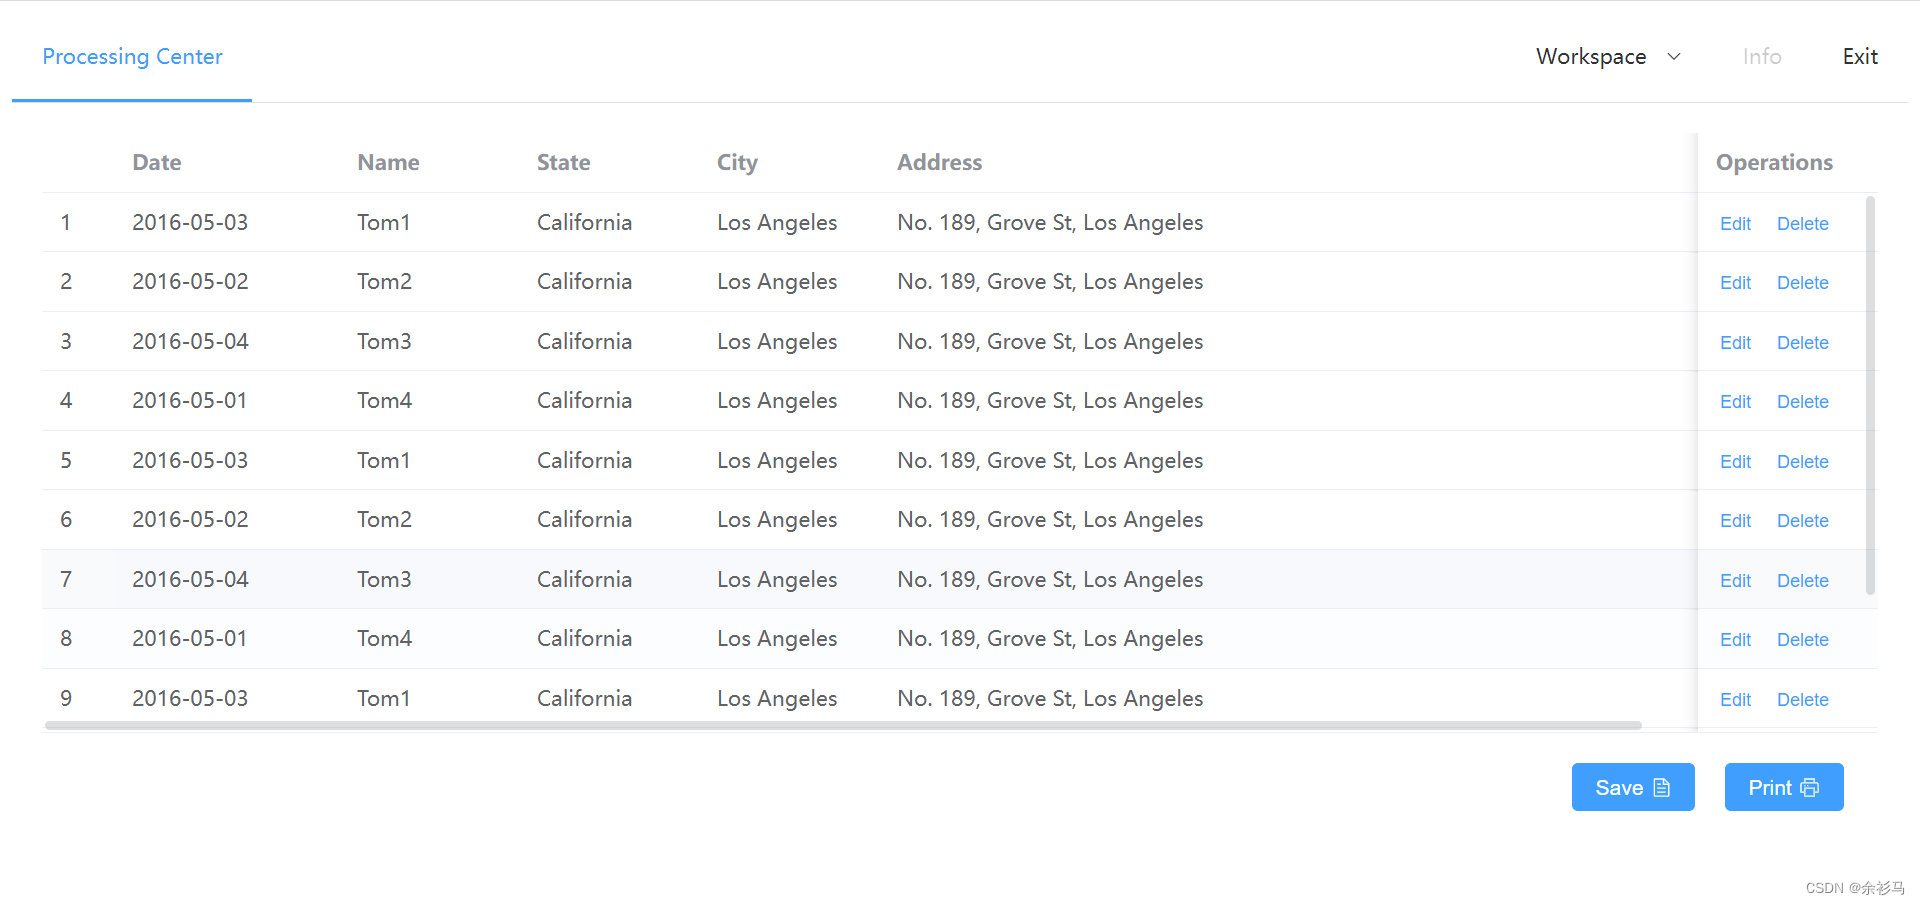
该桌面应用从数据库加载数据到页面表格,用户可以根据需求修改表格数据,保存到Excel,打印PDF。
5、技术栈
Vite + Vue3 + TS + ElementUI(plus) + .NET Framework 4.7.2,开发环境为 Win10,VS2019,VS Code。
6、开发流程
- 整合 Vue + Vite + ElementUI
- 把 JS 需要调用的 .Net 方法临时用 JS 方法代替
- 页面开发完毕,接着开发 .Net 方法,业务处理逻辑
- 导出 .Net 方法,临时 JS 方法替换为真正的 .Net 方法
- 最后发布测试
一、前端设计与实现
1、整合 Vue + Vite + ElementUI
# 创建 vite vue
cnpm create vite@latest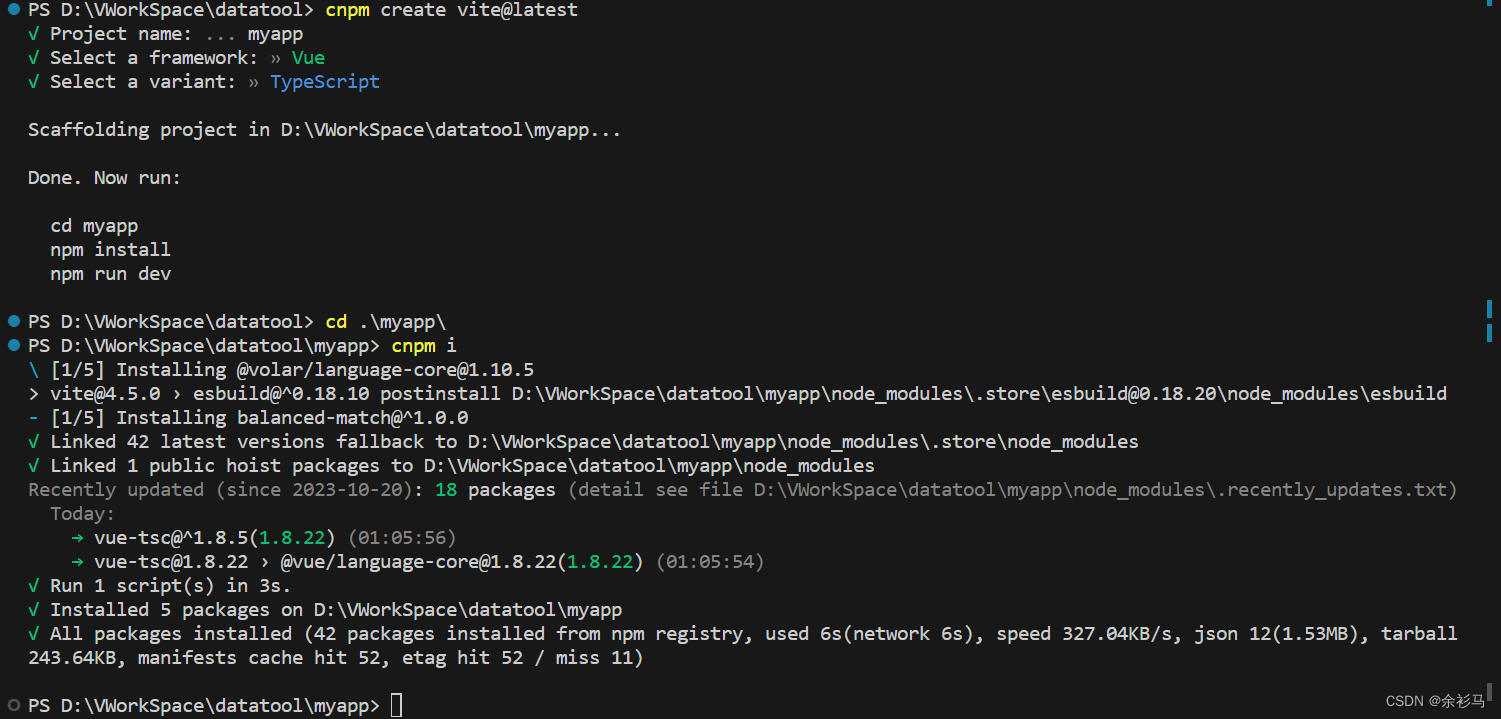
# element-plus 国内镜像 https://element-plus.gitee.io/zh-CN/
# 安装 element-plus
cnpm install element-plus --save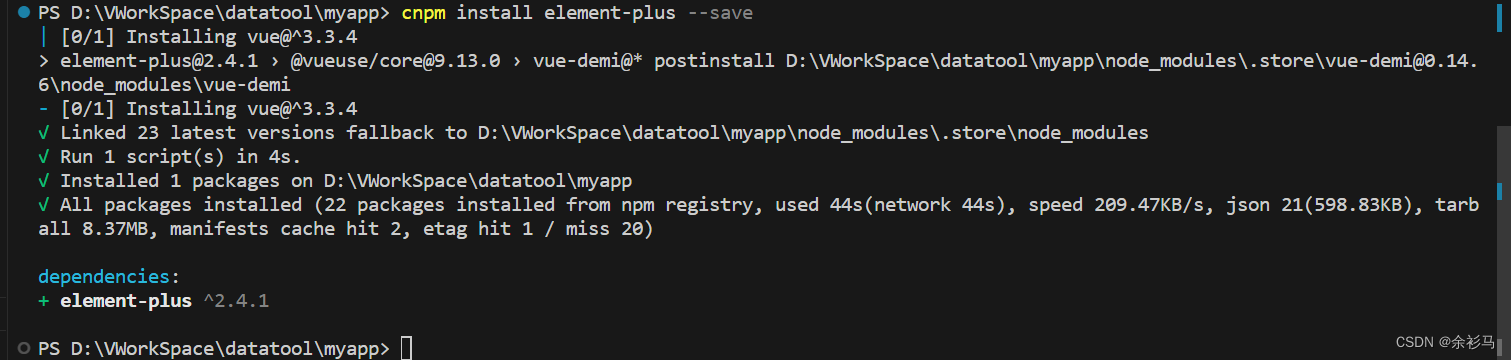
按需引入 element plus,
# 安装导入插件
cnpm install -D unplugin-vue-components unplugin-auto-import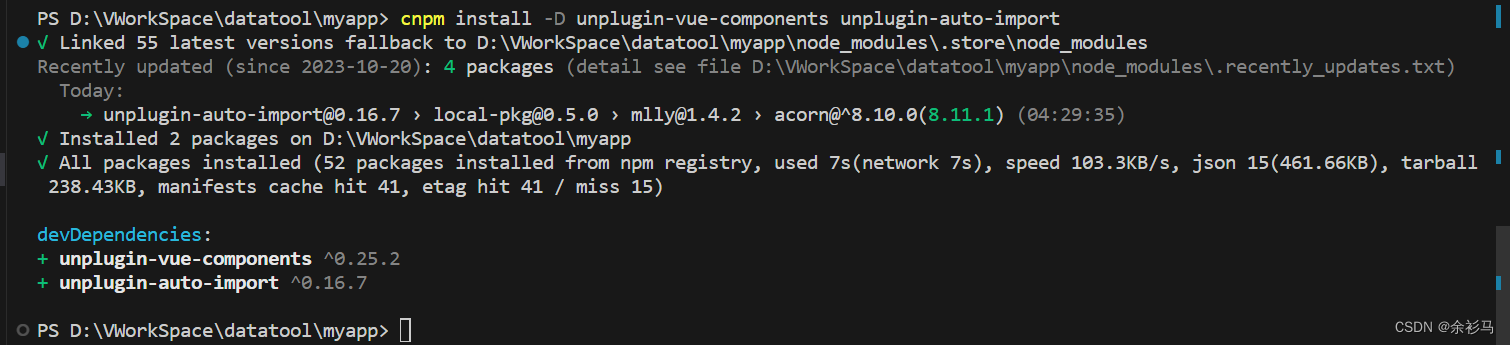
在 main.ts 引入 element-plus 和样式,
// myapp\src\main.ts
import { createApp } from 'vue'
//import './style.css'
import App from './App.vue'
import ElementPlus from 'element-plus'
import 'element-plus/dist/index.css'

createApp(App).use(ElementPlus).mount('#app')
配置 vite,
// myapp\vite.config.ts
import { defineConfig } from 'vite'
import vue from '@vitejs/plugin-vue'
import AutoImport from 'unplugin-auto-import/vite'
import Components from 'unplugin-vue-components/vite'
import { ElementPlusResolver } from 'unplugin-vue-components/resolvers'

// https://vitejs.dev/config/
export default defineConfig({
  plugins: [
    vue(),
    AutoImport({
      resolvers: [ElementPlusResolver()],
    }),
    Components({
      resolvers: [ElementPlusResolver()],
    }),
  ],
})
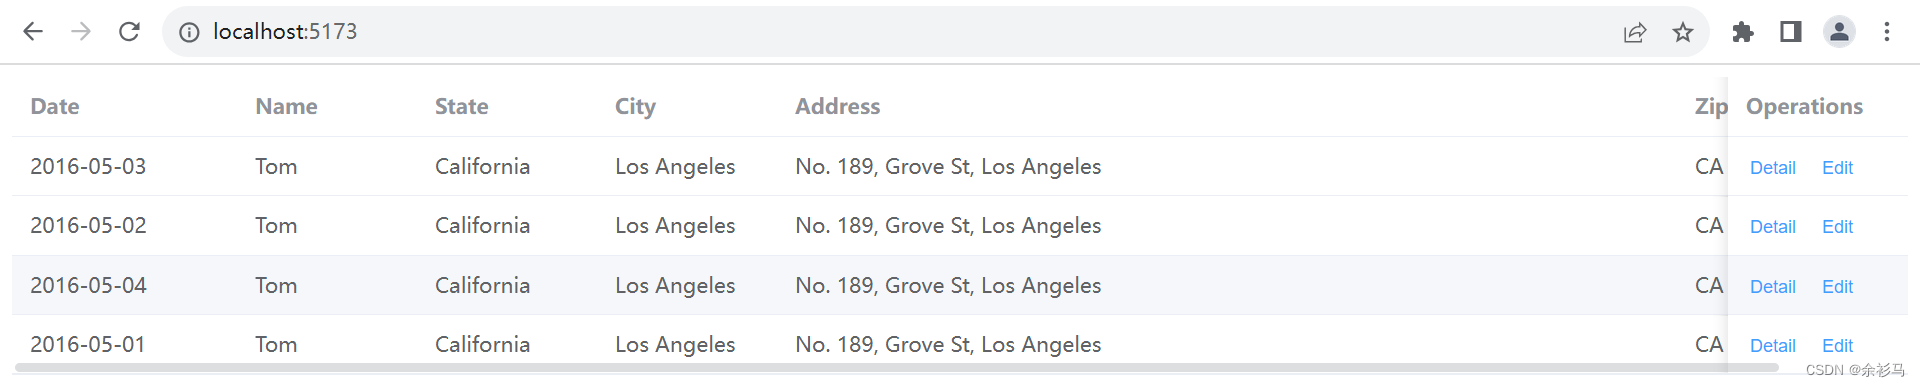
新建一个组件页面,在 App.vue 中引用,
// myapp\src\components\DataViewer.vue
<template>
  <el-table :data="tableData" style="width: 100%">
    <el-table-column fixed prop="date" label="Date" width="150" />
    <el-table-column prop="name" label="Name" width="120" />
    <el-table-column prop="state" label="State" width="120" />
    <el-table-column prop="city" label="City" width="120" />
    <el-table-column prop="address" label="Address" width="600" />
    <el-table-column prop="zip" label="Zip" width="120" />
    <el-table-column fixed="right" label="Operations" width="120">
      <template #default>
        <el-button link type="primary" size="small" @click="handleClick"
          >Detail</el-button
        >
        <el-button link type="primary" size="small">Edit</el-button>
      </template>
    </el-table-column>
  </el-table>
</template>

<script lang="ts" setup>
const handleClick = () => {
  console.log('click')
}

const tableData = [
  {
    date: '2016-05-03',
    name: 'Tom',
    state: 'California',
    city: 'Los Angeles',
    address: 'No. 189, Grove St, Los Angeles',
    zip: 'CA 90036',
    tag: 'Home',
  },
  {
    date: '2016-05-02',
    name: 'Tom',
    state: 'California',
    city: 'Los Angeles',
    address: 'No. 189, Grove St, Los Angeles',
    zip: 'CA 90036',
    tag: 'Office',
  },
  {
    date: '2016-05-04',
    name: 'Tom',
    state: 'California',
    city: 'Los Angeles',
    address: 'No. 189, Grove St, Los Angeles',
    zip: 'CA 90036',
    tag: 'Home',
  },
  {
    date: '2016-05-01',
    name: 'Tom',
    state: 'California',
    city: 'Los Angeles',
    address: 'No. 189, Grove St, Los Angeles',
    zip: 'CA 90036',
    tag: 'Office',
  },
]
</script>
运行,
npm run dev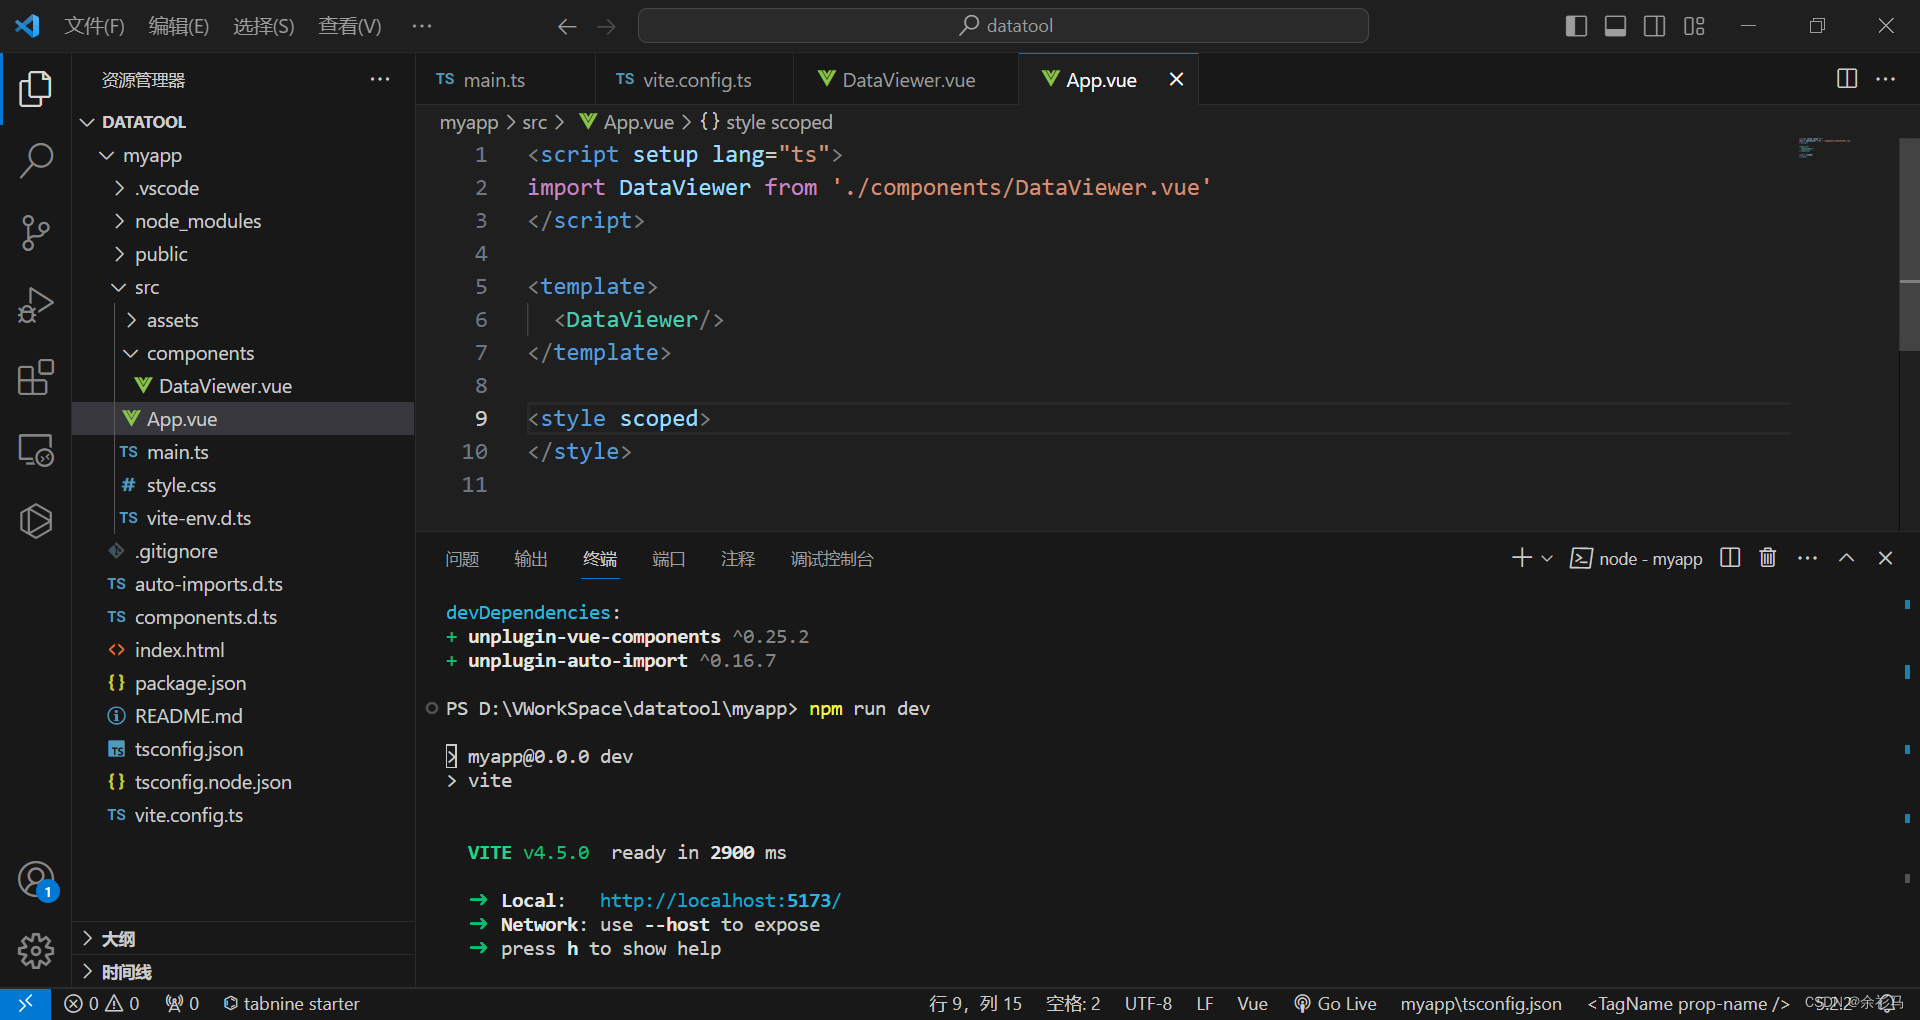
官方 Table 组件示例运行效果如下,
2、使用图标 Icon(补充)
cnpm install @element-plus/icons-vue
3、api 封装
封装 DataUtil 用于模拟调用 .Net 方法获取数据,
// myapp\src\api\DataUtil.ts
export const getData = async (): Promise<any> => {
// await CefSharp.BindObjectAsync("dataUtil")
// return dataUtil.getData()
return new Promise((resolve, _) => {
resolve([{
date: '2016-05-03',
name: 'Tom',
state: 'California',
city: 'Los Angeles',
address: 'No. 189, Grove St, Los Angeles',
zip: 'CA 90036',
tag: 'Home',
},
{
date: '2016-05-02',
name: 'Tom',
state: 'California',
city: 'Los Angeles',
address: 'No. 189, Grove St, Los Angeles',
zip: 'CA 90036',
tag: 'Office',
},
{
date: '2016-05-04',
name: 'Tom',
state: 'California',
city: 'Los Angeles',
address: 'No. 189, Grove St, Los Angeles',
zip: 'CA 90036',
tag: 'Home',
},
{
date: '2016-05-01',
name: 'Tom',
state: 'California',
city: 'Los Angeles',
address: 'No. 189, Grove St, Los Angeles',
zip: 'CA 90036',
tag: 'Office',
},
])
})
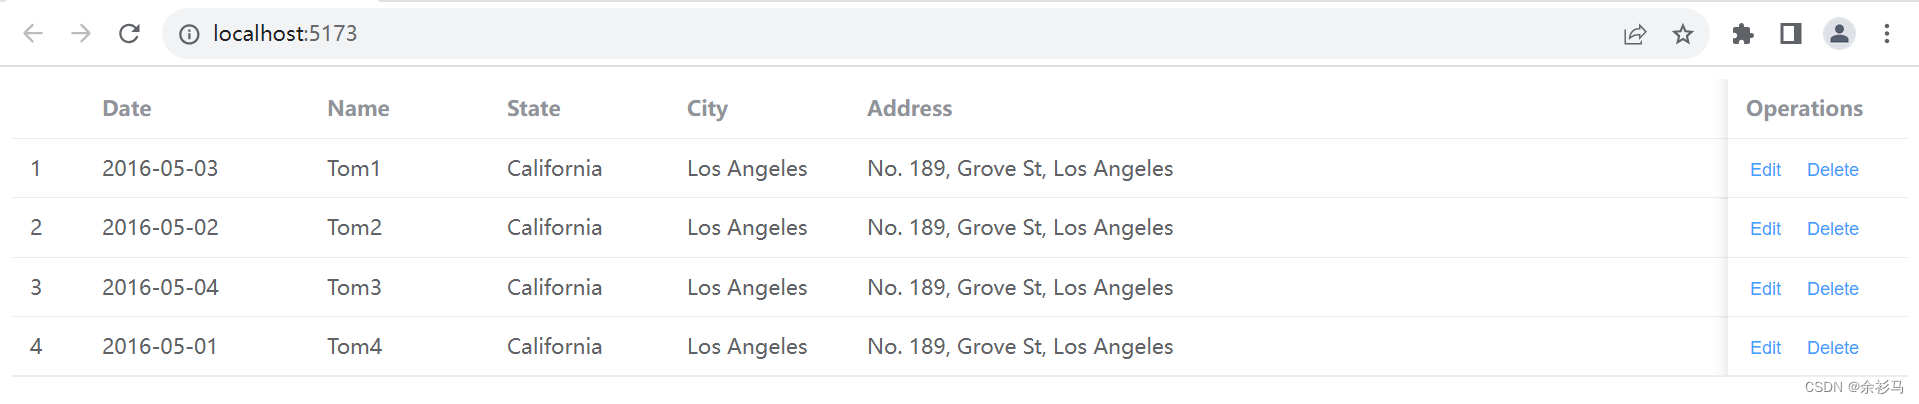
}4、获取数据实现
页面 DataViewer.vue 加载数据,调用 api 的 getData 异步方法,在页面挂载时请求数据,
// myapp\src\components\DataViewer.vue
<template>
  <el-table v-loading="loading" :data="tableData" style="width: 100%">
    <el-table-column fixed prop="date" label="Date" width="150" />
    <el-table-column prop="name" label="Name" width="120" />
    <el-table-column prop="state" label="State" width="120" />
    <el-table-column prop="city" label="City" width="120" />
    <el-table-column prop="address" label="Address" width="600" />
    <el-table-column prop="zip" label="Zip" width="120" />
    <el-table-column fixed="right" label="Operations" width="120">
      <template #default>
        <el-button link type="primary" size="small" @click="handleClick">Edit</el-button>
        <el-button link type="primary" size="small">Delete</el-button>
      </template>
    </el-table-column>
  </el-table>
</template>

<script lang="ts" setup>
import { ref, onMounted, reactive } from 'vue'
import { getData } from '../api/DataUtil'

// 表格数据加载标志
const loading = ref(true)

const handleClick = () => {
  console.log('click')
}

const tableData = reactive([])

onMounted(() => {
  // 获取数据后将加载标志位位置 false,并且绑定到表格
  getData().then((res: any) => {
    loading.value = false
    console.log('>>> getData ', res)
    Object.assign(tableData, res)
  })

})

</script>
本地运行效果如下,
5、更新数据实现
页面 DataViewer.vue 选中表格的某行数据后,点击”Edit“进行编辑,编辑后确认更新,回显到页面,
// myapp\src\components\DataViewer.vue
<template>
  <!-- 获取数据后展示 -->
  <el-table v-loading="loading" :data="tableData" style="width: 100%">
    <el-table-column fixed type="index" :index="indexMethod" />
    <el-table-column prop="date" label="Date" width="150" />
    <el-table-column prop="name" label="Name" width="120" />
    <el-table-column prop="state" label="State" width="120" />
    <el-table-column prop="city" label="City" width="120" />
    <el-table-column prop="address" label="Address" width="600" />
    <el-table-column prop="zip" label="Zip" width="120" />
    <el-table-column fixed="right" label="Operations" width="120">
      <template #default="scope">
        <el-button link type="primary" size="small" @click="handleEdit(scope)">Edit</el-button>
        <el-button link type="primary" size="small">Delete</el-button>
      </template>
    </el-table-column>
  </el-table>

  <!-- 更新数据时,对话框 -->
  <el-dialog v-model="dialogFormVisible" title="Shipping address">
    <el-form :model="currentRow">
      <el-form-item label="date" :label-width="formLabelWidth">
        <el-input v-model="currentRow.date" autocomplete="off" />
      </el-form-item>
      <el-form-item label="name" :label-width="formLabelWidth">
        <el-input v-model="currentRow.name" autocomplete="off" />
      </el-form-item>
      <el-form-item label="state" :label-width="formLabelWidth">
        <el-input v-model="currentRow.state" autocomplete="off" />
      </el-form-item>
      <el-form-item label="city" :label-width="formLabelWidth">
        <el-input v-model="currentRow.city" autocomplete="off" />
      </el-form-item>
      <el-form-item label="address" :label-width="formLabelWidth">
        <el-input v-model="currentRow.address" autocomplete="off" />
      </el-form-item>
      <el-form-item label="zip" :label-width="formLabelWidth">
        <el-input v-model="currentRow.zip" autocomplete="off" />
      </el-form-item>
      <el-form-item label="tag" :label-width="formLabelWidth">
        <el-input v-model="currentRow.tag" autocomplete="off" />
      </el-form-item>
    </el-form>
    <template #footer>
      <span class="dialog-footer">
        <el-button @click="dialogFormVisible = false">Cancel</el-button>
        <el-button type="primary" @click="handleUpdate()">
          Confirm
        </el-button>
      </span>
    </template>
  </el-dialog>
</template>

<script lang="ts" setup>
import { ref, onMounted, reactive } from 'vue'
import { getData } from '../api/DataUtil'

// 表格数据加载标志
const loading = ref(true)
const tableData = reactive([])

// 更新数据对话框
const dialogFormVisible = ref(false)
const formLabelWidth = '140px'

// 当前选中行数据
const currentRow = reactive({
  date: 'please input date',
  name: 'please input name',
  state: 'please input state',
  city: 'please input city',
  address: 'please input address',
  zip: 'please input zip',
  tag: 'please input tag',
})

const currentRowIndex = ref(1)

// 更新事件
const handleUpdate = () => {
  //console.log('>>> handleUpdate ', currentRow, currentRowIndex.value)
  Object.assign(tableData[currentRowIndex.value], currentRow)
  dialogFormVisible.value = false
}

// 索引规则
const indexMethod = (index: number) => {
  return index + 1
}

// Edit 事件
const handleEdit = (scope: any) => {
  //console.log('edit',scope.$index,scope.row)
  Object.assign(currentRow, scope.row)
  currentRowIndex.value = scope.$index
  dialogFormVisible.value = true
}

// 挂载方法
onMounted(() => {
  // 获取数据后将加载标志位位置 false,并且绑定到表格
  getData().then((res: any) => {
    //console.log('>>> getData ', res)
    loading.value = false
    Object.assign(tableData, res)
  })

})

</script>
<style>
.el-button--text {
  margin-right: 15px;
}

.el-select {
  width: 300px;
}

.el-input {
  width: 300px;
}

.dialog-footer button:first-child {
  margin-right: 10px;
}
</style>
本地运行效果如下,
6、删除数据实现
页面 DataViewer.vue 选中表格的某行数据后,点击”Delete“进行删除,弹窗确认,将删除结果回显到页面,
// myapp\src\components\DataViewer.vue
<template>
  <!-- 获取数据后展示 -->
  <el-table v-loading="loading" :data="tableData" style="width: 100%">
    <el-table-column fixed type="index" :index="indexMethod" />
    <el-table-column prop="date" label="Date" width="150" />
    <el-table-column prop="name" label="Name" width="120" />
    <el-table-column prop="state" label="State" width="120" />
    <el-table-column prop="city" label="City" width="120" />
    <el-table-column prop="address" label="Address" width="600" />
    <el-table-column prop="zip" label="Zip" width="120" />
    <el-table-column fixed="right" label="Operations" width="120">
      <template #default="scope">
        <el-button link type="primary" size="small" @click="handleEdit(scope)">Edit</el-button>
        <el-button link type="primary" size="small" @click="handleDelete(scope)">Delete</el-button>
      </template>
    </el-table-column>
  </el-table>

  <!-- 更新数据时,对话框 -->
  <el-dialog v-model="dialogUpdateFormVisible" title="Update Shipping address ?">
    <el-form :model="currentRow">
      <el-form-item label="date" :label-width="formLabelWidth">
        <el-input v-model="currentRow.date" autocomplete="off" />
      </el-form-item>
      <el-form-item label="name" :label-width="formLabelWidth">
        <el-input v-model="currentRow.name" autocomplete="off" />
      </el-form-item>
      <el-form-item label="state" :label-width="formLabelWidth">
        <el-input v-model="currentRow.state" autocomplete="off" />
      </el-form-item>
      <el-form-item label="city" :label-width="formLabelWidth">
        <el-input v-model="currentRow.city" autocomplete="off" />
      </el-form-item>
      <el-form-item label="address" :label-width="formLabelWidth">
        <el-input v-model="currentRow.address" autocomplete="off" />
      </el-form-item>
      <el-form-item label="zip" :label-width="formLabelWidth">
        <el-input v-model="currentRow.zip" autocomplete="off" />
      </el-form-item>
      <el-form-item label="tag" :label-width="formLabelWidth">
        <el-input v-model="currentRow.tag" autocomplete="off" />
      </el-form-item>
    </el-form>
    <template #footer>
      <span class="dialog-footer">
        <el-button @click="dialogUpdateFormVisible = false">Cancel</el-button>
        <el-button type="primary" @click="doUpdate()">
          Confirm
        </el-button>
      </span>
    </template>
  </el-dialog>

  <!-- 删除数据时,对话框 -->
  <el-dialog v-model="dialogDeleteFormVisible" title="Delete Shipping address ?">
    <el-form :model="currentRow">
      <el-form-item label="date" :label-width="formLabelWidth">
        <el-input disabled v-model="currentRow.date" autocomplete="off" />
      </el-form-item>
      <el-form-item label="name" :label-width="formLabelWidth">
        <el-input disabled v-model="currentRow.name" autocomplete="off" />
      </el-form-item>
      <el-form-item label="state" :label-width="formLabelWidth">
        <el-input disabled v-model="currentRow.state" autocomplete="off" />
      </el-form-item>
      <el-form-item label="city" :label-width="formLabelWidth">
        <el-input disabled v-model="currentRow.city" autocomplete="off" />
      </el-form-item>
      <el-form-item label="address" :label-width="formLabelWidth">
        <el-input disabled v-model="currentRow.address" autocomplete="off" />
      </el-form-item>
      <el-form-item label="zip" :label-width="formLabelWidth">
        <el-input disabled v-model="currentRow.zip" autocomplete="off" />
      </el-form-item>
      <el-form-item label="tag" :label-width="formLabelWidth">
        <el-input disabled v-model="currentRow.tag" autocomplete="off" />
      </el-form-item>
    </el-form>
    <template #footer>
      <span class="dialog-footer">
        <el-button @click="dialogDeleteFormVisible = false">Cancel</el-button>
        <el-button type="primary" @click="doDelete()">
          Confirm
        </el-button>
      </span>
    </template>
  </el-dialog>
</template>

<script lang="ts" setup>
import { ref, onMounted, reactive } from 'vue'
import { getData } from '../api/DataUtil'
import { ElMessage } from 'element-plus'

// 表格数据加载标志
const loading = ref(true)
const tableData = reactive([])

// 更新数据对话框
const dialogUpdateFormVisible = ref(false)
const dialogDeleteFormVisible = ref(false)
const formLabelWidth = '140px'

// 当前选中行数据
const currentRow = reactive({
  date: 'please input date',
  name: 'please input name',
  state: 'please input state',
  city: 'please input city',
  address: 'please input address',
  zip: 'please input zip',
  tag: 'please input tag',
})

const currentRowIndex = ref(1)

// 更新事件
const doUpdate = () => {
  //console.log('>>> doUpdate ', currentRow, currentRowIndex.value)
  Object.assign(tableData[currentRowIndex.value], currentRow)
  dialogUpdateFormVisible.value = false
}

// 删除事件
const doDelete = () => {
  // console.log("doDelete ", currentRowIndex.value)
  tableData.splice(currentRowIndex.value, 1)
  dialogDeleteFormVisible.value = false

  ElMessage({
    message: 'Delete success.',
    type: 'success',
  })
}

// 索引规则
const indexMethod = (index: number) => {
  return index + 1
}
// Delete 事件
const handleDelete = (scope: any) => {
  Object.assign(currentRow, scope.row)
  currentRowIndex.value = scope.$index
  dialogDeleteFormVisible.value = true
}

// Edit 事件
const handleEdit = (scope: any) => {
  //console.log('edit',scope.$index,scope.row)
  Object.assign(currentRow, scope.row)
  currentRowIndex.value = scope.$index
  dialogUpdateFormVisible.value = true
}

// 挂载方法
onMounted(() => {
  // 获取数据后将加载标志位位置 false,并且绑定到表格
  getData().then((res: any) => {
    //console.log('>>> getData ', res)
    loading.value = false
    Object.assign(tableData, res)
  })

})

</script>
<style>
.el-button--text {
  margin-right: 15px;
}

.el-select {
  width: 300px;
}

.el-input {
  width: 300px;
}

.dialog-footer button:first-child {
  margin-right: 10px;
}
</style>
本地运行效果如下,
7、保存/打印数据实现
点击页面的“Save”按钮,弹出对话框选择文件保存的路径,将数据保存为 Excel 文件,点击页面的“Print”按钮,将数据转化为PDF格式打印,两个功能都需要调用 .Net 方法实现,
// myapp\src\api\ExcelUtil.ts
export const saveAsExcel = async (data: any): Promise<any> => {
    // await CefSharp.BindObjectAsync("excelUtil")
    // return excelUtil.saveAsExcel(data)
    return new Promise((resolve, _) => {
        resolve({
            code: "1",
            msg: "ok",
            isSuccess: true
        })
    })
}
// myapp\src\api\PrinterUtil.ts
export const printPdf = async (data: any): Promise<any> => {
// await CefSharp.BindObjectAsync("printerlUtil")
// return printerlUtil.printPdf(data)
return new Promise((resolve, _) => {
resolve({
code: "1",
msg: "ok",
isSuccess: true
})
})
}// myapp\src\components\DataViewer.vue
<template>
<div class="common-layout">
<el-container>
<el-main><!-- 获取数据后展示 -->
<el-table v-loading="loading" :data="tableData" height="485" style="width: 100%">
<el-table-column fixed type="index" :index="indexMethod" />
<el-table-column prop="date" label="Date" width="150" />
<el-table-column prop="name" label="Name" width="120" />
<el-table-column prop="state" label="State" width="120" />
<el-table-column prop="city" label="City" width="120" />
<el-table-column prop="address" label="Address" width="600" />
<el-table-column prop="zip" label="Zip" width="120" />
<el-table-column fixed="right" label="Operations" width="120">
<template #default="scope">
<el-button link type="primary" size="small" @click="handleEdit(scope)">Edit</el-button>
<el-button link type="primary" size="small" @click="handleDelete(scope)">Delete</el-button>
</template>
</el-table-column>
</el-table>
<!-- 更新数据时,对话框 -->
<el-dialog v-model="dialogUpdateFormVisible" title="Update Shipping address ?">
<el-form :model="currentRow">
<el-form-item label="date" :label-width="formLabelWidth">
<el-input v-model="currentRow.date" autocomplete="off" />
</el-form-item>
<el-form-item label="name" :label-width="formLabelWidth">
<el-input v-model="currentRow.name" autocomplete="off" />
</el-form-item>
<el-form-item label="state" :label-width="formLabelWidth">
<el-input v-model="currentRow.state" autocomplete="off" />
</el-form-item>
<el-form-item label="city" :label-width="formLabelWidth">
<el-input v-model="currentRow.city" autocomplete="off" />
</el-form-item>
<el-form-item label="address" :label-width="formLabelWidth">
<el-input v-model="currentRow.address" autocomplete="off" />
</el-form-item>
<el-form-item label="zip" :label-width="formLabelWidth">
<el-input v-model="currentRow.zip" autocomplete="off" />
</el-form-item>
<el-form-item label="tag" :label-width="formLabelWidth">
<el-input v-model="currentRow.tag" autocomplete="off" />
</el-form-item>
</el-form>
<template #footer>
<span class="dialog-footer">
<el-button @click="dialogUpdateFormVisible = false">Cancel</el-button>
<el-button type="primary" @click="doUpdate()">
Confirm
</el-button>
</span>
</template>
</el-dialog>
<!-- 删除数据时,对话框 -->
<el-dialog v-model="dialogDeleteFormVisible" title="Delete Shipping address ?">
<el-form :model="currentRow">
<el-form-item label="date" :label-width="formLabelWidth">
<el-input disabled v-model="currentRow.date" autocomplete="off" />
</el-form-item>
<el-form-item label="name" :label-width="formLabelWidth">
<el-input disabled v-model="currentRow.name" autocomplete="off" />
</el-form-item>
<el-form-item label="state" :label-width="formLabelWidth">
<el-input disabled v-model="currentRow.state" autocomplete="off" />
</el-form-item>
<el-form-item label="city" :label-width="formLabelWidth">
<el-input disabled v-model="currentRow.city" autocomplete="off" />
</el-form-item>
<el-form-item label="address" :label-width="formLabelWidth">
<el-input disabled v-model="currentRow.address" autocomplete="off" />
</el-form-item>
<el-form-item label="zip" :label-width="formLabelWidth">
<el-input disabled v-model="currentRow.zip" autocomplete="off" />
</el-form-item>
<el-form-item label="tag" :label-width="formLabelWidth">
<el-input disabled v-model="currentRow.tag" autocomplete="off" />
</el-form-item>
</el-form>
<template #footer>
<span class="dialog-footer">
<el-button @click="dialogDeleteFormVisible = false">Cancel</el-button>
<el-button type="primary" @click="doDelete()">
Confirm
</el-button>
</span>
</template>
</el-dialog>
</el-main>
<el-header>
<el-row class="row-bg" justify="end">
<el-col :span="2">
<el-button @click="handleSaveData" type="primary">
Save<el-icon class="el-icon--right">
<Document />
</el-icon>
</el-button>
</el-col>
<el-col :span="2">
<el-button @click="handlePrintData" type="primary">
Print<el-icon class="el-icon--right">
<Printer />
</el-icon>
</el-button>
</el-col>
</el-row>
</el-header>
</el-container>
</div>
</template>
<script lang="ts" setup>
import { ref, onMounted, reactive } from 'vue'
import { getData } from '../api/DataUtil'
import { saveAsExcel } from '../api/ExcelUtil'
import { printPdf } from '../api/PrinterUtil'
import { ElMessage } from 'element-plus'
import { Document, Printer } from '@element-plus/icons-vue'
// 表格数据加载标志
const loading = ref(true)
const tableData = reactive([])
// 更新数据对话框
const dialogUpdateFormVisible = ref(false)
const dialogDeleteFormVisible = ref(false)
const formLabelWidth = '140px'
// 当前选中行数据
const currentRow = reactive({
date: 'please input date',
name: 'please input name',
state: 'please input state',
city: 'please input city',
address: 'please input address',
zip: 'please input zip',
tag: 'please input tag',
})
const currentRowIndex = ref(1)
// 更新事件
const doUpdate = () => {
//console.log('>>> doUpdate ', currentRow, currentRowIndex.value)
Object.assign(tableData[currentRowIndex.value], currentRow)
dialogUpdateFormVisible.value = false
ElMessage({
message: 'Update success.',
type: 'success',
})
}
// 删除事件
const doDelete = () => {
// console.log("doDelete ", currentRowIndex.value)
tableData.splice(currentRowIndex.value, 1)
dialogDeleteFormVisible.value = false
ElMessage({
message: 'Delete success.',
type: 'success',
})
}
// 索引规则
const indexMethod = (index: number) => {
return index + 1
}
// Delete 事件
const handleDelete = (scope: any) => {
Object.assign(currentRow, scope.row)
currentRowIndex.value = scope.$index
dialogDeleteFormVisible.value = true
}
// Edit 事件
const handleEdit = (scope: any) => {
//console.log('edit',scope.$index,scope.row)
Object.assign(currentRow, scope.row)
currentRowIndex.value = scope.$index
dialogUpdateFormVisible.value = true
}
// 保存事件
const handleSaveData = () => {
saveAsExcel(tableData).then((res: any) => {
if (res.isSuccess) {
ElMessage({
message: 'Save success.',
type: 'success',
})
} else {
ElMessage({
message: res.msg,
type: 'error',
})
}
})
}
// 打印事件
const handlePrintData = () => {
printPdf(tableData).then((res: any) => {
if (res.isSuccess) {
ElMessage({
message: 'Save success.',
type: 'success',
})
} else {
ElMessage({
message: res.msg,
type: 'error',
})
}
})
}
// 挂载方法
onMounted(() => {
// 获取数据后将加载标志位位置 false,并且绑定到表格
getData().then((res: any) => {
//console.log('>>> getData ', res)
loading.value = false
Object.assign(tableData, res)
})
})
</script>
<style>
.el-button--text {
margin-right: 15px;
}
.el-select {
width: 300px;
}
.el-input {
width: 300px;
}
.dialog-footer button:first-child {
margin-right: 10px;
}
.el-row {
margin-bottom: 20px;
}
.el-row:last-child {
margin-bottom: 0;
}
.el-col {
border-radius: 4px;
}
</style>
二、后端设计与实现
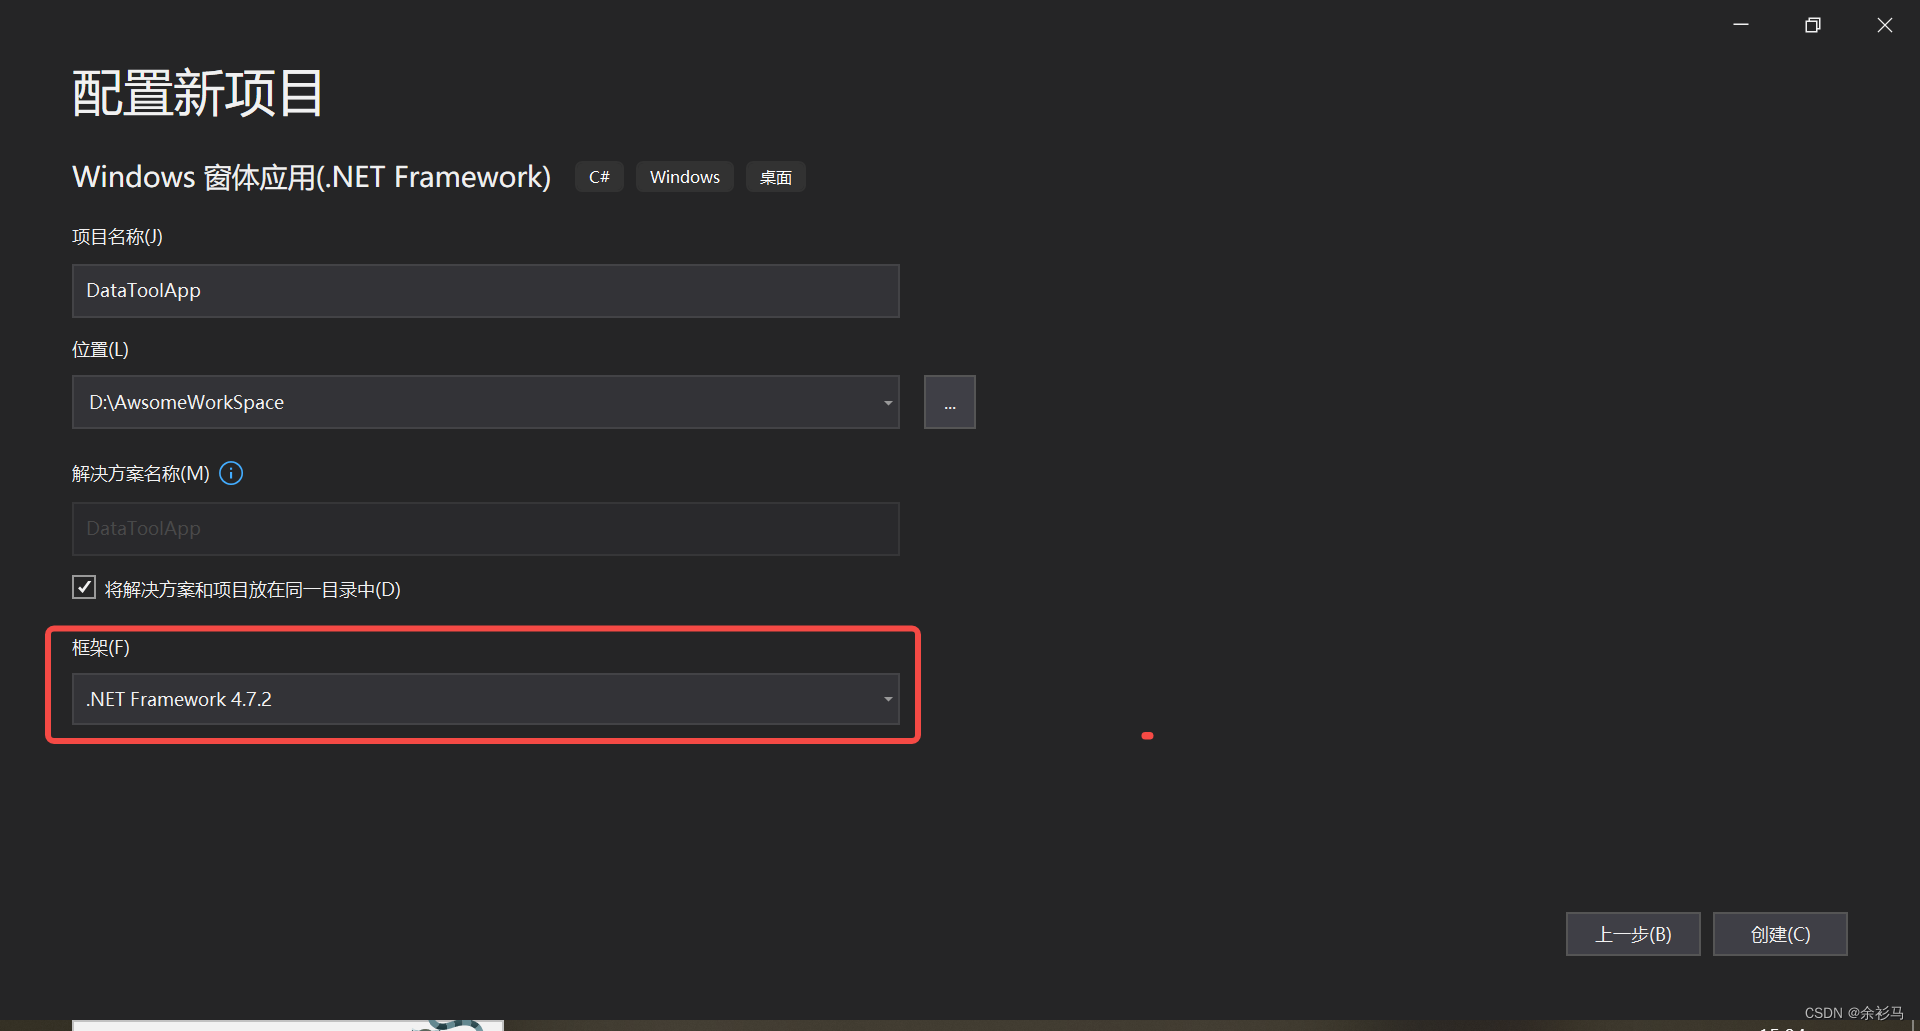
1、新建 WimForm 项目
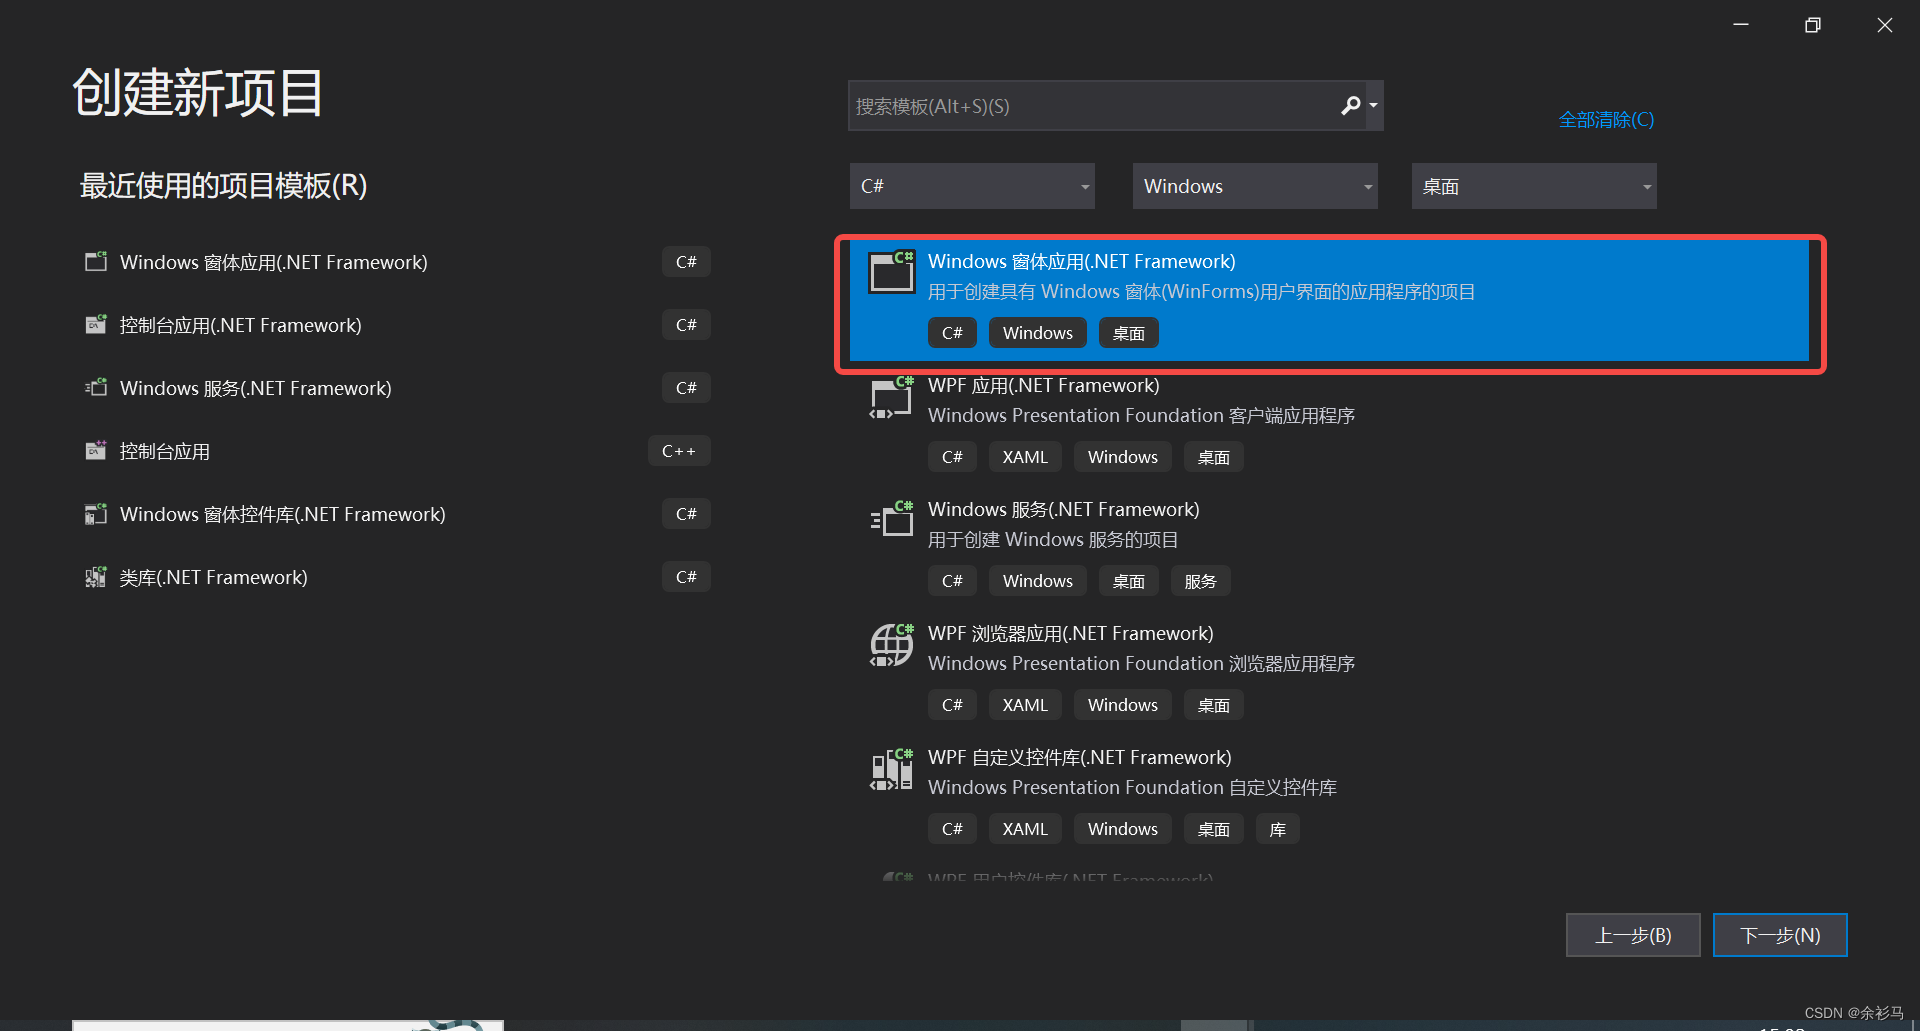
2、安装 CefSharp 程序包
CefSharp.WinForms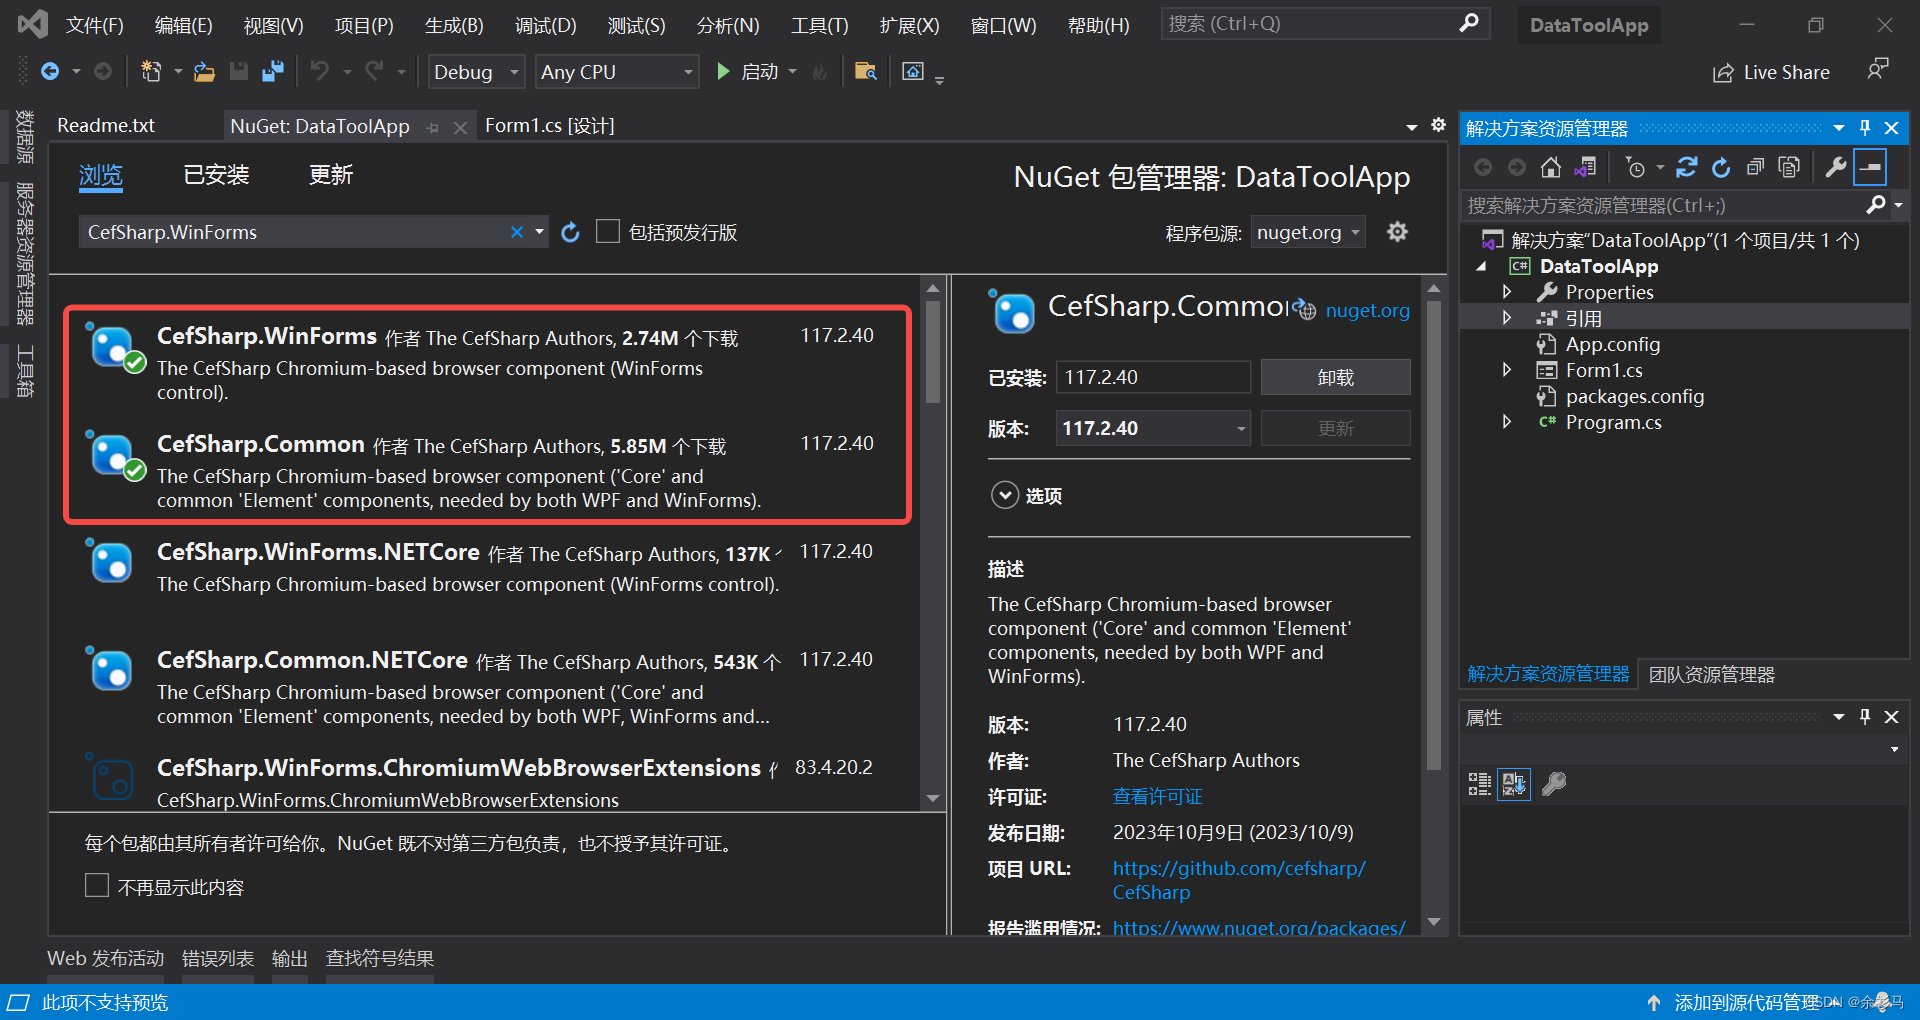
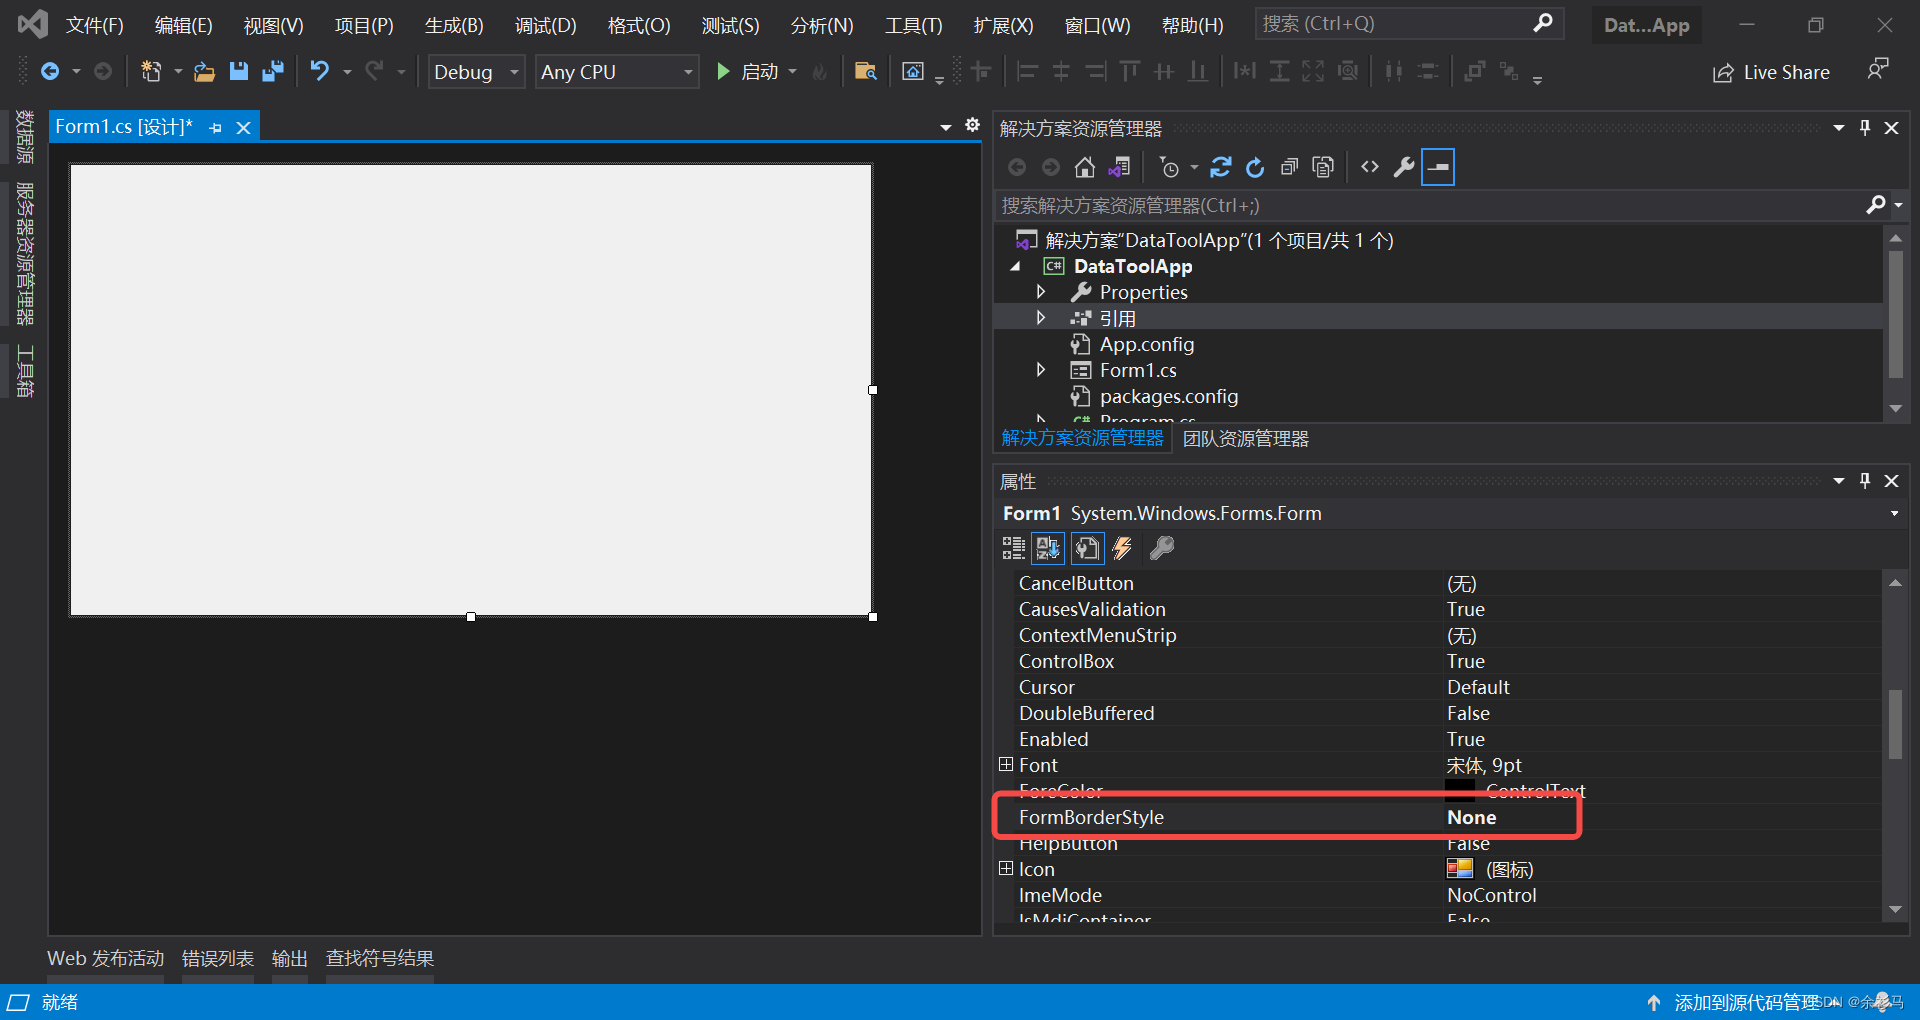
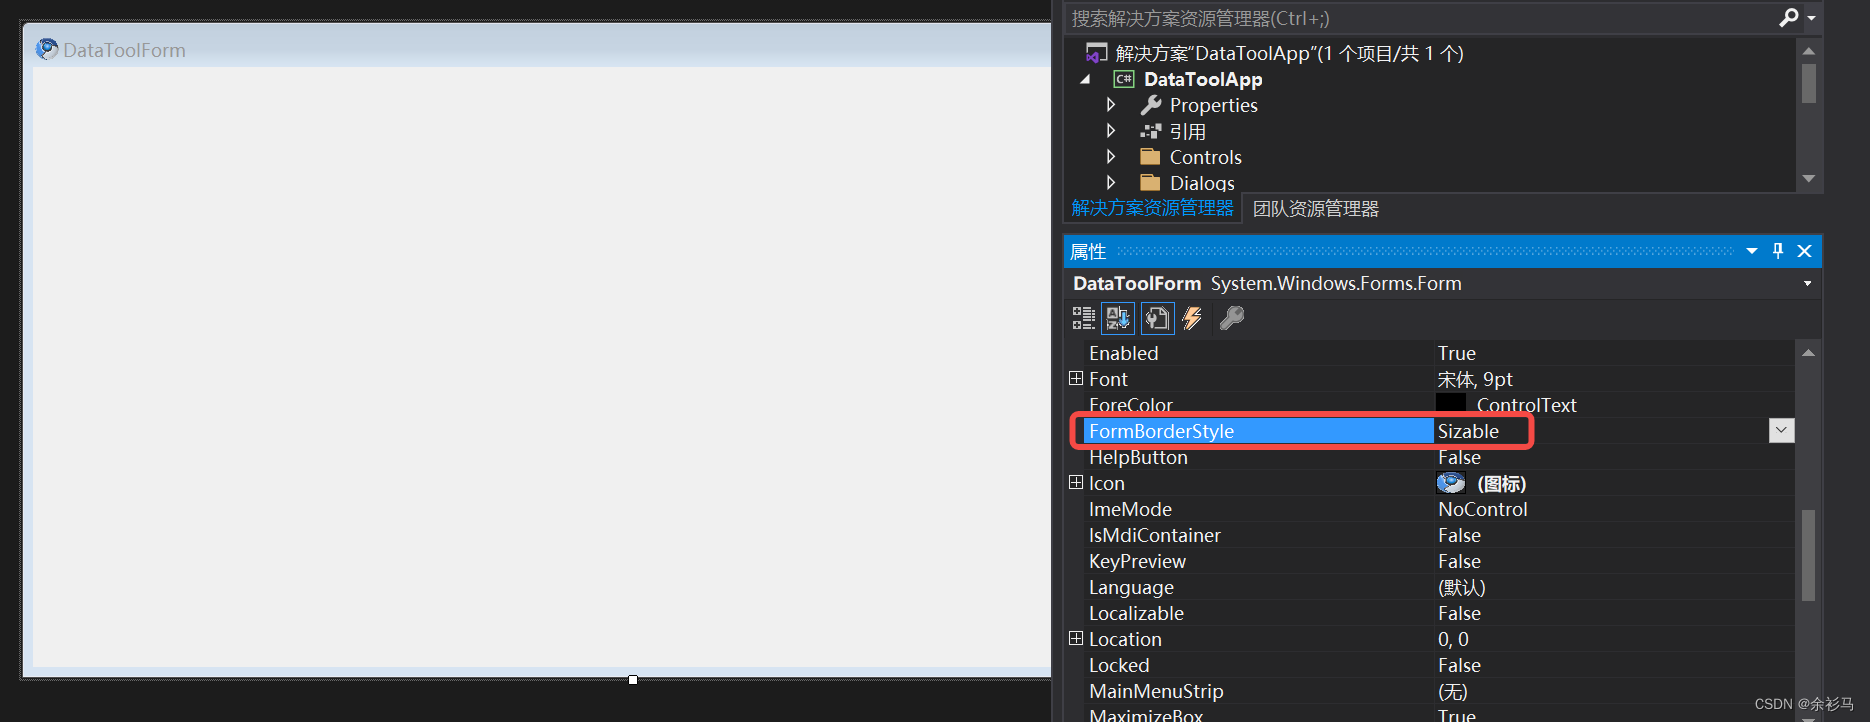
3、窗体无边框设置(可选)
3.1、FormBorderStyle 属性置为 NONE(可选)
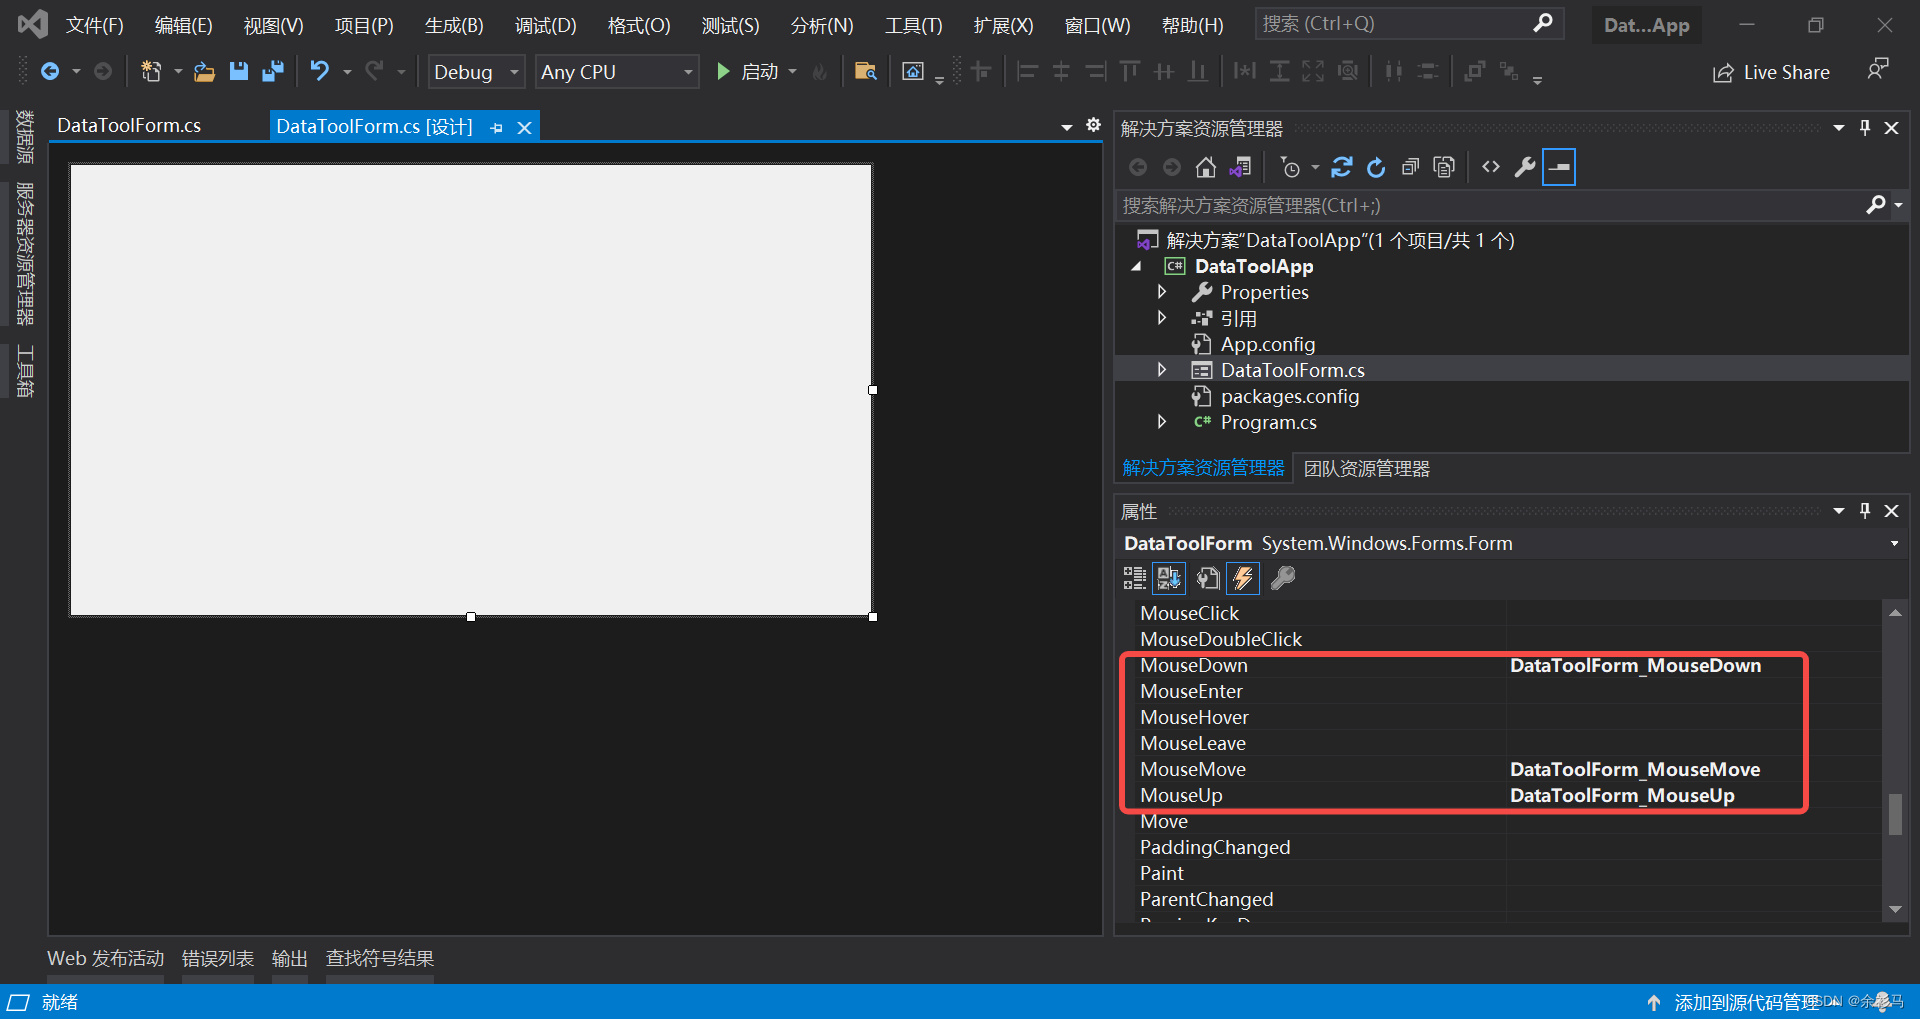
3.2、实现窗体事件(可选)
通过窗体 MouseDown、MouseMove、MouseUp 鼠标事件实现窗体移动,
// DataToolForm.cs
using System;
using System.Collections.Generic;
using System.ComponentModel;
using System.Data;
using System.Drawing;
using System.Linq;
using System.Text;
using System.Threading.Tasks;
using System.Windows.Forms;

namespace DataToolApp
{
    public partial class DataToolForm : Form
    {
        /// <summary>
        /// 鼠标按下时的点
        /// </summary>
        private Point point;

        /// <summary>
        /// 拖动标识
        /// </summary>
        private bool isMoving = false;

        public DataToolForm()
        {
            InitializeComponent();
        }

        /// <summary>
        /// 鼠标按下时,启用拖动
        /// </summary>
        /// <param name="sender"></param>
        /// <param name="e"></param>
        private void DataToolForm_MouseDown(object sender, MouseEventArgs e)
        {
            point = e.Location;
            isMoving = true;
        }

        /// <summary>
        /// 鼠标移动,计算移动的位置
        /// </summary>
        /// <param name="sender"></param>
        /// <param name="e"></param>
        private void DataToolForm_MouseMove(object sender, MouseEventArgs e)
        {
            if (e.Button == MouseButtons.Left && isMoving)
            {
                Point pNew = new Point(e.Location.X - point.X, e.Location.Y - point.Y);
                Location += new Size(pNew);
            }
        }
        /// <summary>
        /// 鼠标停下
        /// </summary>
        /// <param name="sender"></param>
        /// <param name="e"></param>
        private void DataToolForm_MouseUp(object sender, MouseEventArgs e)
        {
            isMoving = false;
        }
    }
}
3.3、窗体拖拽效果(可选)
4、窗体页面配置
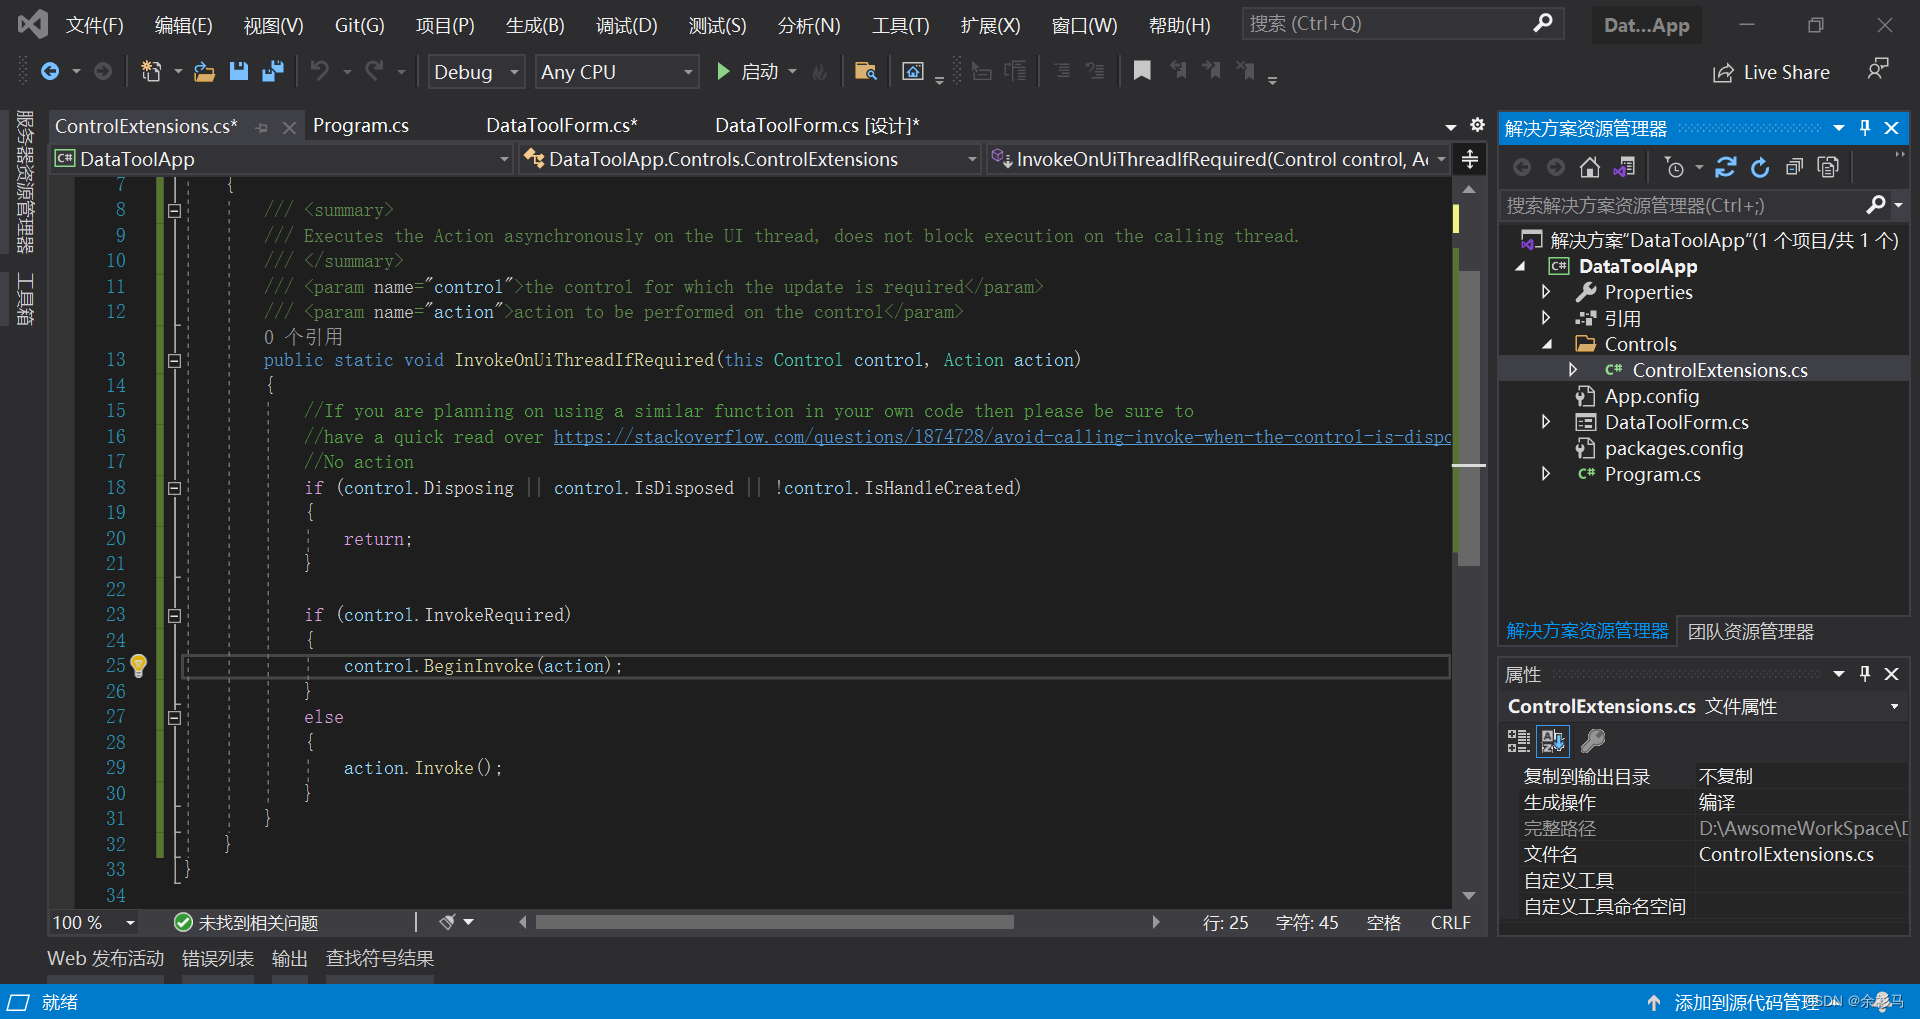
4.1、在 UI 线程上异步执行 Action
新建文件夹,添加类 ControlExtensions,
// DataToolApp\Controls\ControlExtensions.cs
using System;
using System.Windows.Forms;

namespace DataToolApp.Controls
{
    public static class ControlExtensions
    {
        /// <summary>
        /// Executes the Action asynchronously on the UI thread, does not block execution on the calling thread.
        /// </summary>
        /// <param name="control">the control for which the update is required</param>
        /// <param name="action">action to be performed on the control</param>
        public static void InvokeOnUiThreadIfRequired(this Control control, Action action)
        {
            //If you are planning on using a similar function in your own code then please be sure to
            //have a quick read over https://stackoverflow.com/questions/1874728/avoid-calling-invoke-when-the-control-is-disposed
            //No action
            if (control.Disposing || control.IsDisposed || !control.IsHandleCreated)
            {
                return;
            }

            if (control.InvokeRequired)
            {
                control.BeginInvoke(action);
            }
            else
            {
                action.Invoke();
            }
        }
    }
}
// 异步调用示例,在控件 outputLabel 中显示文本 output
this.InvokeOnUiThreadIfRequired(() => outputLabel.Text = output);
4.2、全屏设置(可选)
在窗体构造方法中将 WindowState 置为最大分辨率,
public DataToolForm()
{
InitializeComponent();
Text = title;
// 这里将窗体设置为最大屏幕分辨率
WindowState = FormWindowState.Maximized;
browser = new ChromiumWebBrowser("www.baidu.com");
this.Controls.Add(browser);
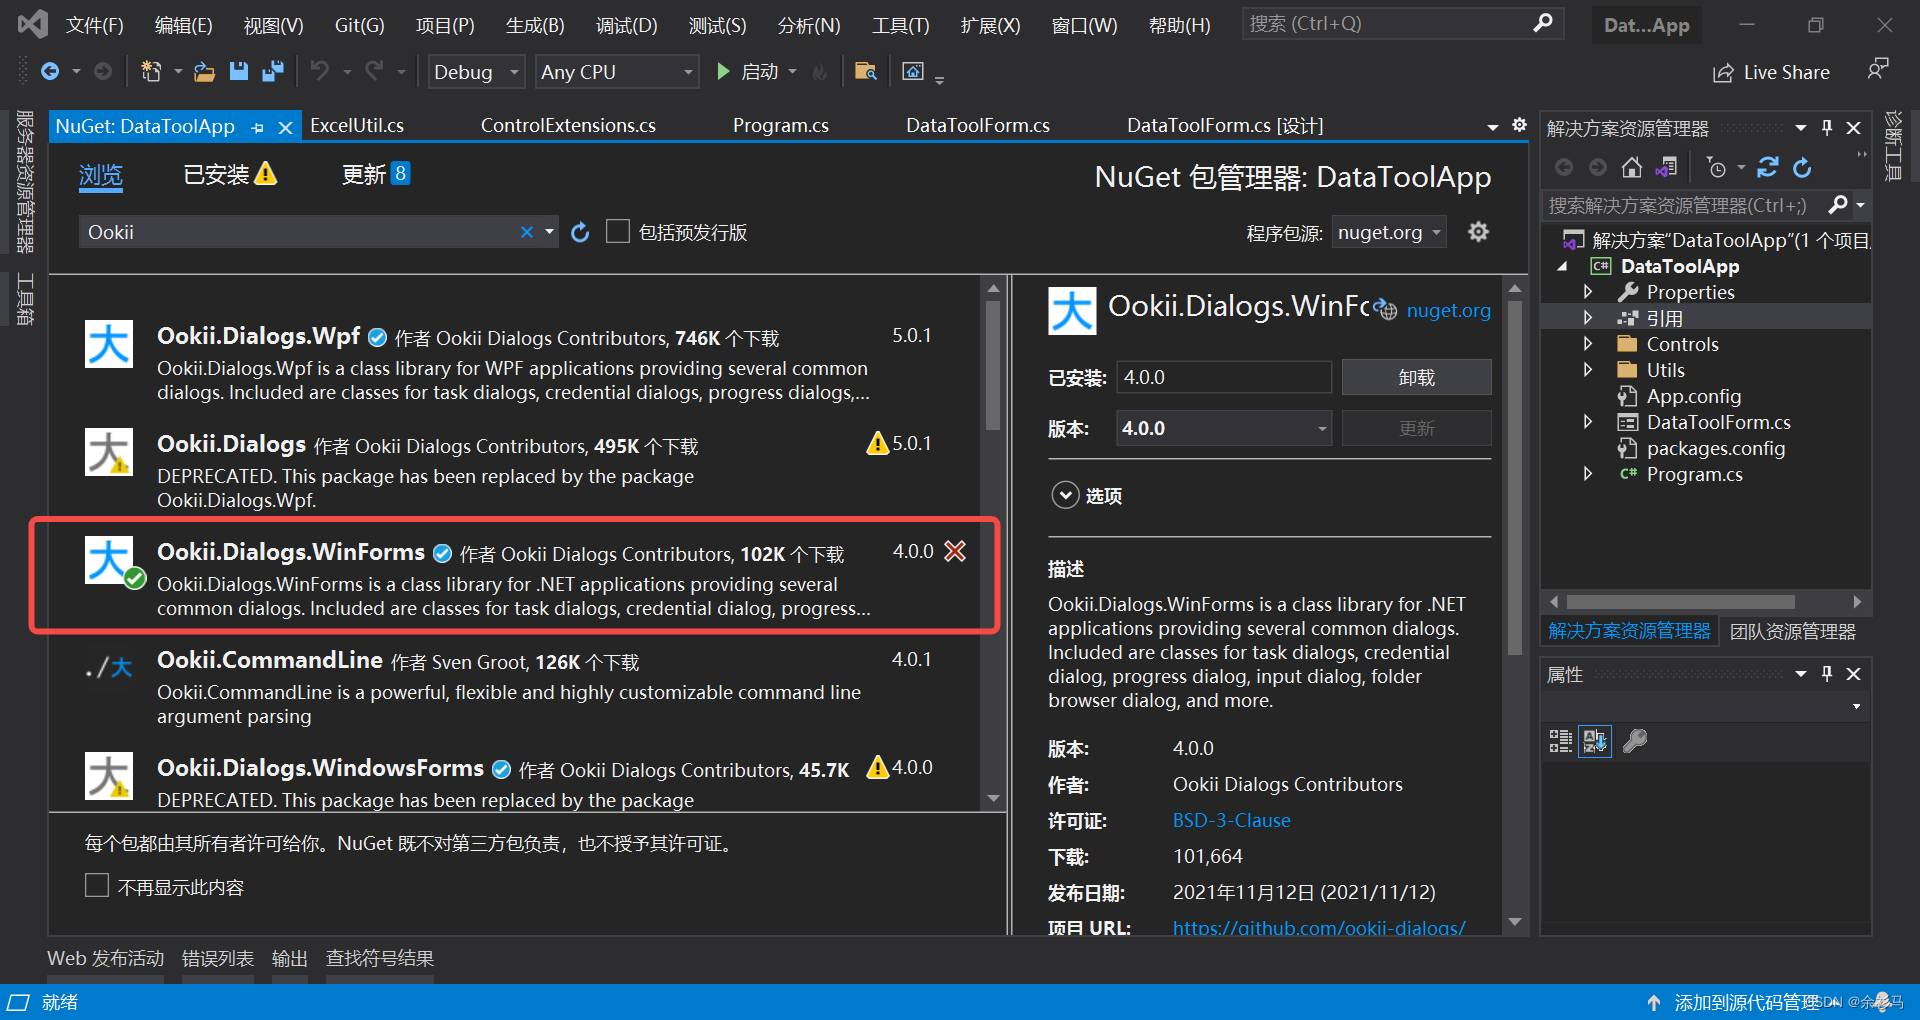
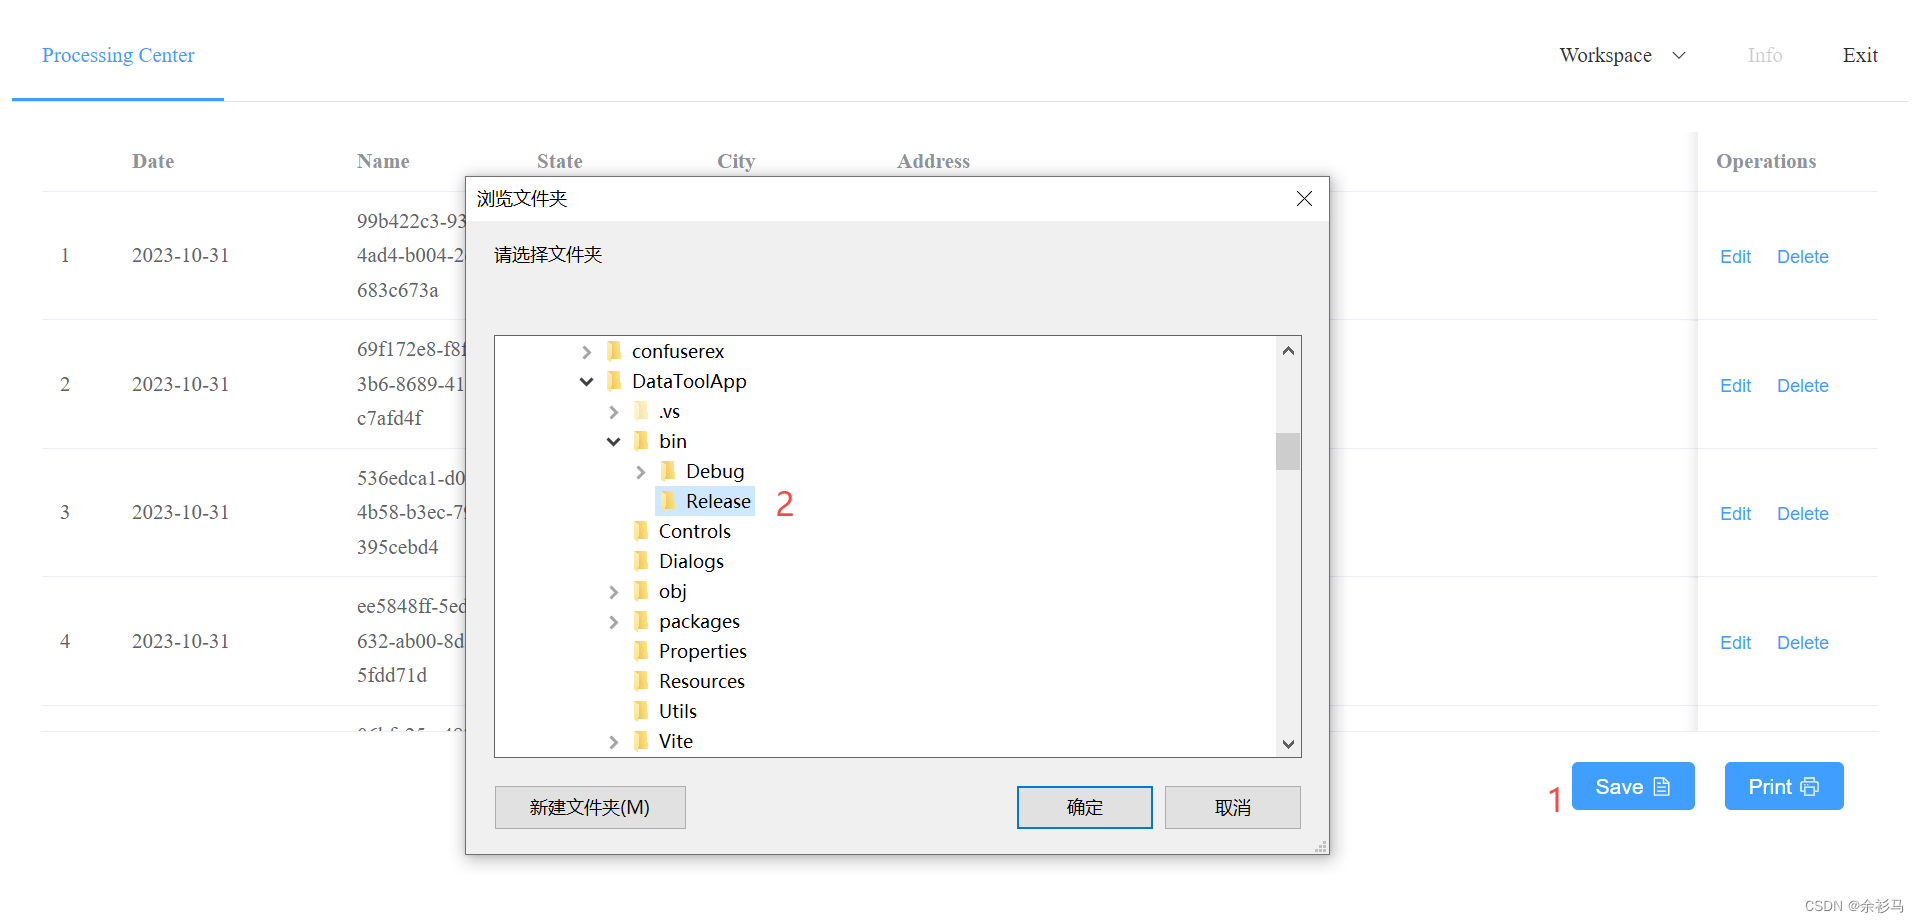
}5、弹窗选择文件夹
安装 Ookii 包,这里的版本是 4.0.0,实现弹窗选择文件夹,
弹窗示例代码如下,
var folderDialog = new Ookii.Dialogs.WinForms.VistaFolderBrowserDialog
{
    Description = "选择文件夹"
};

if (folderDialog.ShowDialog() != DialogResult.OK)
{
    Debug.WriteLine(res);
}
也可以使用原生方法,
FolderBrowserDialog folderBrowserDialog = new FolderBrowserDialog()
{
    Description="请选择文件夹",
    ShowNewFolderButton = true,
};
if(folderBrowserDialog.ShowDialog() == DialogResult.OK)
{
    string selectedFolderPath = folderBrowserDialog.SelectedPath;
    MessageBox.Show("选择的文件夹路径为:" + selectedFolderPath);
}
效果如下,
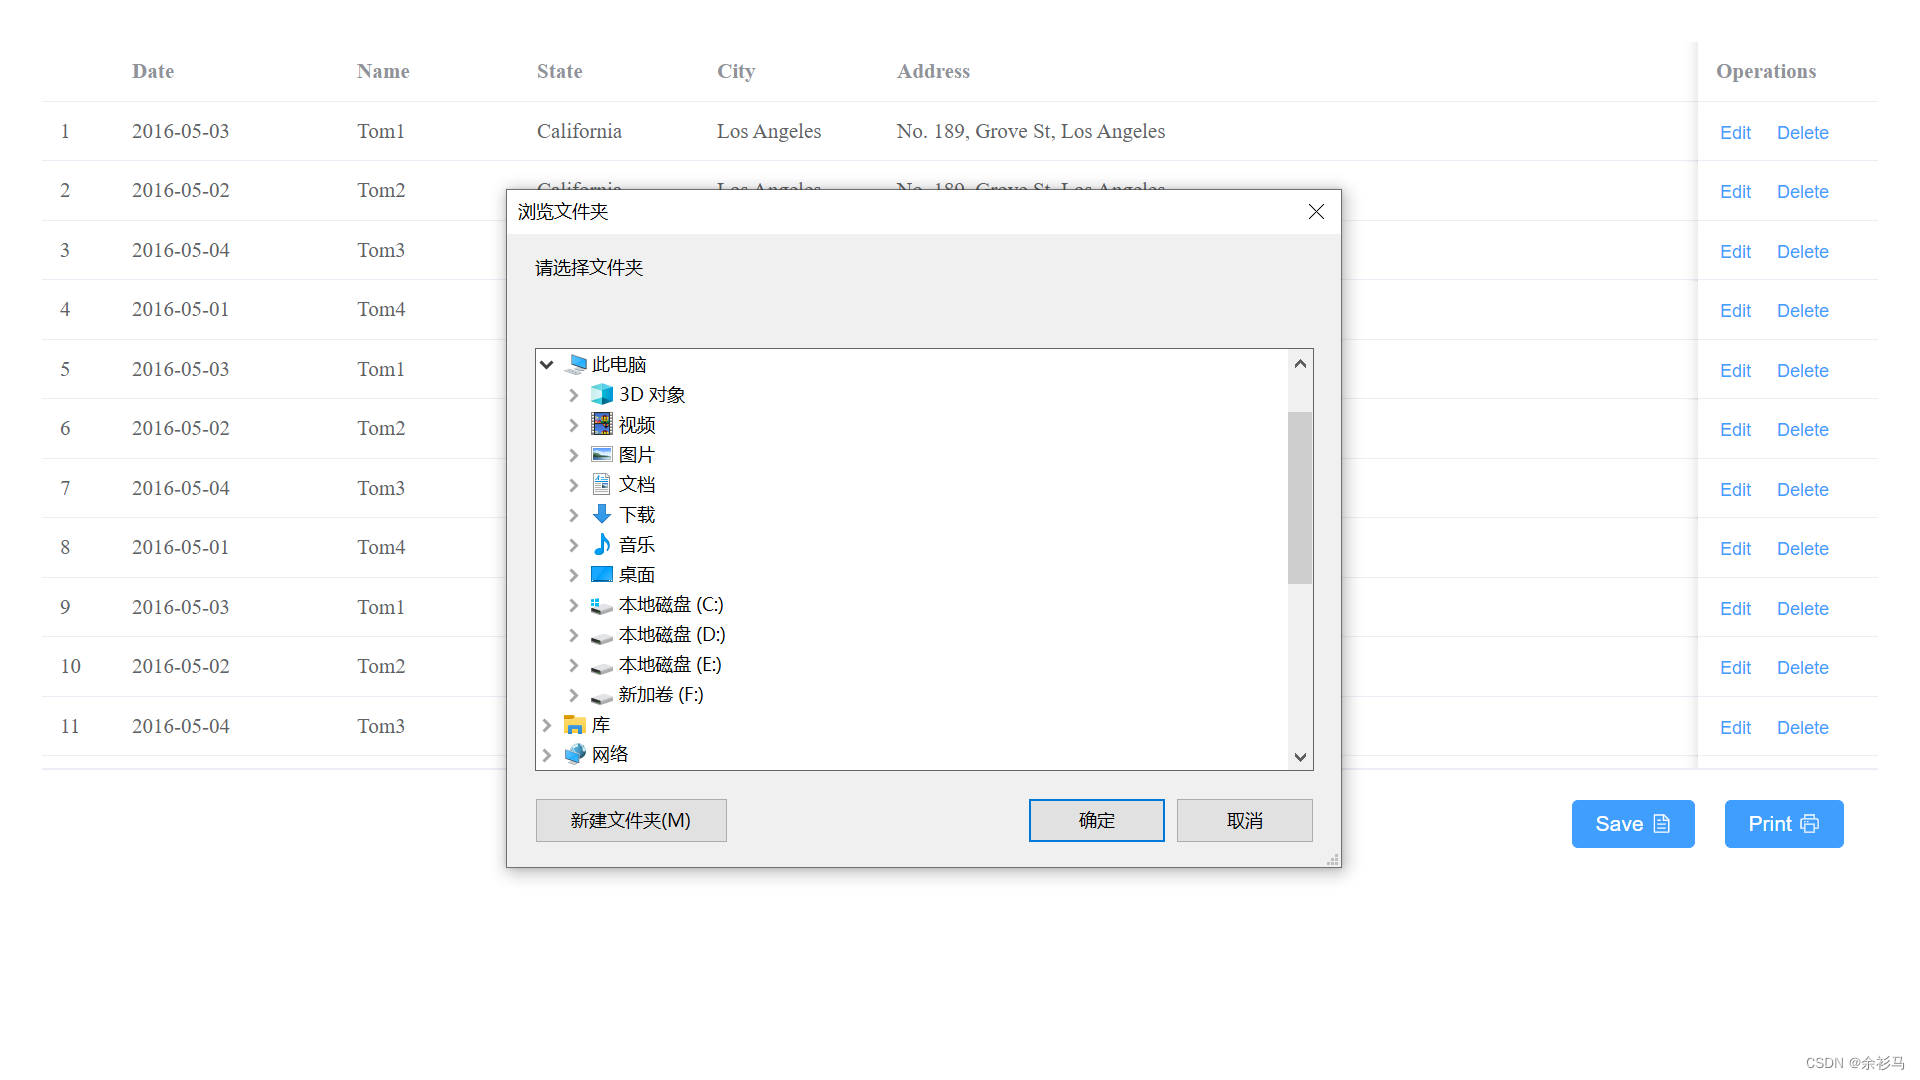
使用同步委托,逻辑上是先获取文件夹路径,再保存文件,
// DataToolApp\Dialogs\CustomerFolderBrowserDialog.cs
using System.Windows.Forms;

namespace DataToolApp.Dialogs
{
    public class CustomerFolderBrowserDialog
    {

        /// <summary>
        /// 委托实现,显示文件夹浏览器,返回选中的文件夹路径
        /// </summary>
        /// <returns></returns>
        public static string ShowFolderBrowserDialog()
        {
            FolderBrowserDialog folderBrowserDialog = new FolderBrowserDialog()
            {
                Description = "请选择文件夹",
                ShowNewFolderButton = true,
            };
            if (folderBrowserDialog.ShowDialog() == DialogResult.OK)
            {
                return folderBrowserDialog.SelectedPath;
            }
            return "";
        }
    }
}
 // 主窗体 DataToolForm.cs

 // 自定义委托
 public delegate string MyFolderBrowserDialog();

 /// <summary>
 /// 获取选中的文件夹路径
 /// </summary>
 public Object GetSelectedFolderPath()
 {
     MyFolderBrowserDialog myFolderBrowserDialog = CustomerFolderBrowserDialog.ShowFolderBrowserDialog;
     return this.Invoke(myFolderBrowserDialog);
 }
6、ExcelUtil 工具类封装
安装 NPOI 包,这里的版本是 2.6.2,
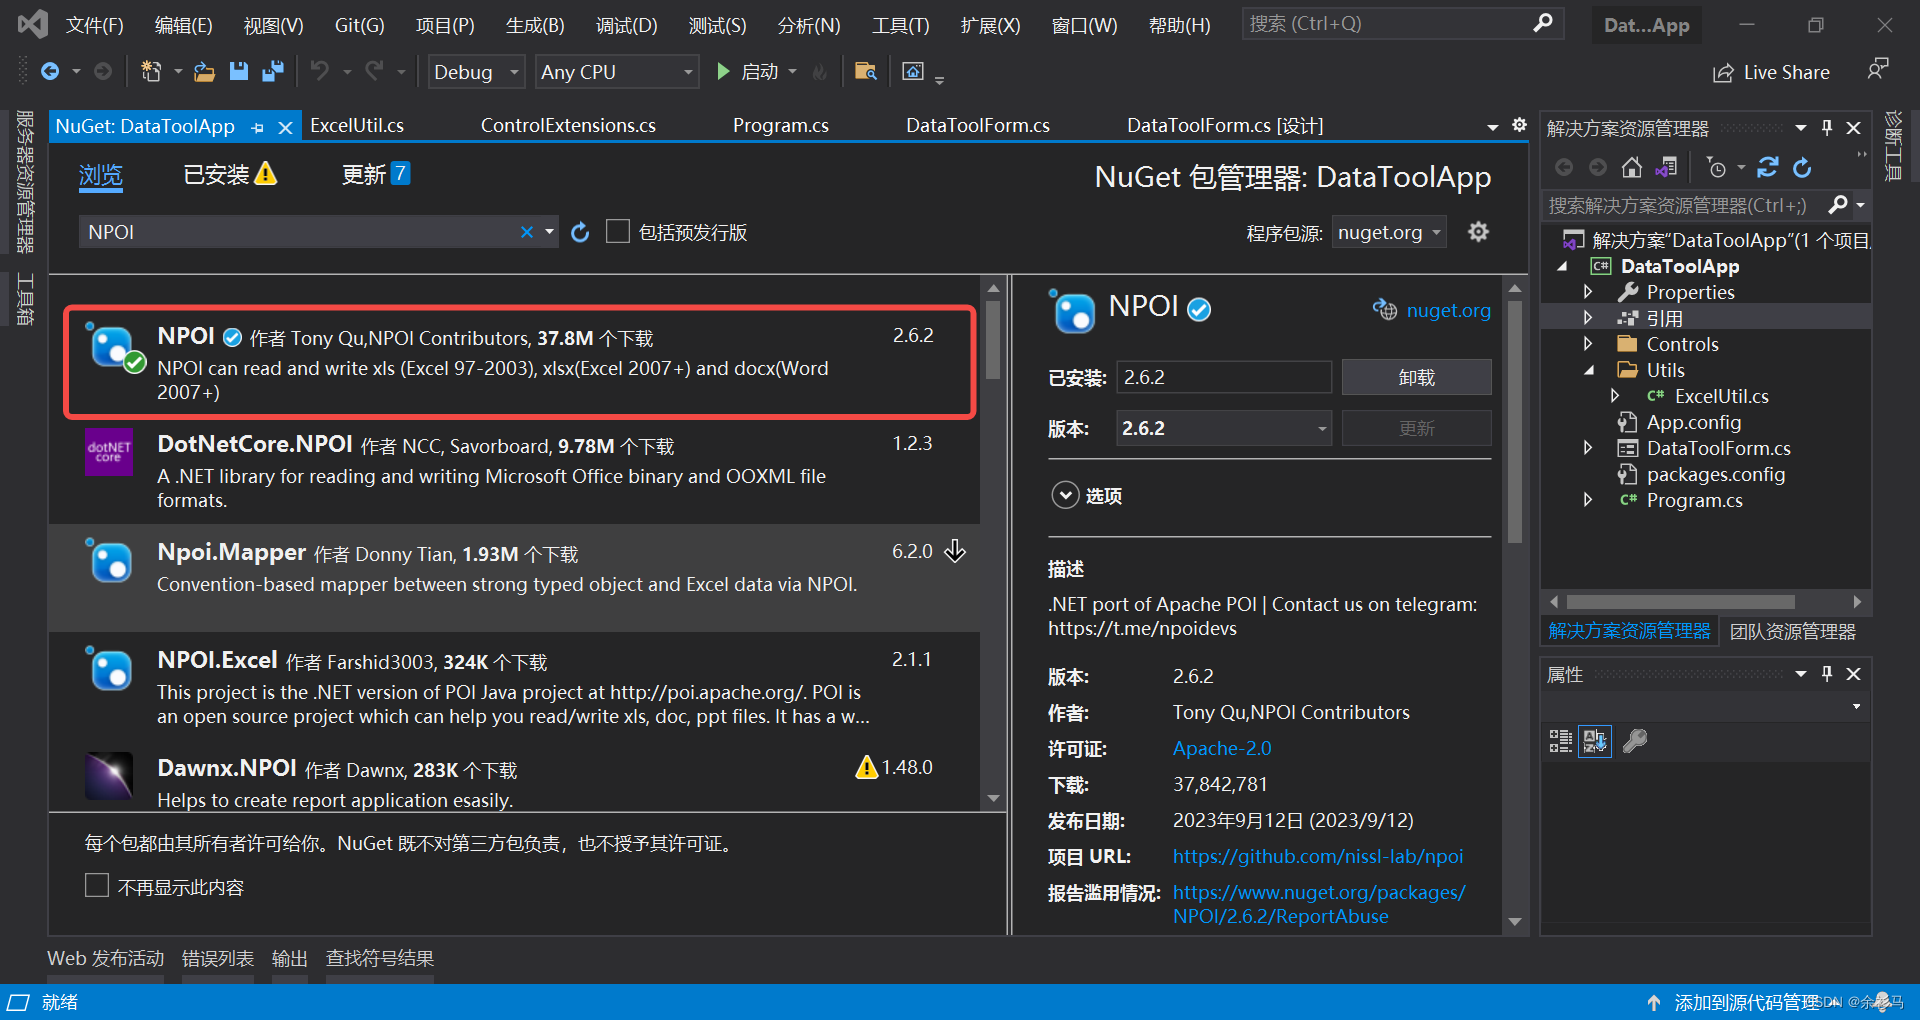
封装 SaveAsExcel 方法,
using NPOI.HSSF.UserModel;
using NPOI.SS.UserModel;
using System;
using System.Collections.Generic;
using System.Diagnostics;
using System.IO;

namespace DataToolApp.Utils
{
    public class ExcelUtil
    {

        public Object SaveAsExcel(Object obj)
        {
            // (IDictionary<String, Object>) obj
            // System.Collections.Generic.ICollection<System.Collections.Generic.KeyValuePair<string, object>> obj

            // 结果
            Dictionary<String, Object> res = new Dictionary<String, Object>(3);

            // 获取保存文件夹
            string selectedPath = Program.dataToolForm.GetSelectedFolderPath().ToString();

            if (string.IsNullOrEmpty(selectedPath))
            {
                // 返回结果
                res.Add("code", "0");
                res.Add("msg", "fail");
                res.Add("isSuccess", false);
                return res;
            }
            string filename = Guid.NewGuid().ToString() + ".xls";

            // 创建 workbook
            IWorkbook workbook = new HSSFWorkbook();
            // 添加一个 sheet
            ISheet sheet1 = workbook.CreateSheet("sheet1");

            // 写入 Excel
            bool isHeader = true;
            List<string> header = new List<string>();
            int rowCounter = 0;
            ICollection<KeyValuePair<string, object>> entities = (ICollection<KeyValuePair<string, object>>)obj;
            foreach (var entity in entities)
            {
                IDictionary<String, Object> entityInfo = (IDictionary<String, object>)entity.Value;
                // 写入表头
                if (isHeader)
                {
                    foreach (var key in entityInfo.Keys)
                    {
                        header.Add(key);
                    }

                    // 第一行
                    IRow firstRow = sheet1.CreateRow(0);
                    for (int j = 0; j < header.Count; j++)
                    {
                        firstRow.CreateCell(j).SetCellValue(header[j]);
                    }
                    isHeader = false;
                }
                rowCounter++;

                // 第 N 行
                IRow row = sheet1.CreateRow(rowCounter);
                // 写入内容
                for (int k = 0; k < header.Count; k++)
                {
                    row.CreateCell(k).SetCellValue(entityInfo[header[k]].ToString());
                }

            }
            // 写入文件
            using (FileStream file = new FileStream(selectedPath + "\\" + filename, FileMode.Create))
            {
                workbook.Write(file);
            }
            // 返回结果
            res.Add("code", "1");
            res.Add("msg", "ok");
            res.Add("isSuccess", true);
            return res;
        }
    }
}
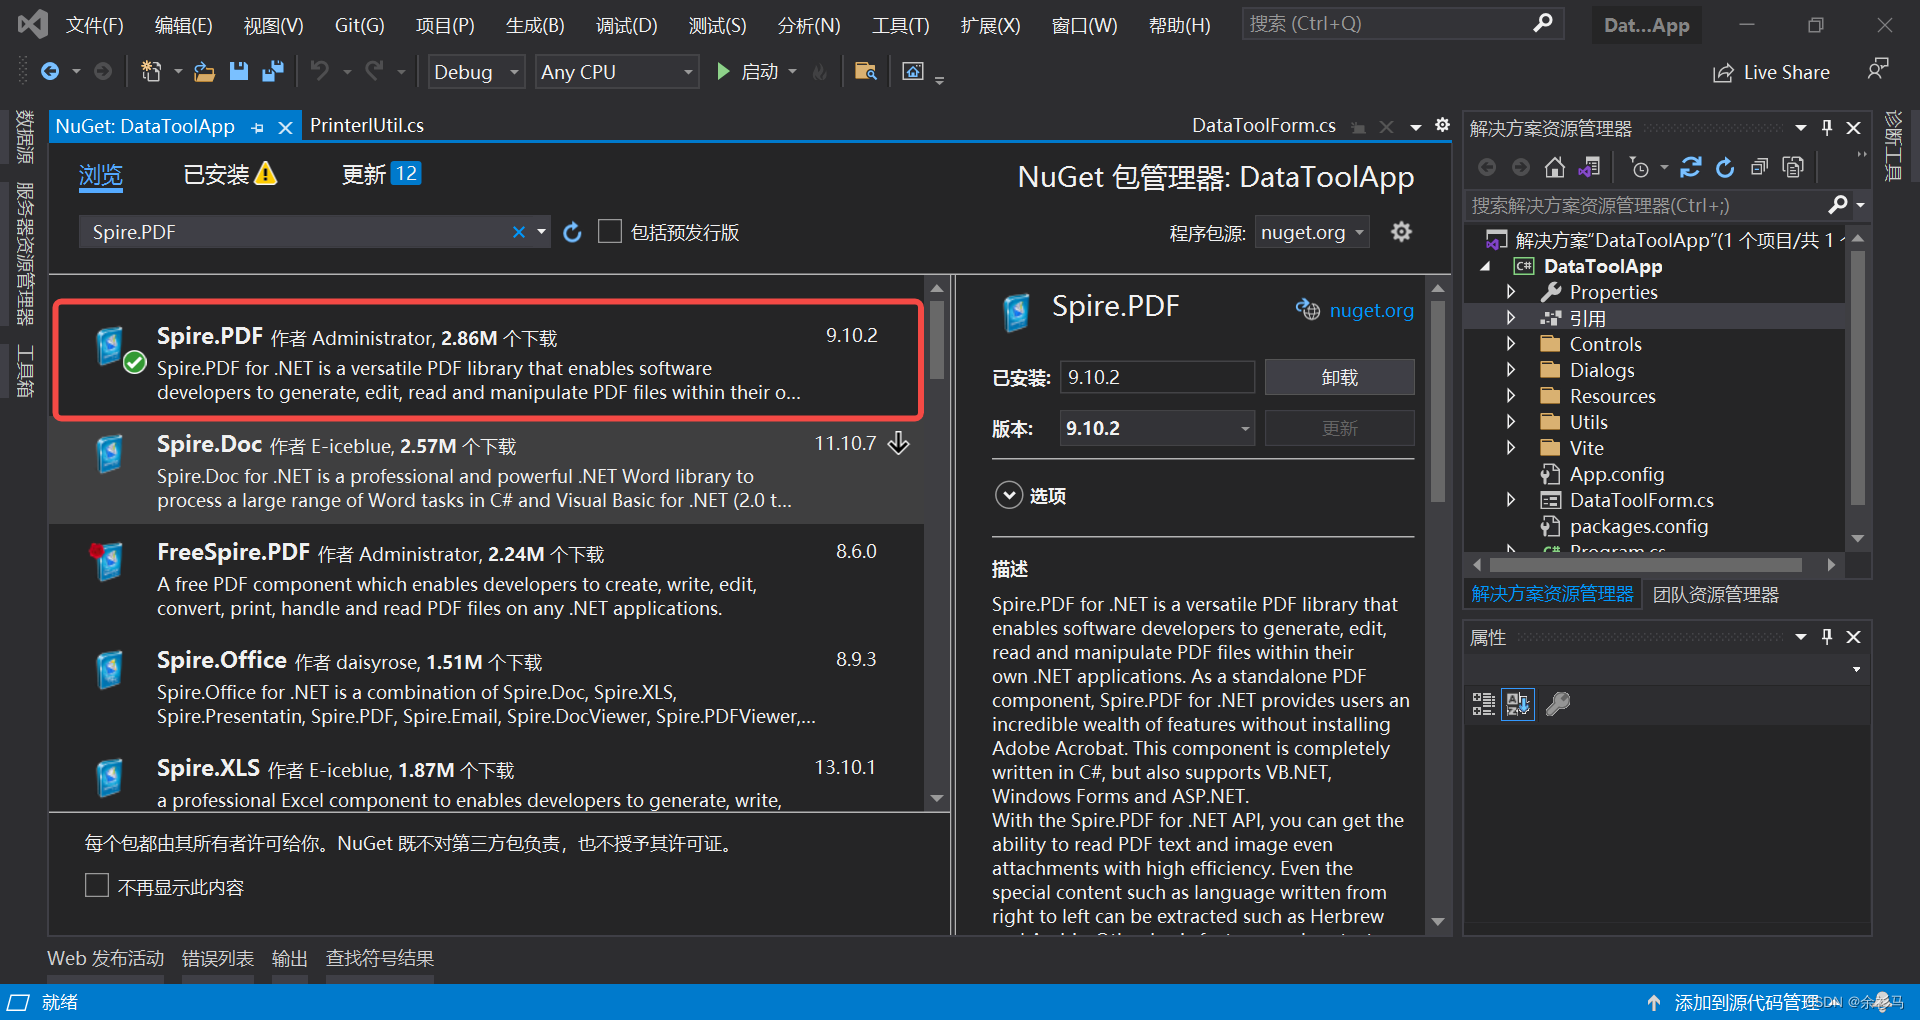
7、PrinterUitl 工具类封装
安装 Spire.XLS 包,这里的版本是 13.10.1,

安装 Spire.PDF 包(收费),这里的版本是 9.10.2,
// PrinterlUtil.cs
using iTextSharp.text;
using iTextSharp.text.pdf;
using System;
using System.Collections.Generic;
using System.IO;

namespace DataToolApp.Utils
{
    public class PrinterlUtil
    {
        /// <summary>
        /// 创建一个 PDF 文档
        /// </summary>
        /// <param name="filename"></param>
        public void CreateDocument(string filename)
        {
            // 创建新的PDF文档
            Document document = new Document(PageSize.A4);

            // 创建PDF写入器
            PdfWriter.GetInstance(document, new FileStream(filename, FileMode.Create));

            // 打开文档
            document.Open();

            // 创建一个PdfPTable对象,设置表格的列数和列宽
            PdfPTable table = new PdfPTable(3);
            table.SetWidths(new float[] { 1, 2, 3 });
            // 创建一个PdfPCell对象,设置单元格的内容和样式
            PdfPCell cell = new PdfPCell(new Phrase("Header"));
            cell.Colspan = 3;
            cell.HorizontalAlignment = 1;
            table.AddCell(cell);
            table.AddCell("Col 1 Row 1");
            table.AddCell("Col 2 Row 1");
            table.AddCell("Col 3 Row 1");
            table.AddCell("Col 1 Row 2");
            table.AddCell("Col 2 Row 2");
            table.AddCell("Col 3 Row 2");//将表格添加到Document对象中
            document.Add(table);
            //关闭Document对象
            document.Close();
        }

        /// <summary>
        ///  打印 PDF 文档
        /// </summary>
        /// <param name="obj"></param>
        /// <returns></returns>
        public Object PrintPdf(Object obj)
        {
            string tempfile = @"E:\Test.pdf";
            string savefile = @"E:\Test2.pdf";
            string printerName = "Microsoft Print to PDF";

            CreateDocument(tempfile);

            // 加载 PDF 文档
            Spire.Pdf.PdfDocument doc = new Spire.Pdf.PdfDocument();
            doc.LoadFromFile(tempfile);
            // 选择 Microsoft Print to PDF 打印机
            doc.PrintSettings.PrinterName = printerName;
            // 打印 PDF 文档
            doc.PrintSettings.PrintToFile(savefile);
            doc.Print();

            // 删除缓存文件
            File.Delete(tempfile);

            // 结果
            Dictionary<String, Object> res = new Dictionary<String, Object>(3);
            res.Add("code", "1");
            res.Add("msg", "ok");
            res.Add("isSuccess", true);
            return res;
        }
    }
}
8、DataUtil 工具类封装
// DataUtil.cs
using System;
using System.Collections.Generic;
using System.Linq;
using System.Text;
using System.Threading.Tasks;

namespace DataToolApp.Utils
{
    public class DataUtil
    {
        // 模拟从数据库中返回数据
        public List<DataEntity> getData()
        {
            int length = 100;
            List<DataEntity> dataEntities = new List<DataEntity>(length);
            for (int i = 0; i < length; i++)
            {
                DataEntity e = new DataEntity()
                {
                    date = "2023-10-31",
                    name = Guid.NewGuid().ToString(),
                    state = Guid.NewGuid().ToString(),
                    city = Guid.NewGuid().ToString(),
                    address = Guid.NewGuid().ToString(),
                    zip = Guid.NewGuid().ToString(),
                    tag = Guid.NewGuid().ToString(),
                };
                dataEntities.Add(e);
            }
            return dataEntities;
        }

        public class DataEntity
        {
            public string date { get; set; }
            public string name { get; set; }
            public string state { get; set; }
            public string city { get; set; }
            public string address { get; set; }
            public string zip { get; set; }
            public string tag { get; set; }
        }
    }
}
9、导出 .Net 方法
注意以下两点,
- 导出的 .Net 方法有限制,不能导出 Form/Window/Control
- 必须使用委托实现窗体异步事件,否则会出现报错“在可以调用 OLE 之前,必须将当前线程设置为单线程单元(STA)模式”
// DataToolForm.cs
using System;
using System.Diagnostics;
using System.Drawing;
using System.Windows.Forms;
using CefSharp;
using CefSharp.JavascriptBinding;
using CefSharp.WinForms;
using DataToolApp.Controls;
using DataToolApp.Dialogs;
using DataToolApp.Utils;

namespace DataToolApp
{
    public partial class DataToolForm : Form
    {

        /// <summary>
        /// 鼠标按下时的点
        /// </summary>
        private Point point;

        /// <summary>
        /// 拖动标识
        /// </summary>
        private bool isMoving = false;

        /// <summary>
        /// 打包编译类型
        /// </summary>
#if DEBUG
        private const string Build = "Debug";
#else
        private const string Build = "Release";
#endif
        /// <summary>
        /// 应用标题
        /// </summary>
        private readonly string title = "DataToolApp (" + Build + ")";

        /// <summary>
        /// ChromiumWebBrowser
        /// </summary>
        private static ChromiumWebBrowser browser;


        // 委托
        public delegate string MyFolderBrowserDialog();

        /// <summary>
        /// 获取选中的文件夹路径
        /// </summary>
        public Object GetSelectedFolderPath()
        {
            MyFolderBrowserDialog myFolderBrowserDialog = CustomerFolderBrowserDialog.ShowFolderBrowserDialog;
            return this.Invoke(myFolderBrowserDialog);
        }

        public DataToolForm()
        {
            InitializeComponent();

            Text = title;
            WindowState = FormWindowState.Maximized;

            AddChromiumWebBrowser();
        }

        /// <summary>
        /// Create a new instance in code or add via the designer
        /// </summary>
        private void AddChromiumWebBrowser()
        {
            browser = new ChromiumWebBrowser("http://datatool.test");
            browser.MenuHandler = new CustomContextMenuHandler();
            // 导出 .Net 方法
            ExposeDotnetClass();
            this.Controls.Add(browser);

        }


        /// <summary>
        /// 鼠标按下时,启用拖动
        /// </summary>
        /// <param name="sender"></param>
        /// <param name="e"></param>
        private void DataToolForm_MouseDown(object sender, MouseEventArgs e)
        {
            point = e.Location;
            isMoving = true;
        }

        /// <summary>
        /// 鼠标移动,计算移动的位置
        /// </summary>
        /// <param name="sender"></param>
        /// <param name="e"></param>
        private void DataToolForm_MouseMove(object sender, MouseEventArgs e)
        {
            if (e.Button == MouseButtons.Left && isMoving)
            {
                Point pNew = new Point(e.Location.X - point.X, e.Location.Y - point.Y);
                Location += new Size(pNew);
            }
        }
        /// <summary>
        /// 鼠标停下
        /// </summary>
        /// <param name="sender"></param>
        /// <param name="e"></param>
        private void DataToolForm_MouseUp(object sender, MouseEventArgs e)
        {
            isMoving = false;
        }

        /// <summary>
        /// 导出类方法
        /// </summary>
        public static void ExposeDotnetClass()
        {
            browser.JavascriptObjectRepository.ResolveObject += (sender, e) =>
            {
                // 注册 ExcelUtil 实例
                DoRegisterDotNetFunc(e.ObjectRepository, e.ObjectName, "excelUtil", new ExcelUtil());
                // 注册 PrinterlUtil 实例
                DoRegisterDotNetFunc(e.ObjectRepository, e.ObjectName, "printerlUtil", new PrinterlUtil());

                // 注册其他实例 ...
            };

            browser.JavascriptObjectRepository.ObjectBoundInJavascript += (sender, e) =>
            {
                var name = e.ObjectName;
                Debug.WriteLine($"Object {e.ObjectName} was bound successfully.");
            };

        }
        /// <summary>
        /// 注册 DoNet 实例
        /// </summary>
        /// <param name="repo"> IJavascriptObjectRepository </param>
        /// <param name="eventObjectName">事件对象名</param>
        /// <param name="funcName">方法名</param>
        /// <param name="objectToBind">需要绑定的DotNet对象</param>
        private static void DoRegisterDotNetFunc(IJavascriptObjectRepository repo, string eventObjectName, string funcName, object objectToBind)
        {
            if (eventObjectName.Equals(funcName))
            {
                BindingOptions bindingOptions = null;
                bindingOptions = BindingOptions.DefaultBinder;
                repo.NameConverter = null;
                repo.NameConverter = new CamelCaseJavascriptNameConverter();
                repo.Register(funcName, objectToBind, isAsync: true, options: bindingOptions);
            }
        }

        /// <summary>
        /// 自定义右键菜单
        /// </summary>
        public class CustomContextMenuHandler : IContextMenuHandler
        {
            /// <summary>
            /// 上下文菜单列表,在这里加菜单
            /// </summary>
            /// <param name="chromiumWebBrowser"></param>
            /// <param name="browser"></param>
            /// <param name="frame"></param>
            /// <param name="parameters"></param>
            /// <param name="model"></param>
            void IContextMenuHandler.OnBeforeContextMenu(IWebBrowser chromiumWebBrowser, IBrowser browser, IFrame frame, IContextMenuParams parameters, IMenuModel model)
            {
                if (model.Count > 0)
                {
                    // 添加分隔符
                    model.AddSeparator();
                }
                model.AddItem((CefMenuCommand)29501, "Show DevTools");
            }

            /// <summary>
            /// 上下文菜单指令,这里实现菜单要做的事情
            /// </summary>
            /// <param name="chromiumWebBrowser"></param>
            /// <param name="browser"></param>
            /// <param name="frame"></param>
            /// <param name="parameters"></param>
            /// <param name="commandId"></param>
            /// <param name="eventFlags"></param>
            /// <returns></returns>
            bool IContextMenuHandler.OnContextMenuCommand(IWebBrowser chromiumWebBrowser, IBrowser browser, IFrame frame, IContextMenuParams parameters, CefMenuCommand commandId, CefEventFlags eventFlags)
            {
                if (commandId == (CefMenuCommand)29501)
                {
                    browser.GetHost().ShowDevTools();
                    return true;
                }
                return false;
            }

            void IContextMenuHandler.OnContextMenuDismissed(IWebBrowser chromiumWebBrowser, IBrowser browser, IFrame frame)
            {
                var webBrowser = (ChromiumWebBrowser)chromiumWebBrowser;
                Action setContextAction = delegate ()
                {
                    webBrowser.ContextMenu = null;
                };
                webBrowser.Invoke(setContextAction);
            }

            bool IContextMenuHandler.RunContextMenu(IWebBrowser chromiumWebBrowser, IBrowser browser, IFrame frame, IContextMenuParams parameters, IMenuModel model, IRunContextMenuCallback callback)
            {
                // 必须返回 false
                return false;
            }

        }

        /// <summary>
        /// 窗体加载事件
        /// </summary>
        /// <param name="sender"></param>
        /// <param name="e"></param>
        private void DataToolForm_Load(object sender, System.EventArgs e)
        {
            browser.LoadUrl("http://datatool.test");
        }
    }
}
三、整合前后端
1、前端打包
Vite 配置 ESLint,否则打包的时候会报错,
# 安装 eslint
cnpm i -D eslint @babel/eslint-parser
# 初始化配置
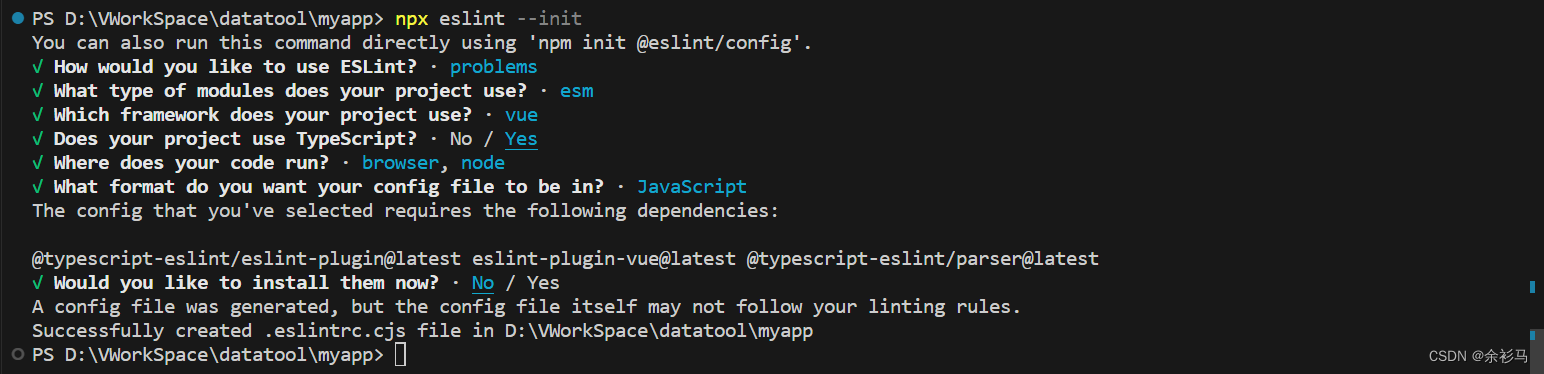
npx eslint --init
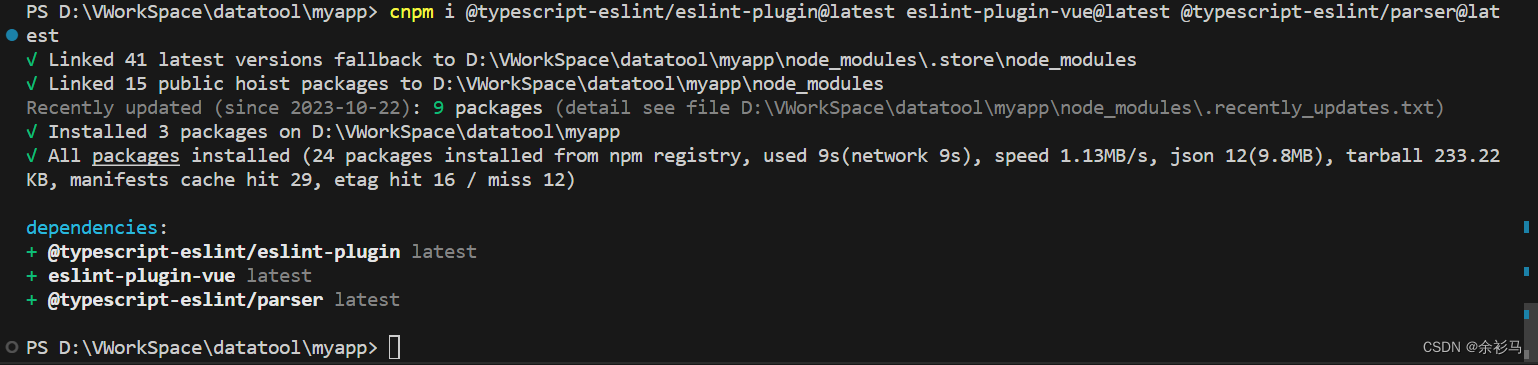
# 安装依赖
cnpm i @typescript-eslint/eslint-plugin@latest eslint-plugin-vue@latest @typescript-eslint/parser@latest
# 安装插件
cnpm i -D vite-plugin-eslint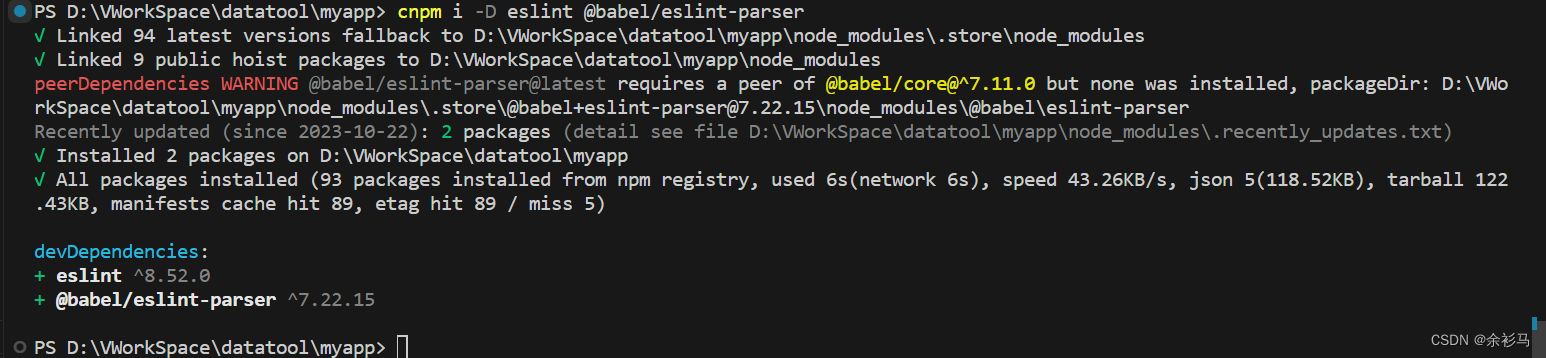

配置 vite,
// vite.config.js
import { defineConfig } from 'vite'
import vue from '@vitejs/plugin-vue'
import AutoImport from 'unplugin-auto-import/vite'
import Components from 'unplugin-vue-components/vite'
import { ElementPlusResolver } from 'unplugin-vue-components/resolvers'
import eslintPlugin from 'vite-plugin-eslint'

// https://vitejs.dev/config/
export default defineConfig({
  plugins: [
    vue(),
    //  ESLint 插件配置
    eslintPlugin({
      include: ['src/**/*.js', 'src/**/*.vue', 'src/*.js', 'src/*.vue']
    }),
    AutoImport({
      resolvers: [ElementPlusResolver()],
    }),
    Components({
      resolvers: [ElementPlusResolver()],
    }),
  ],
})
配置 eslint 规则,
// .eslintrc.cjs
module.exports = {
    "env": {
        "browser": true,
        "es2021": true,
        "node": true
    },
    "extends": [
        "eslint:recommended",
        "plugin:@typescript-eslint/recommended",
        "plugin:vue/vue3-essential"
    ],
    "overrides": [
        {
            "env": {
                "node": true
            },
            "files": [
                ".eslintrc.{js,cjs}"
            ],
            "parserOptions": {
                "sourceType": "script"
            }
        }
    ],
    "parserOptions": {
        "ecmaVersion": "latest",
        "parser": "@typescript-eslint/parser",
        "sourceType": "module"
    },
    "plugins": [
        "@typescript-eslint",
        "vue"
    ],
    "rules": {
        "@typescript-eslint/no-explicit-any": 1,
        "no-console": 1,
        "no-debugger": 1,
        "no-undefined": 1,
    }
}
修改 vite 打包指令,
// package.json
{
  "name": "myapp",
  "private": true,
  "version": "0.0.0",
  "type": "module",
  "scripts": {
    "dev": "vite",
    "build": "vite build", // 修改这里
    "preview": "vite preview"
  },
  "dependencies": {
    "@element-plus/icons-vue": "^2.1.0",
    "@typescript-eslint/eslint-plugin": "latest",
    "@typescript-eslint/parser": "latest",
    "element-plus": "^2.4.1",
    "eslint-plugin-vue": "latest",
    "vue": "^3.3.4"
  },
  "devDependencies": {
    "@babel/eslint-parser": "^7.22.15",
    "@vitejs/plugin-vue": "^4.2.3",
    "eslint": "^8.52.0",
    "typescript": "^5.0.2",
    "unplugin-auto-import": "^0.16.7",
    "unplugin-vue-components": "^0.25.2",
    "vite": "^4.4.5",
    "vite-plugin-eslint": "^1.8.1",
    "vue-tsc": "^1.8.5"
  }
}
打包,
npm run build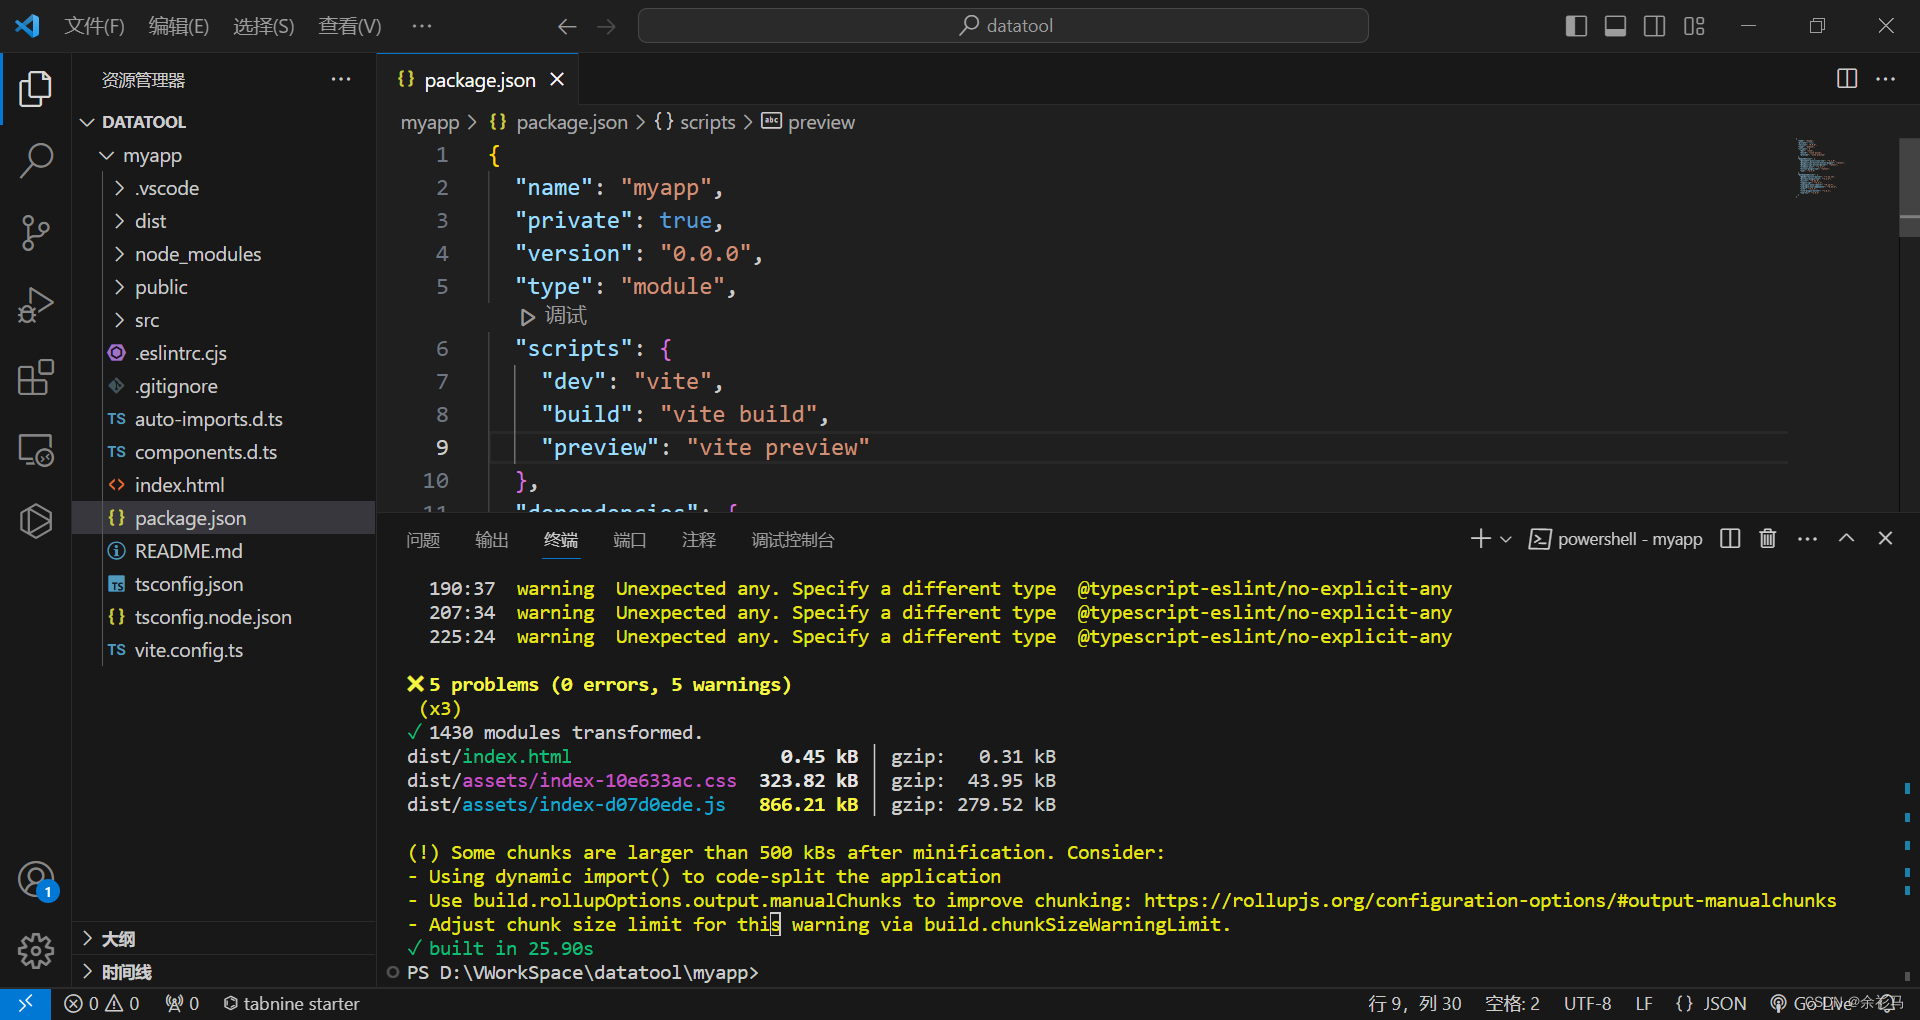
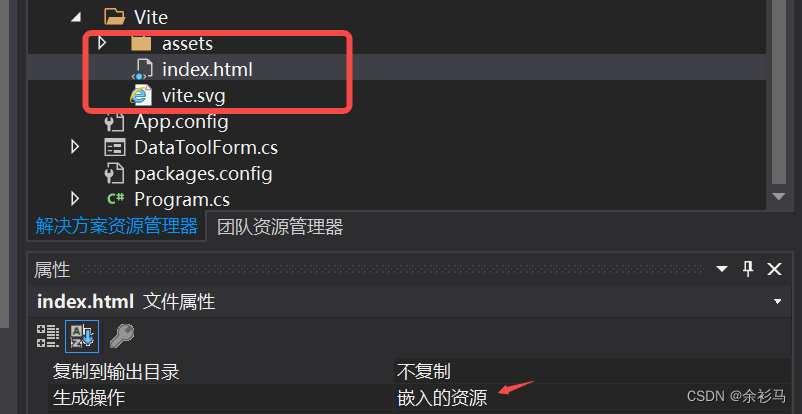
2、引入静态资源
项目新建文件夹 Vite,把前端打包好的资源引入进来,并设为“嵌入的资源”,
3、配置 CEF
程式主入口配置本地网页的访问域、缓存目录等信息,
// Program.cs
using CefSharp;
using CefSharp.SchemeHandler;
using CefSharp.WinForms;
using System;
using System.IO;
using System.Windows.Forms;

namespace DataToolApp
{
    static class Program
    {
        /// <summary>
        /// 应用程序的主入口点。
        /// </summary>
        [STAThread]
        static void Main()
        {
            InitCefSettings();
            Application.EnableVisualStyles();
            Application.SetCompatibleTextRenderingDefault(false);
            Application.Run(new DataToolForm());
        }

        private static void InitCefSettings()
        {

#if ANYCPU
            CefRuntime.SubscribeAnyCpuAssemblyResolver();
#endif

            // Pseudo code; you probably need more in your CefSettings also.
            var settings = new CefSettings()
            {
                //By default CefSharp will use an in-memory cache, you need to specify a Cache Folder to persist data
                CachePath = Path.Combine(Environment.GetFolderPath(Environment.SpecialFolder.LocalApplicationData), "CefSharp\\Cache")
            };

            //Example of setting a command line argument
            //Enables WebRTC
            // - CEF Doesn't currently support permissions on a per browser basis see https://bitbucket.org/chromiumembedded/cef/issues/2582/allow-run-time-handling-of-media-access
            // - CEF Doesn't currently support displaying a UI for media access permissions
            //
            //NOTE: WebRTC Device Id's aren't persisted as they are in Chrome see https://bitbucket.org/chromiumembedded/cef/issues/2064/persist-webrtc-deviceids-across-restart
            settings.CefCommandLineArgs.Add("enable-media-stream");
            //https://peter.sh/experiments/chromium-command-line-switches/#use-fake-ui-for-media-stream
            settings.CefCommandLineArgs.Add("use-fake-ui-for-media-stream");
            //For screen sharing add (see https://bitbucket.org/chromiumembedded/cef/issues/2582/allow-run-time-handling-of-media-access#comment-58677180)
            settings.CefCommandLineArgs.Add("enable-usermedia-screen-capturing");

            settings.RegisterScheme(new CefCustomScheme
            {
                SchemeName = "http",
                DomainName = "datatool.test",
                SchemeHandlerFactory = new FolderSchemeHandlerFactory(rootFolder: @"..\..\..\DataToolApp\Vite",
                            hostName: "datatool.test", //Optional param no hostname/domain checking if null
                            defaultPage: "index.html") //Optional param will default to index.html
            });

            //Perform dependency check to make sure all relevant resources are in our output directory.
            Cef.Initialize(settings, performDependencyCheck: true, browserProcessHandler: null);
        }

    }
}
4、配置右键菜单
右键显示控制台菜单,需要实现 IContextMenuHandler 接口,
        /// <summary>
        /// 自定义右键菜单
        /// </summary>
        public class CustomContextMenuHandler : IContextMenuHandler
        {
            /// <summary>
            /// 上下文菜单列表,在这里加菜单
            /// </summary>
            /// <param name="chromiumWebBrowser"></param>
            /// <param name="browser"></param>
            /// <param name="frame"></param>
            /// <param name="parameters"></param>
            /// <param name="model"></param>
            void IContextMenuHandler.OnBeforeContextMenu(IWebBrowser chromiumWebBrowser, IBrowser browser, IFrame frame, IContextMenuParams parameters, IMenuModel model)
            {
                if (model.Count > 0)
                {
                    // 添加分隔符
                    model.AddSeparator();
                }
                model.AddItem((CefMenuCommand)29501, "Show DevTools");
            }

            /// <summary>
            /// 上下文菜单指令,这里实现菜单要做的事情
            /// </summary>
            /// <param name="chromiumWebBrowser"></param>
            /// <param name="browser"></param>
            /// <param name="frame"></param>
            /// <param name="parameters"></param>
            /// <param name="commandId"></param>
            /// <param name="eventFlags"></param>
            /// <returns></returns>
            bool IContextMenuHandler.OnContextMenuCommand(IWebBrowser chromiumWebBrowser, IBrowser browser, IFrame frame, IContextMenuParams parameters, CefMenuCommand commandId, CefEventFlags eventFlags)
            {
                if (commandId == (CefMenuCommand)29501)
                {
                    browser.GetHost().ShowDevTools();
                    return true;
                }
                return false;
            }

            void IContextMenuHandler.OnContextMenuDismissed(IWebBrowser chromiumWebBrowser, IBrowser browser, IFrame frame)
            {
                var webBrowser = (ChromiumWebBrowser)chromiumWebBrowser;
                Action setContextAction = delegate ()
                {
                    webBrowser.ContextMenu = null;
                };
                webBrowser.Invoke(setContextAction);
            }

            bool IContextMenuHandler.RunContextMenu(IWebBrowser chromiumWebBrowser, IBrowser browser, IFrame frame, IContextMenuParams parameters, IMenuModel model, IRunContextMenuCallback callback)
            {
                // 必须返回 false
                return false;
            }

        }
然后绑定浏览器的 MenuHandler ,
browser.MenuHandler = new CustomContextMenuHandler();5、关闭窗口事件(补充)
5.1、顶部栏菜单(补充)
// myapp\src\api\WindowsUtil.ts
export const closeWindows = async () => {
    await CefSharp.BindObjectAsync("windowsUtil")
    windowsUtil.Close()
}
// myapp\src\components\DataViewer.vue
<template>
<el-menu :default-active="activeIndex" class="el-menu-demo" :ellipsis="false" mode="horizontal" @select="handleSelect">
<el-menu-item index="1">Processing Center</el-menu-item>
<div class="flex-grow" />
<el-sub-menu index="2">
<template #title>Workspace</template>
<el-menu-item index="2-1">item one</el-menu-item>
<el-menu-item index="2-2">item two</el-menu-item>
<el-menu-item index="2-3">item three</el-menu-item>
<el-sub-menu index="2-4">
<template #title>item four</template>
<el-menu-item index="2-4-1">item one</el-menu-item>
<el-menu-item index="2-4-2">item two</el-menu-item>
<el-menu-item index="2-4-3">item three</el-menu-item>
</el-sub-menu>
</el-sub-menu>
<el-menu-item index="3" disabled>Info</el-menu-item>
<el-menu-item index="4">Exit</el-menu-item>
</el-menu>
<div class="common-layout">
<el-container>
<el-main><!-- 获取数据后展示 -->
<el-table v-loading="loading" :data="tableData" height="400" style="width: 100%">
<el-table-column fixed type="index" :index="indexMethod" />
<el-table-column prop="date" label="Date" width="150" />
<el-table-column prop="name" label="Name" width="120" />
<el-table-column prop="state" label="State" width="120" />
<el-table-column prop="city" label="City" width="120" />
<el-table-column prop="address" label="Address" width="600" />
<el-table-column prop="zip" label="Zip" width="120" />
<el-table-column fixed="right" label="Operations" width="120">
<template #default="scope">
<el-button link type="primary" size="small" @click="handleEdit(scope)">Edit</el-button>
<el-button link type="primary" size="small" @click="handleDelete(scope)">Delete</el-button>
</template>
</el-table-column>
</el-table>
<!-- 更新数据时,对话框 -->
<el-dialog v-model="dialogUpdateFormVisible" title="Update Shipping address ?">
<el-form :model="currentRow">
<el-form-item label="date" :label-width="formLabelWidth">
<el-input v-model="currentRow.date" autocomplete="off" />
</el-form-item>
<el-form-item label="name" :label-width="formLabelWidth">
<el-input v-model="currentRow.name" autocomplete="off" />
</el-form-item>
<el-form-item label="state" :label-width="formLabelWidth">
<el-input v-model="currentRow.state" autocomplete="off" />
</el-form-item>
<el-form-item label="city" :label-width="formLabelWidth">
<el-input v-model="currentRow.city" autocomplete="off" />
</el-form-item>
<el-form-item label="address" :label-width="formLabelWidth">
<el-input v-model="currentRow.address" autocomplete="off" />
</el-form-item>
<el-form-item label="zip" :label-width="formLabelWidth">
<el-input v-model="currentRow.zip" autocomplete="off" />
</el-form-item>
<el-form-item label="tag" :label-width="formLabelWidth">
<el-input v-model="currentRow.tag" autocomplete="off" />
</el-form-item>
</el-form>
<template #footer>
<span class="dialog-footer">
<el-button @click="dialogUpdateFormVisible = false">Cancel</el-button>
<el-button type="primary" @click="doUpdate()">
Confirm
</el-button>
</span>
</template>
</el-dialog>
<!-- 删除数据时,对话框 -->
<el-dialog v-model="dialogDeleteFormVisible" title="Delete Shipping address ?">
<el-form :model="currentRow">
<el-form-item label="date" :label-width="formLabelWidth">
<el-input disabled v-model="currentRow.date" autocomplete="off" />
</el-form-item>
<el-form-item label="name" :label-width="formLabelWidth">
<el-input disabled v-model="currentRow.name" autocomplete="off" />
</el-form-item>
<el-form-item label="state" :label-width="formLabelWidth">
<el-input disabled v-model="currentRow.state" autocomplete="off" />
</el-form-item>
<el-form-item label="city" :label-width="formLabelWidth">
<el-input disabled v-model="currentRow.city" autocomplete="off" />
</el-form-item>
<el-form-item label="address" :label-width="formLabelWidth">
<el-input disabled v-model="currentRow.address" autocomplete="off" />
</el-form-item>
<el-form-item label="zip" :label-width="formLabelWidth">
<el-input disabled v-model="currentRow.zip" autocomplete="off" />
</el-form-item>
<el-form-item label="tag" :label-width="formLabelWidth">
<el-input disabled v-model="currentRow.tag" autocomplete="off" />
</el-form-item>
</el-form>
<template #footer>
<span class="dialog-footer">
<el-button @click="dialogDeleteFormVisible = false">Cancel</el-button>
<el-button type="primary" @click="doDelete()">
Confirm
</el-button>
</span>
</template>
</el-dialog>
<!-- 关闭窗口时 -->
<el-dialog v-model="dialogVisible" title="提示" width="30%" :before-close="handleClose">
<span>确认关闭窗口?</span>
<template #footer>
<span class="dialog-footer">
<el-button @click="dialogVisible = false">取消</el-button>
<el-button type="primary" @click="doClose">
确认
</el-button>
</span>
</template>
</el-dialog>
</el-main>
<el-header>
<el-row class="row-bg" justify="end">
<el-col :span="2">
<el-button @click="handleSaveData()" type="primary">
Save<el-icon class="el-icon--right">
<Document />
</el-icon>
</el-button>
</el-col>
<el-col :span="2">
<el-button @click="handlePrintData()" type="primary">
Print<el-icon class="el-icon--right">
<Printer />
</el-icon>
</el-button>
</el-col>
</el-row>
</el-header>
</el-container>
</div>
</template>
<script lang="ts" setup>
import { ref, onMounted, reactive } from 'vue'
import { getData } from '../api/DataUtil'
import { saveAsExcel } from '../api/ExcelUtil'
import { printPdf } from '../api/PrinterUtil'
import { closeWindows } from '../api/WindowsUtil'
import { ElMessage, ElMessageBox } from 'element-plus'
import { Document, Printer } from '@element-plus/icons-vue'
// 表格数据加载标志
const loading = ref(true)
const tableData = reactive([])
// 更新数据对话框
const dialogUpdateFormVisible = ref(false)
const dialogDeleteFormVisible = ref(false)
const formLabelWidth = '140px'
// 当前选中行数据
const currentRow = reactive({
date: 'please input date',
name: 'please input name',
state: 'please input state',
city: 'please input city',
address: 'please input address',
zip: 'please input zip',
tag: 'please input tag',
})
const currentRowIndex = ref(1)
const dialogVisible = ref(false)
// 确认关闭
const doClose = () =>{
dialogVisible.value = false
closeWindows()
}
// 关闭窗口
const handleClose = (done: () => void) => {
ElMessageBox.confirm('Are you sure to close this dialog?')
.then(() => {
done()
})
.catch(() => {
// catch error
})
}
// 顶部栏菜单
const activeIndex = ref('1')
const handleSelect = (key: string, keyPath: string[]) => {
console.log(key, keyPath)
if (key == '4') {
dialogVisible.value = true
}
}
// 更新事件
const doUpdate = () => {
//console.log('>>> doUpdate ', currentRow, currentRowIndex.value)
Object.assign(tableData[currentRowIndex.value], currentRow)
dialogUpdateFormVisible.value = false
ElMessage({
message: 'Update success.',
type: 'success',
})
}
// 删除事件
const doDelete = () => {
// console.log("doDelete ", currentRowIndex.value)
tableData.splice(currentRowIndex.value, 1)
dialogDeleteFormVisible.value = false
ElMessage({
message: 'Delete success.',
type: 'success',
})
}
// 索引规则
const indexMethod = (index: number) => {
return index + 1
}
// Delete 事件
const handleDelete = (scope: any) => {
Object.assign(currentRow, scope.row)
currentRowIndex.value = scope.$index
dialogDeleteFormVisible.value = true
}
// Edit 事件
const handleEdit = (scope: any) => {
//console.log('edit',scope.$index,scope.row)
Object.assign(currentRow, scope.row)
currentRowIndex.value = scope.$index
dialogUpdateFormVisible.value = true
}
// 保存事件
const handleSaveData = () => {
console.log('handleSaveData')
saveAsExcel(tableData).then((res: any) => {
console.log('res', res)
if (res.isSuccess) {
ElMessage({
message: 'Save success.',
type: 'success',
})
} else {
ElMessage({
message: res.msg,
type: 'error',
})
}
}).catch((err: any) => {
console.log('err', err)
})
}
// 打印事件
const handlePrintData = () => {
printPdf(tableData).then((res: any) => {
if (res.isSuccess) {
ElMessage({
message: 'Save success.',
type: 'success',
})
} else {
ElMessage({
message: res.msg,
type: 'error',
})
}
})
}
// 挂载方法
onMounted(() => {
// 获取数据后将加载标志位位置 false,并且绑定到表格
getData().then((res: any) => {
//console.log('>>> getData ', res)
loading.value = false
Object.assign(tableData, res)
})
})
</script>
<style>
.el-button--text {
margin-right: 15px;
}
.el-select {
width: 300px;
}
.el-input {
width: 300px;
}
.dialog-footer button:first-child {
margin-right: 10px;
}
.el-row {
margin-bottom: 20px;
}
.el-row:last-child {
margin-bottom: 0;
}
.el-col {
border-radius: 4px;
}
.flex-grow {
flex-grow: 1;
}
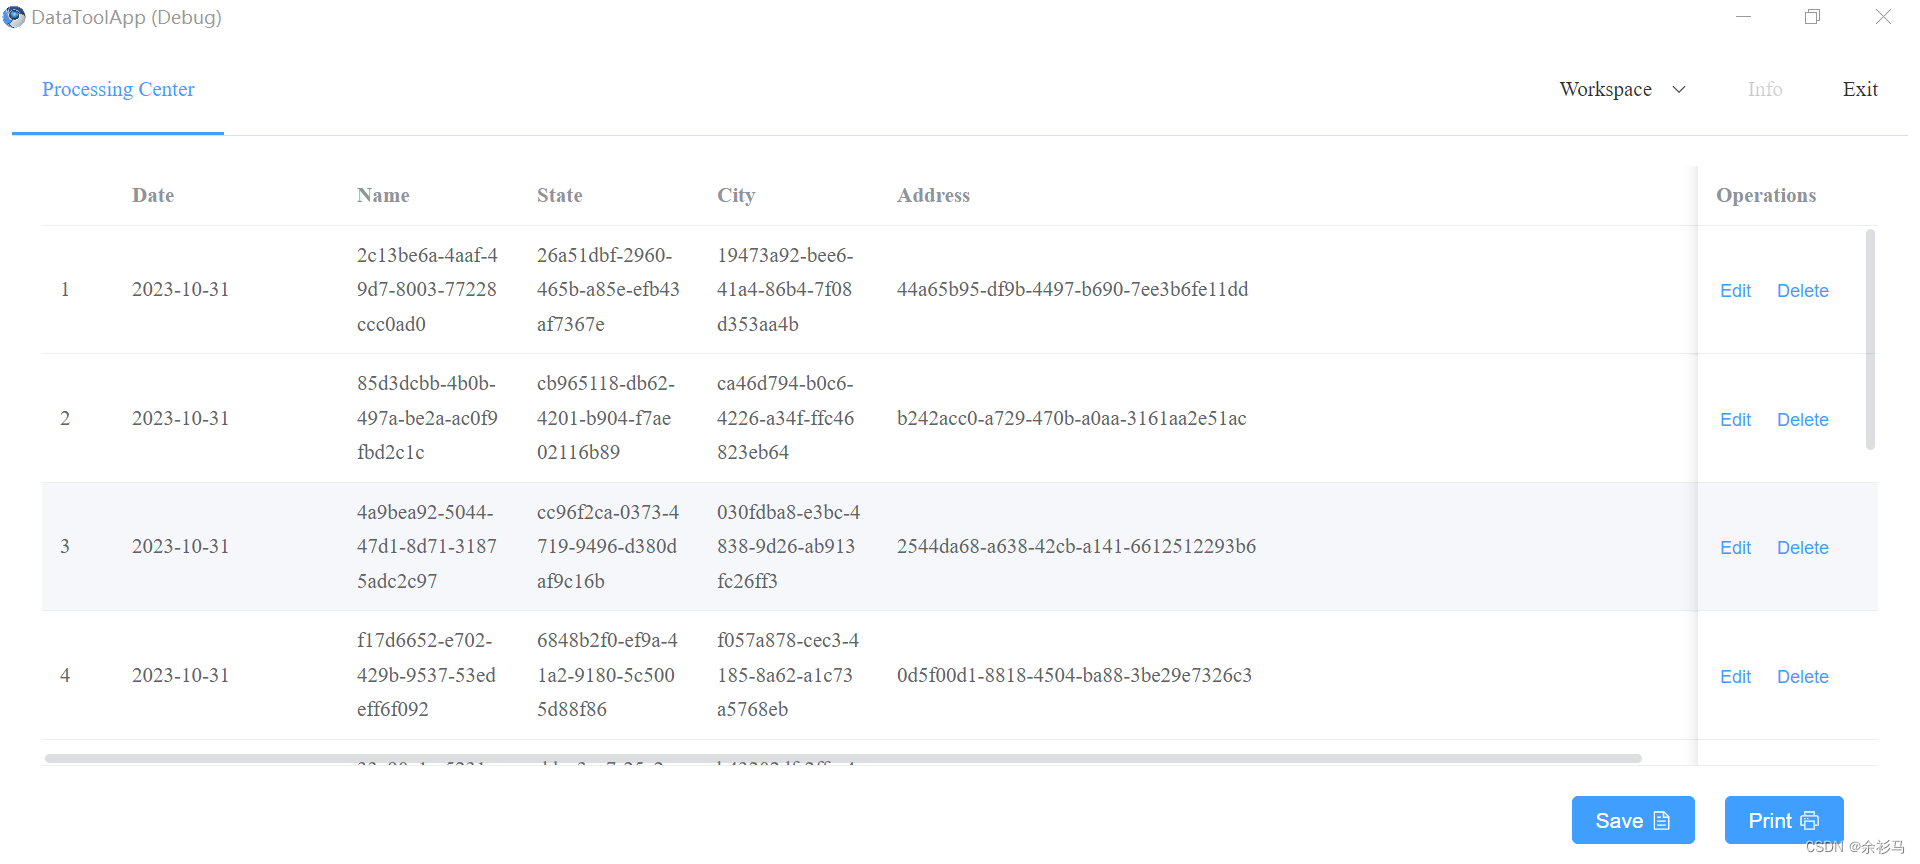
</style>顶部栏菜单效果,
5.2、关闭方法(补充)
// WindowsUtil.cs
namespace DataToolApp.Utils
{
    public class WindowsUtil
    {
        public void Close()
        {
            Program.dataToolForm.DoCloseWindows();
        }
    }
}
// DataToolForm.cs
/// <summary>
/// 关闭窗口
/// </summary>
public void DoCloseWindows()
{
    this.InvokeOnUiThreadIfRequired(()=>
    {
        rowser.Dispose();
        Cef.Shutdown();
        Close();
    });
}

/// <summary>
/// 导出类方法
/// </summary>
public static void ExposeDotnetClass()
{
    browser.JavascriptObjectRepository.ResolveObject += (sender, e) =>
    {
        // 注册 ExcelUtil 实例
        DoRegisterDotNetFunc(e.ObjectRepository, e.ObjectName, "excelUtil", new ExcelUtil());
        // 注册 PrinterlUtil 实例
        DoRegisterDotNetFunc(e.ObjectRepository, e.ObjectName, "printerlUtil", new PrinterlUtil());
        // 注册 WindowsUtil 实例
        DoRegisterDotNetFunc(e.ObjectRepository, e.ObjectName, "windowsUtil", new WindowsUtil());
        // 注册其他实例 ...
    };

    browser.JavascriptObjectRepository.ObjectBoundInJavascript += (sender, e) =>
    {
        var name = e.ObjectName;
        Debug.WriteLine($"Object {e.ObjectName} was bound successfully.");
    };

}
6、调整 DoRegisterDotNetFunc
NameConverter 只能赋值一次,
        /// <summary>
        /// 注册 DoNet 实例
        /// </summary>
        /// <param name="repo"> IJavascriptObjectRepository </param>
        /// <param name="eventObjectName">事件对象名</param>
        /// <param name="funcName">方法名</param>
        /// <param name="objectToBind">需要绑定的DotNet对象</param>
        private static void DoRegisterDotNetFunc(IJavascriptObjectRepository repo, string eventObjectName, string funcName, object objectToBind)
        {

            if (eventObjectName.Equals(funcName))
            {
                if (!IsSetNameConverter)
                {
                    repo.NameConverter = new CamelCaseJavascriptNameConverter();
                    IsSetNameConverter = true;
                }

                BindingOptions bindingOptions = null;
                bindingOptions = BindingOptions.DefaultBinder;
                //repo.NameConverter = null;
                //repo.NameConverter = new CamelCaseJavascriptNameConverter();
                repo.Register(funcName, objectToBind, isAsync: true, options: bindingOptions);
            }
        }
四、效果测试
1、查询
2、修改

3、删除
4、保存 Excel
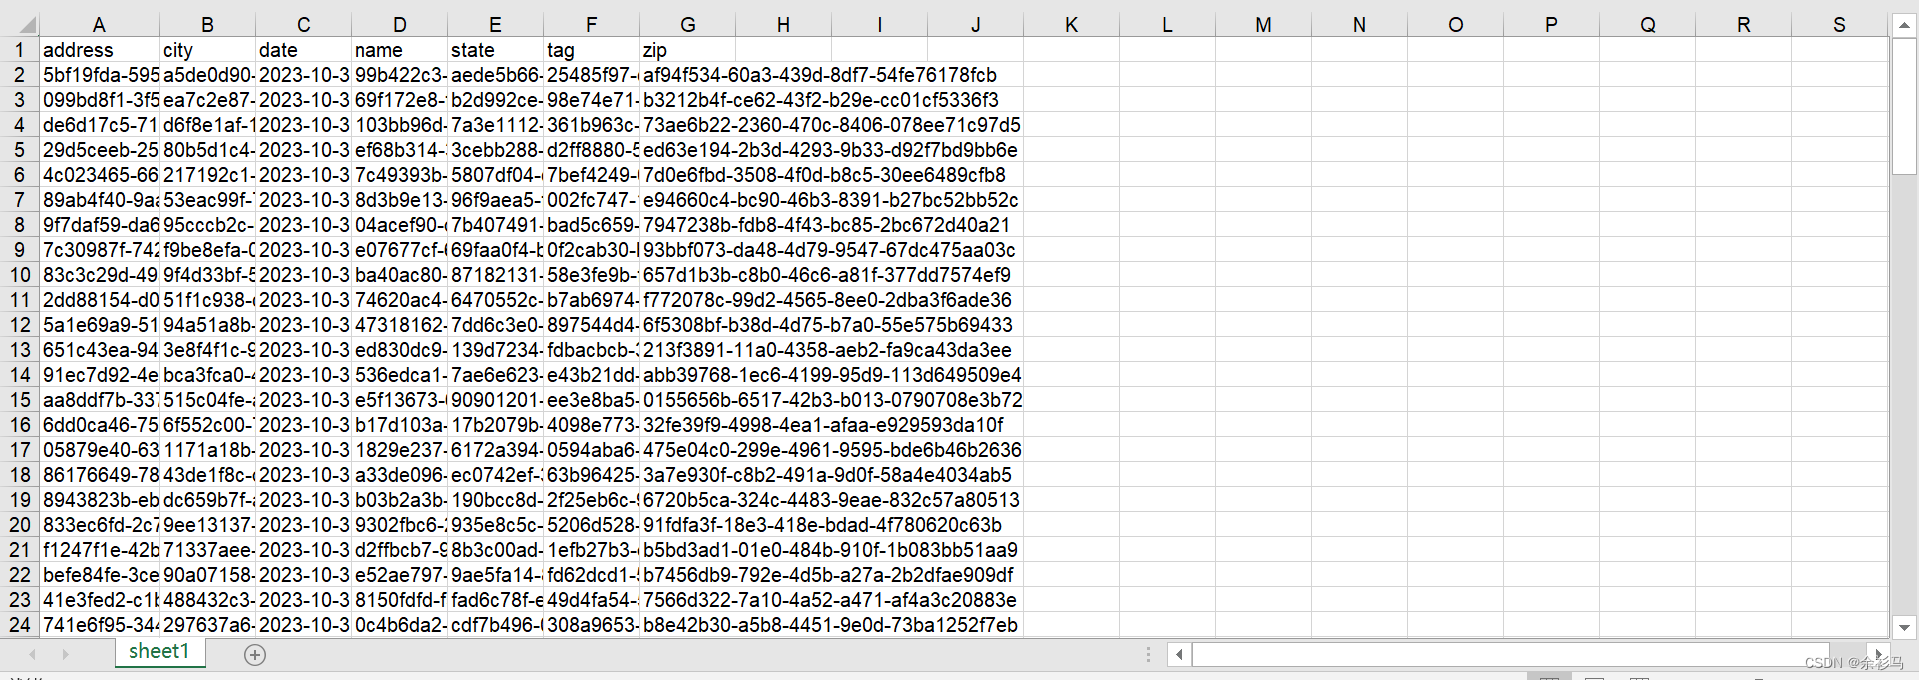
5、打印 PDF


6、关闭
五、窗口属性配置(补充)
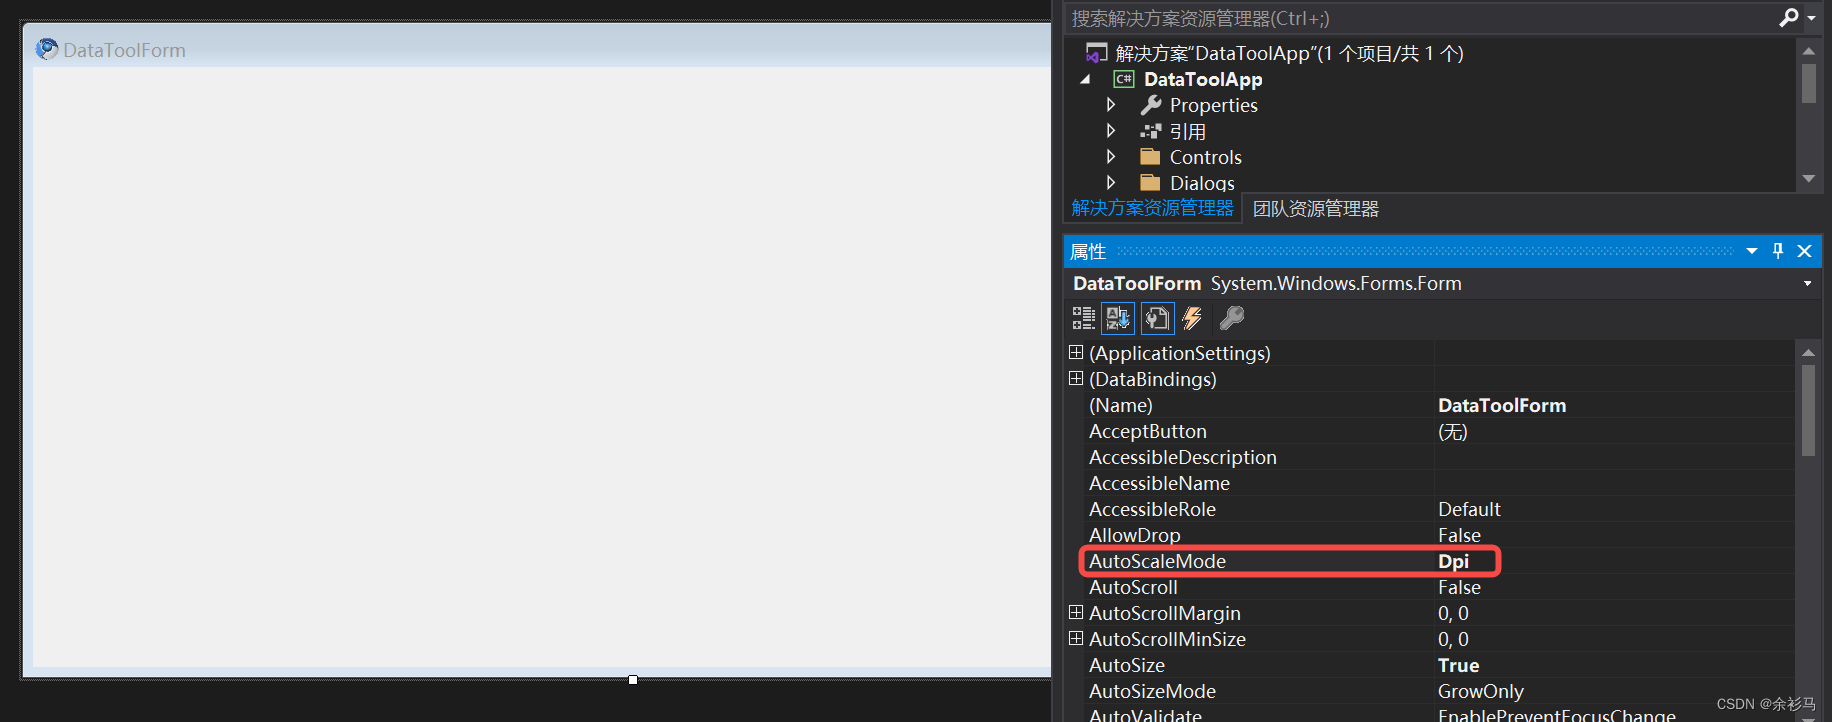
1、自适应分辨率
2、动态边框长宽
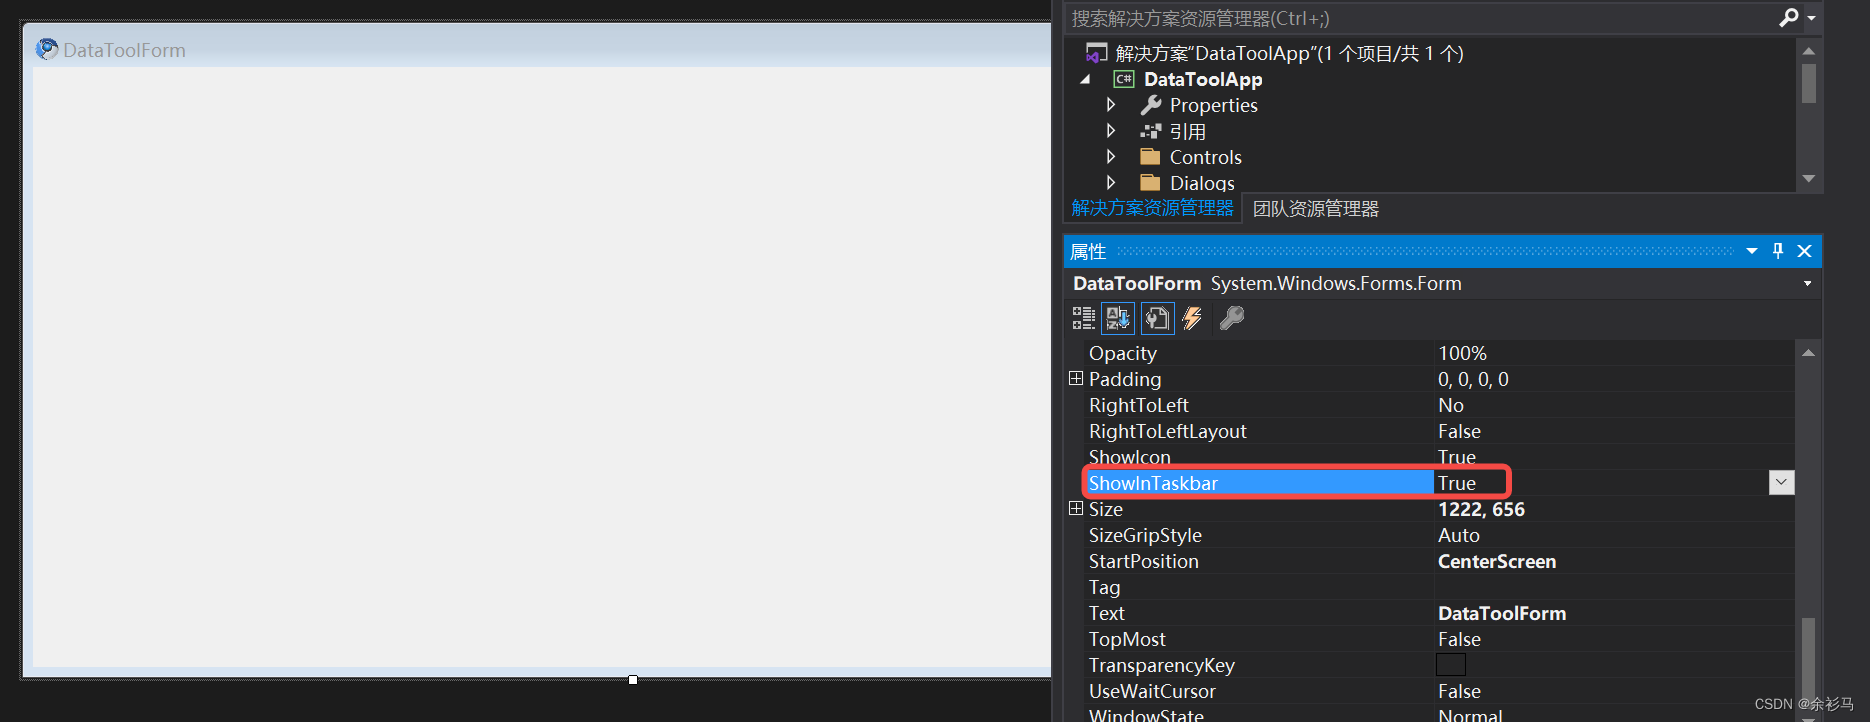
3、显示任务栏图标
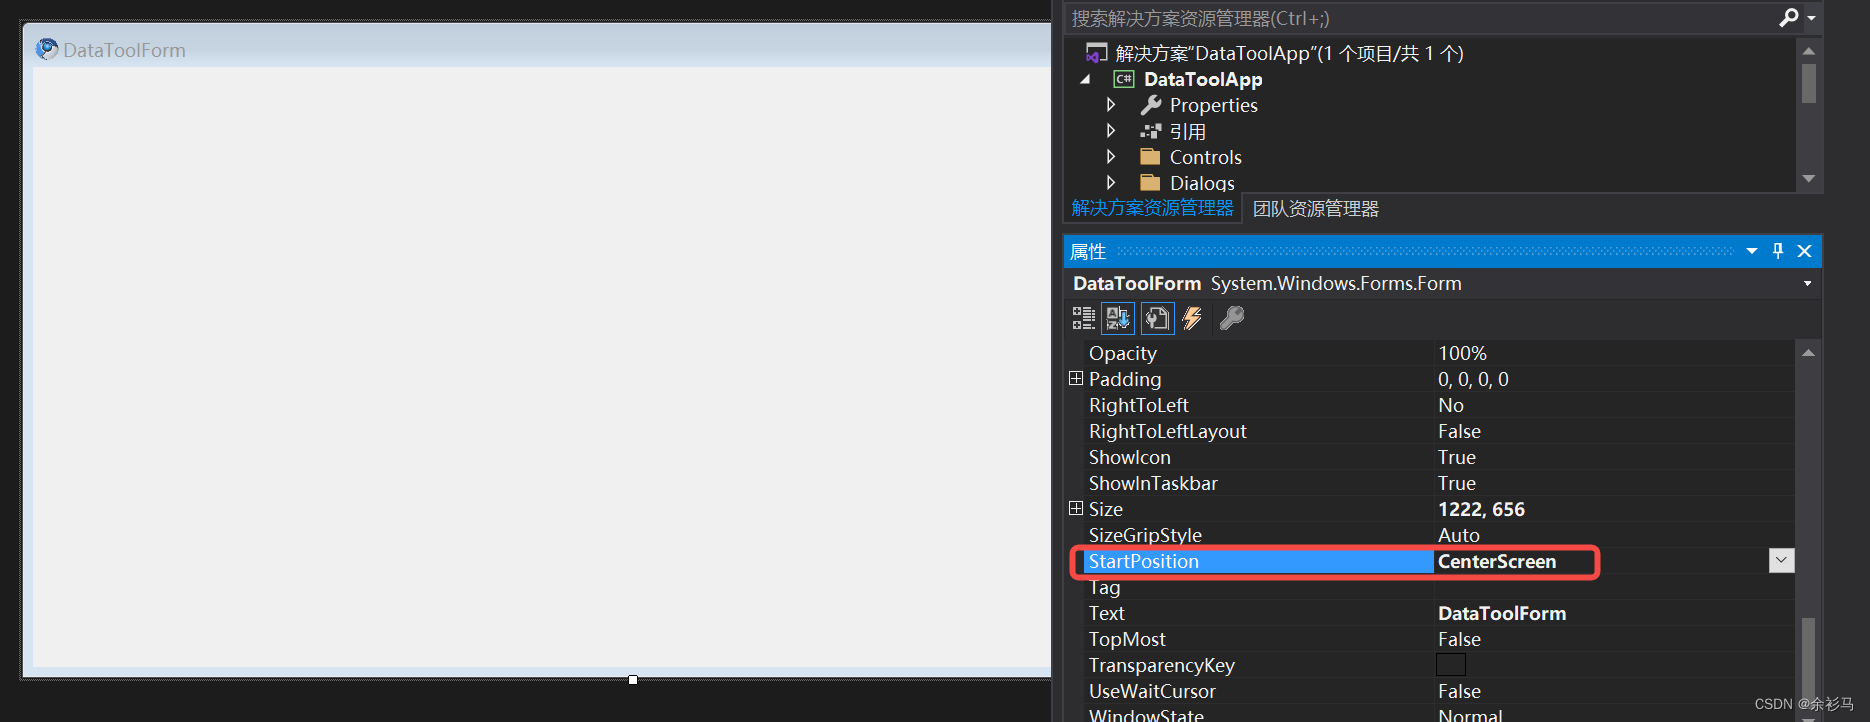
4、窗口屏幕居中
六、Demo 最终成品