Vue2使用触摸滑动插件(Swiper)
参考文档:
-
Swiper官方
-
Swiper Vue
-
Swiper Demos
本文使用的是最新版本:Swiper@9.2.2
安装插件:yarn add swiper
本文基于Swiper插件进行封装,主要实现两种形式的轮播图展示:
-
首页轮播图切换展示(type: banner)
-
走马灯轮播图滚动展示(type: carousel)
可自定义设置以下属性:
-
轮播图片数组(images),类型:Array<{title: string, link?: string, src: string}>,默认 []
-
图片宽度(width),类型:number | string,默认 '100%'
-
图片高度(height),类型:number | string,默认 '100vh'
-
banner轮播图模式 | carousel走马灯模式(type),类型:string,默认 'banner'
-
是否显示导航(navigation),类型:boolean,默认 true
-
自动切换的时间间隔(type: banner时生效)(delay),单位ms,类型:number,默认 3000
-
是否可以鼠标拖动(swipe),类型:boolean,默认 true
-
预加载时的loading颜色(preloaderColor),类型:string,默认 'theme',可选 theme(主题色) | white | black
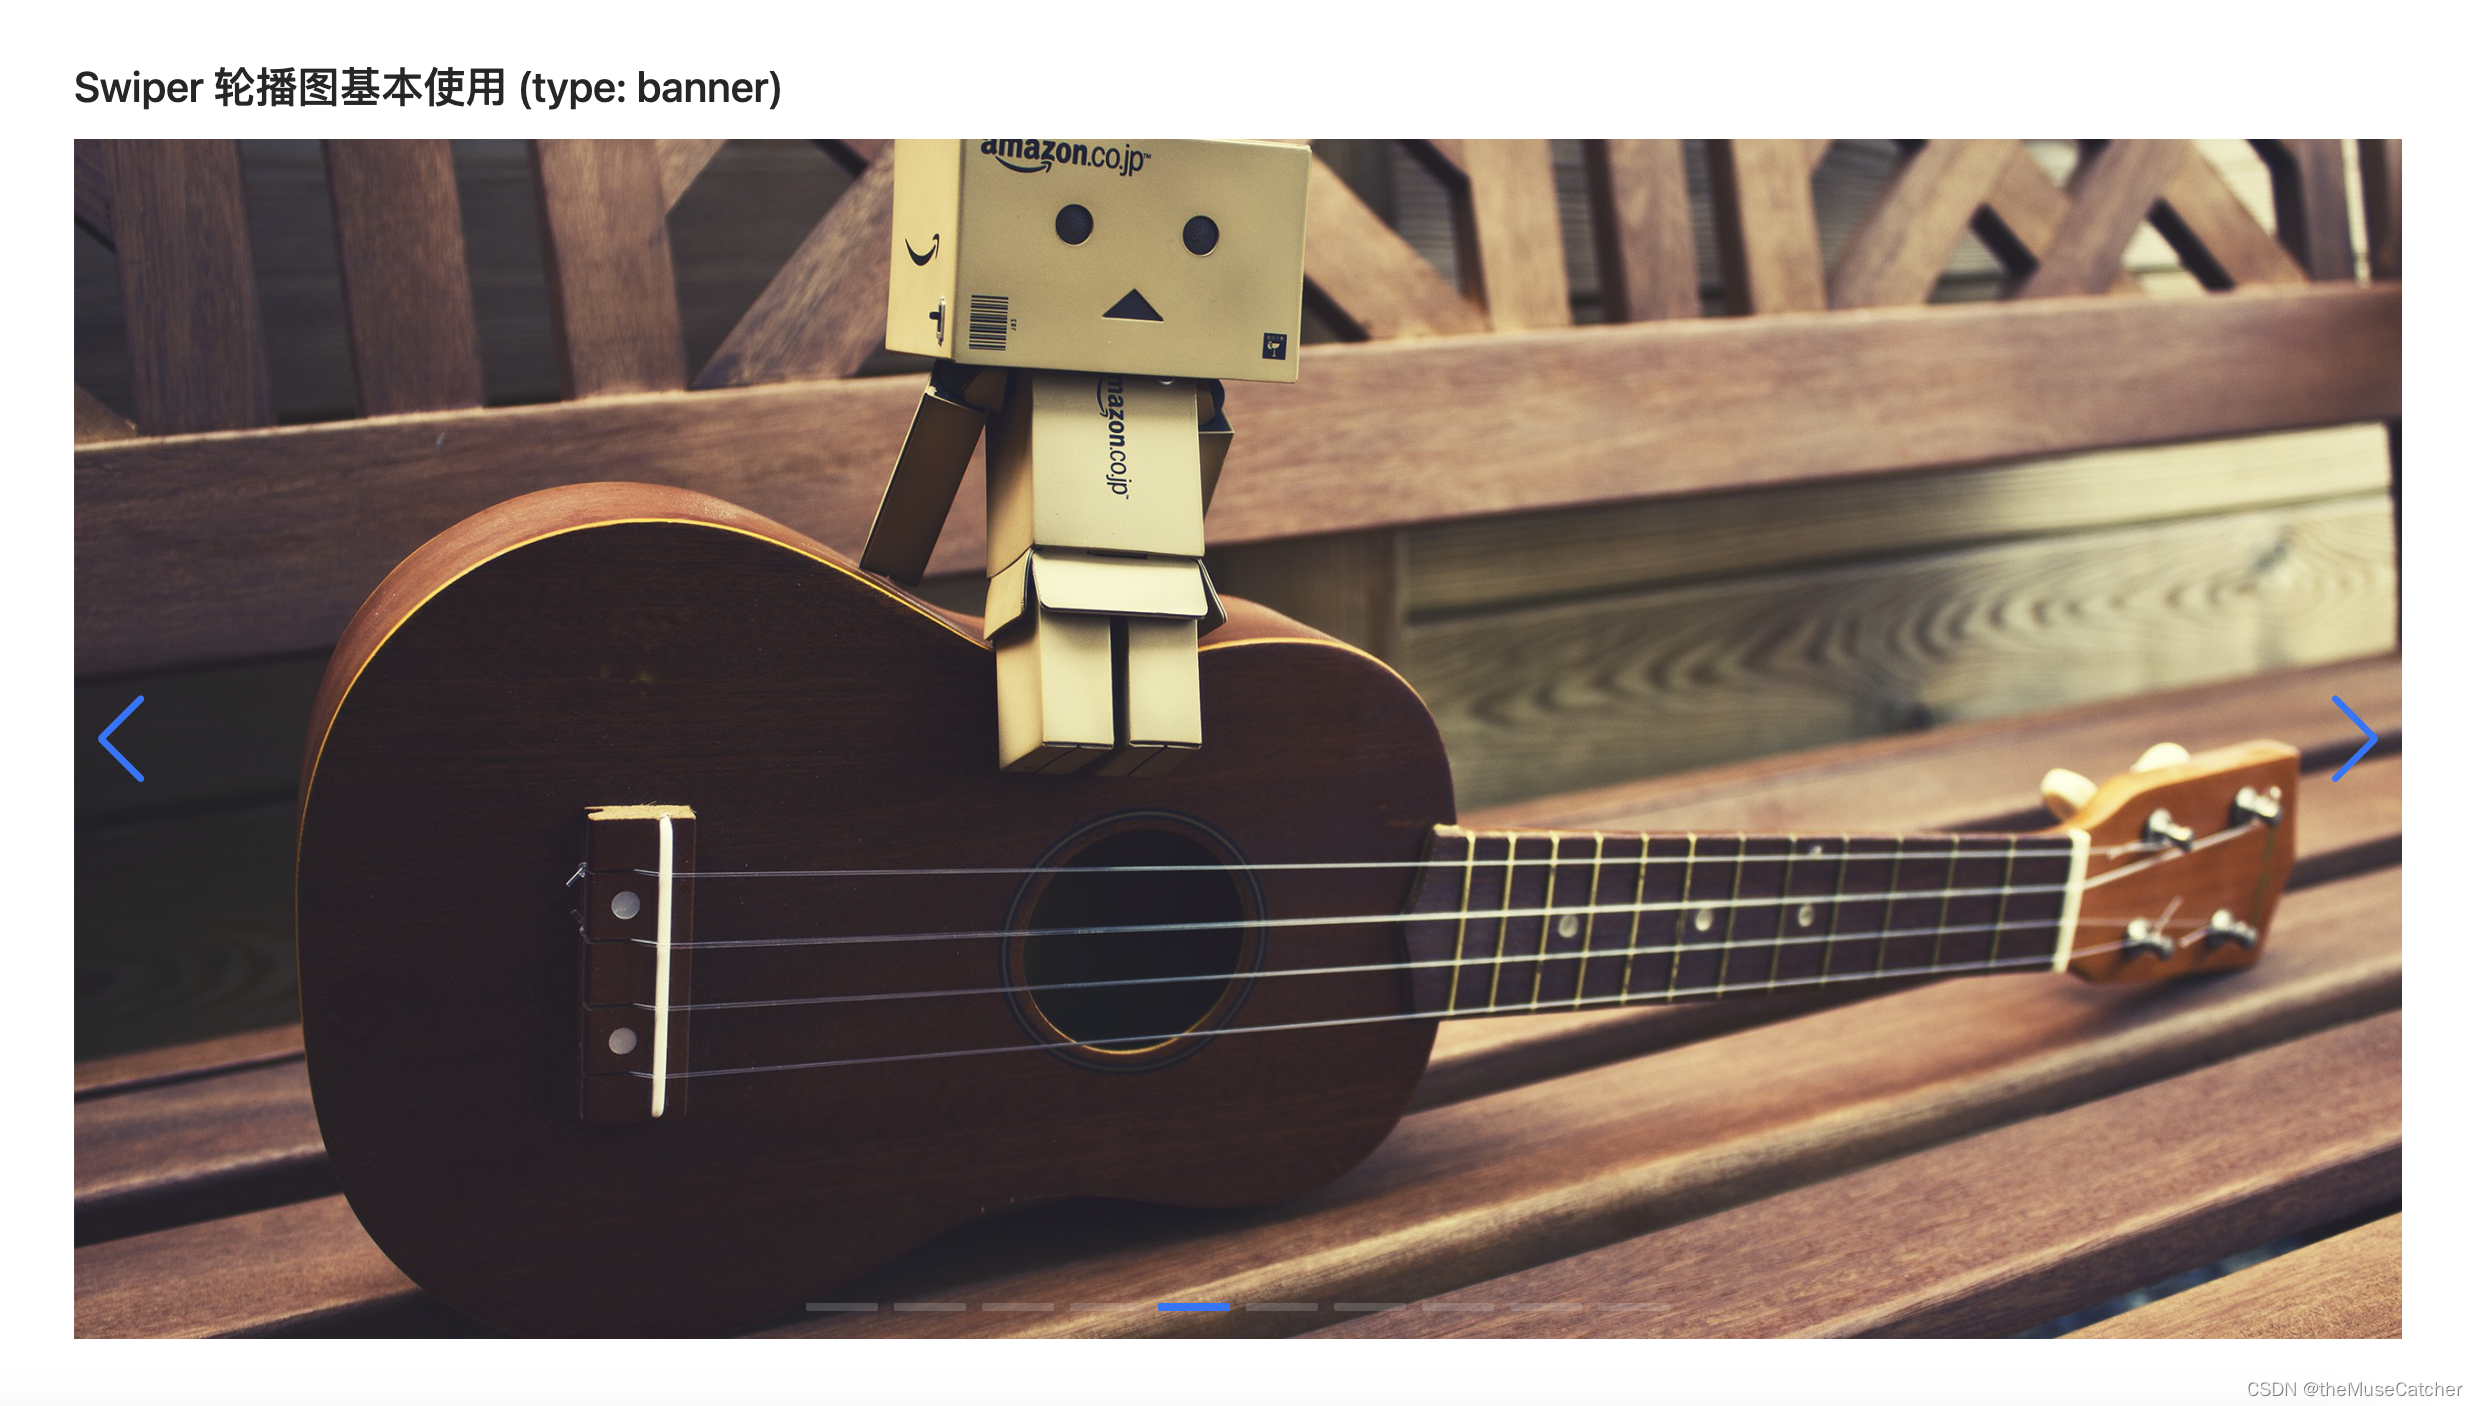
效果如下图:
首页轮播图 type: banner
走马灯 type: carousel

①创建触摸滑动组件Swiper.vue:
<script setup lang="ts">
import { Swiper, SwiperSlide } from 'swiper/vue'
import { Pagination, Navigation, Autoplay, EffectFade } from 'swiper'
import 'swiper/css'
import 'swiper/css/navigation'
import 'swiper/css/pagination'
import 'swiper/css/effect-fade'
import { ref, computed } from 'vue'
interface Image {
  title: string // 图片名称
  link?: string // 图片跳转链接
  src: string // 图片地址
}
interface Props {
  images: Image[] // 轮播图片数组
  width?: number|string // 图片宽度
  height?: number|string // 图片高度
  type?: string // banner轮播图模式 | carousel走马灯模式
  navigation?: boolean // 是否显示导航
  delay?: number // 自动切换的时间间隔(type: banner时生效),单位ms
  swipe?: boolean // 是否可以鼠标拖动
  preloaderColor?: string // 预加载时的loading颜色
}
const props = withDefaults(defineProps<Props>(), {
  images: () => [],
  width: '100%',
  height: '100vh',
  type: 'banner', // 可选 banner | carousel
  navigation: true,
  delay: 3000,
  swipe: true,
  preloaderColor: 'theme' // 可选 theme white black
})
const imgWidth = computed(() => {
  if (typeof props.width === 'number') {
    return props.width + 'px'
  } else {
    return props.width
  }
})
const imgHeight = computed(() => {
  if (typeof props.height === 'number') {
    return props.height + 'px'
  } else {
    return props.height
  }
})
const modulesBanner = ref([Navigation, Pagination, Autoplay, EffectFade])
const pagination = ref({
  clickable: true
})
const autoplayBanner = ref({
  delay: props.delay,
  disableOnInteraction: false, // 用户操作swiper之后,是否禁止autoplay。默认为true:停止。
  pauseOnMouseEnter: true // 鼠标置于swiper时暂停自动切换,鼠标离开时恢复自动切换,默认false
})

const modulesCarousel = ref([Autoplay])
const autoplayCarousel = ref<object|boolean>({
  delay: 0,
  disableOnInteraction: false
})
function onSwiper (swiper: any) {
  // console.log(swiper)
  if (props.type === 'carousel') {
    swiper.el.onmouseenter = () => { // 移入暂停
      swiper.autoplay.stop()
    }
    swiper.el.onmouseleave = () => { // 移出启动
      swiper.autoplay.start()
    }
  }
}
</script>
<template>
  <swiper
    :class="{'swiper-no-swiping': !swipe}"
    v-if="type==='banner'"
    :modules="modulesBanner"
    :lazy="true"
    :navigation="navigation"
    :pagination="pagination"
    :slides-per-view="1"
    :autoplay="autoplayBanner"
    :loop="true"
    @swiper="onSwiper"
    @slideChange="$emit('change')"
    v-bind="$attrs">
    <swiper-slide v-for="(image, index) in images" :key="index">
      <a :href="image.link ? image.link:'javascript:;'" :target="image.link ? '_blank':'_self'" class="m-link">
        <img
          :src="image.src"
          class="u-img"
          :style="`width: ${imgWidth}; height: ${imgHeight};`"
          :alt="image.title"
          loading="lazy" />
      </a>
      <div :class="`swiper-lazy-preloader swiper-lazy-preloader-${preloaderColor}`"></div>
    </swiper-slide>
  </swiper>
  <swiper
    class="swiper-no-swiping"
    v-if="type==='carousel'"
    :modules="modulesCarousel"
    :lazy="true"
    :autoplay="autoplayCarousel"
    :loop="true"
    @swiper="onSwiper"
    @slideChange="$emit('change')"
    v-bind="$attrs">
    <swiper-slide v-for="(image, index) in images" :key="index">
      <a :href="image.link ? image.link:'javascript:;'" :target="image.link ? '_blank':'_self'" class="m-link">
        <img
          :src="image.src"
          class="u-img"
          :style="`width: ${imgWidth}; height: ${imgHeight};`"
          :alt="image.title"
          loading="lazy" />
      </a>
      <div :class="`swiper-lazy-preloader swiper-lazy-preloader-${preloaderColor}`"></div>
    </swiper-slide>
  </swiper>
</template>
<style lang="less" scoped>
.m-link {
  display: block;
  height: 100%;
}
.u-img {
  object-fit: cover;
  cursor: pointer;
}
.swiper {
  --swiper-theme-color: @themeColor;
}
:deep(.swiper-wrapper) { // 自动切换过渡效果设置
  transition-timing-function: linear; // 线性过渡模拟走马灯效果
  -webkit-transition-timing-function: linear;
}
:deep(.swiper-pagination-bullet) {
  width: 36px;
  height: 4px;
  background: #E3E3E3;
  border-radius: 1px;
  margin-right: 10px;
  cursor: pointer;
}
:deep(.swiper-pagination-bullet-active) {
  background: @themeColor;
}
.swiper-lazy-preloader-theme {
  --swiper-preloader-color: @themeColor;
}
</style>
②在要使用的页面引入:
<script setup lang="ts">
import { Swiper } from './Swiper.vue'
import { ref, onBeforeMount } from 'vue'
import { getImageUrl } from '@/utils/util'

const images = ref<any[]>([])

function loadImages () {
  for (let i = 1; i <= 10; i++) {
    images.value.push({
      title: `image-${i}`,
      link: '',
      src: getImageUrl(i)
    })
  }
  console.log(images.value)
}
onBeforeMount(() => { // 组件已完成响应式状态设置,但未创建DOM节点
  loadImages()
})
function onChange () {
  console.log('slider change')
}
</script>
<template>
  <div>
    <h1>Swiper 参考文档</h1>
    <ul class="m-list">
      <li>
        <a class="u-file" href="https://swiperjs.com/" target="_blank">Swiper官方</a>
      </li>
      <li>
        <a class="u-file" href="https://swiperjs.com/vue" target="_blank">Swiper Vue</a>
      </li>
      <li>
        <a class="u-file" href="https://swiperjs.com/demos" target="_blank">Swiper Demos</a>
      </li>
    </ul>
    <h2 class="mt30 mb10">Swiper 轮播图基本使用 (type: banner)</h2>
    <Swiper
      :images="images"
      type="banner"
      effect="slider"
      width="100%"
      height="100vh"
      navigation
      @change="onChange" />
    <h2 class="mt30 mb10">Swiper 走马灯基本使用 (type: carousel)</h2>
    <Swiper
      :images="images"
      type="carousel"
      width="100%"
      preloaderColor="theme"
      :height="240"
      :slides-per-view="3"
      :space-between="20"
      :speed="2500" />
  </div>
</template>
<style lang="less" scoped>
</style>