安装环境
1. 安装vue+nodejs
略
2.创建项目
vue init webpack 项目名

3. 安装依赖
PS:此处自行选择安装
# 进入工程目录
cd hello-vue

# 安装vue-router
npm install vue-router --save-dev

# 安装element-ui
npm i element-ui -S

# 安装SASS加载器
npm install sass-loader node-sass --save-dev

# 安装axios
npm install --save axios vue-axios

# 安装项目
npm install

# 安装js-cookies
npm i js-cookie -S

# 启动项目
npm run dev
Vue路由
1. 创建路由文件夹
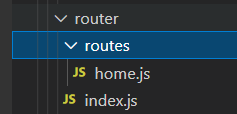
2. 改写路由
// index.js
import Vue from 'vue'
import Router from 'vue-router'
import homeroute from './routes/home.js'
import Vuex from 'vuex'

Vue.use(Router);

const router = new VueRouter({
  routes:homeroute,
  model: 'history',
  base: '/',
})

export default router
此处把 export default newRouter({});进行改写,把它单独拿出来,而此时我们定义的变量router引用了homeroute。而homerouter是我们定义的方便管理home路由的一个路由文件,后序我们再加的时候只需要新建路由文件,然后分开管理即可。尽量做到每个页面一个路由文件。做好路由的统一管理。
// home.js
let routes = [
    {path: '/', redirect: '/home'},
    {
      path: '/home',
      name: "Home",
      component: (resolve) => require(['../../views/home.vue'], resolve),
    },
    {
      path: '/hello',
      name: "HelloWorld",
      component: (resolve) => require(['../../components/HelloWorld.vue'], resolve),
    }

  ]
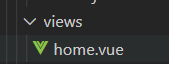
export default routes;这里我们把/进行重定向,原本/是直接进入到app.vue然后引用了Helloword.vue文件。我们把helloworld.vue进行了路由重写,让他定位到/hello中。然后我们redirect直接就跳到了我们的首页。而我们的/home就是我们views/文件夹下面的home.vue
引入模板
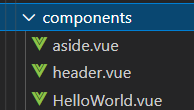
1. 创建文件夹
// components
// views
此处进行分模块管理。侧边栏放在aside.vue文件夹中,导航栏放在header.vue文件夹中。
2. 引入模块
<template>
  <div id="Home">
    <Header></Header>
    <el-container>
      <Aside></Aside>
    </el-container>
  </div>
</template>
<script>
import Header from '@/components/header.vue'
import Aside from '@/components/aside.vue'
export default {
  name: 'Home',
  components:{
    Header,
    Aside
  }

}
</script>

<style>
#app {
  font-family: 'Avenir', Helvetica, Arial, sans-serif;
  -webkit-font-smoothing: antialiased;
  -moz-osx-font-smoothing: grayscale;
  text-align: center;
  color: #2c3e50;
  margin-top: 60px;
}
</style>
我们引入后取的名字Header和Aside就可以直接使用他们的名字作为标签来插入到我们的home.vue中。实现分文件管理。让任务更清晰明确,解耦合。
引入Vuex
在我们的导航栏和侧边栏中,我们想要实现点击按钮收起侧边栏。但是由于是分文件的。我们点击事件放在导航栏,影响的是侧边栏的属性。所以我们要使用vuex。为了呈现之后用elementui写的html,也将引入elementui。
在router/index.js里面,引入
import Vue from 'vue'
import Router from 'vue-router'
import VueRouter from 'vue-router'
import homeroute from './routes/home.js'
import ElementUI from 'element-ui';
import 'element-ui/lib/theme-chalk/index.css'
import Vuex from 'vuex'

Vue.use(Vuex);
Vue.use(ElementUI);
Vue.use(Router);

const router = new VueRouter({
  routes:homeroute,
  model: 'history',
  base: '/',
})

export default router
此处使用了Vue.use,使全局共享引入的模块,所以每个文件都可以使用。
2. 创建store文件夹
Vuex中是为了方便管理全局变量。我们定义了一个state里面包含我们要用到的isCollapse,以改变他是展开还是叠起。实现侧边栏展开叠起功能。我们通过mutations定义一个改变他状态的函数。然后通过new Vuex.Store给他们注册。export default 把他们暴露出来。后面我们就可以直接引用这个变量和这个方法了。而state的状态只能通过mutations改变,请一定要注意。
import Vue from 'vue'
import Vuex from 'vuex'

Vue.use(Vuex);

const state = {
    isCollapse: false,
}

const mutations={
    change(state){
        state.isCollapse = !state.isCollapse;
    }
}

export default new Vuex.Store({
    state,
    mutations,
});
// aside.vue
<template>
    <div>
<!-- 菜单栏宽度设为自动 -->
<el-aside width="auto">

    <el-menu
        default-active="2"
        class="el-menu-vertical"
        background-color="#545c64"
        text-color="#fff"
        active-text-color="#ffd04b"
        :collapse="$store.state.isCollapse"> // 属性的绑定
        <el-submenu index="1">

            <template slot="title">
                <i class="el-icon-location"></i>
                <span>导航一</span>
            </template>
            <el-menu-item-group>
                <template slot="title">分组一</template>
                <el-menu-item index="1-1">选项1</el-menu-item>
                <el-menu-item index="1-2">选项2</el-menu-item>
            </el-menu-item-group>
            <el-menu-item-group title="分组2">
                <el-menu-item index="1-3">选项3</el-menu-item>
            </el-menu-item-group>
            <el-submenu index="1-4">
                <template slot="title">选项4</template>
                <el-menu-item index="1-4-1">选项1</el-menu-item>
            </el-submenu>
        </el-submenu>
        <el-menu-item index="2">
            <i class="el-icon-menu"></i>
            <span slot="title">导航二</span>
        </el-menu-item>
        <el-menu-item index="3" disabled>
            <i class="el-icon-document"></i>
            <span slot="title">导航三</span>
        </el-menu-item>
        <el-menu-item index="4">
            <i class="el-icon-setting"></i>
            <span slot="title">导航四</span>
        </el-menu-item>
    </el-menu>
</el-aside>
    </div>
</template>

<script>
import store from '@/store/store' // 引入store

  export default {
    data(){
      return{
      };
    },
    store, // 这里使用了store
    methods: {
      handleOpen(key, keyPath) {
        console.log(key, keyPath);
      },
      handleClose(key, keyPath) {
        console.log(key, keyPath);
      }
    }
  }
</script>

<style>
.el-menu{
  border-right: none;
}

/** 设置展开式菜单宽度 */
.el-menu-vertical:not(.el-menu--collapse){
  width: 230px;
}
</style>
// header.vue
<template>
    <div>
        <el-header height="50px">
            <a class="logo" href="/" style="float: left">后台管理系统</a>
            <div class="toggle" @click="$store.commit('change')"> // 使用mutatijons方法
                <i class="el-icon-s-unfold" v-if="$store.state.isCollapse"></i> // 绑定属性
                <i class="el-icon-s-fold" v-if="!$store.state.isCollapse"></i> // 绑定属性
            </div>
            <el-dropdown>
                <span class="el-dropdown-link">
                    <i class="el-icon-user el-icon--left"></i>
                </span>
                <el-dropdown-menu slot="dropdown">
                    <el-dropdown-item icon="el-icon-user"> 用户中心</el-dropdown-item>
                    <el-dropdown-item icon="el-icon-setting"> 修改密码</el-dropdown-item>
                    <el-dropdown-item icon="el-icon-switch-button"> 退出登录</el-dropdown-item>
                </el-dropdown-menu>
                <span class="el-dropdown-link">
                    <i class="el-icon-switch-button"></i>
                </span>
            </el-dropdown>
        </el-header>
    </div>
</template>

<script>
import store from '@/store/store' // 引入vuex
export default {
    name: 'Header',

    data(){
        return{
            activeIndex: '1',
        };
    },
    store, // 使用store
    methods: {
    handleSelect(key, keyPath) {
    console.log(key, keyPath);
    }
}
}
</script>
<style>
.el-header{
    background-color: #0074D9;
    z-index: 999;
}
/* logo */
.logo{
    color: #fff;
    text-align: center;
    font-size: 26px;
    line-height: 50px;
    padding: 0 15px;
    font-weight: 400;
    text-decoration: none;
}
/* 折叠按钮 */
.toggle{
    color: #fff;
    text-align: center;
    font-size: 26px;
    line-height: 50px;
    display: inline-block;
    padding: 0 15px;
    border-left: solid 1px #ccc;
    position: absolute;
    left:230px;
    cursor: pointer;
}
.toggle:hover{
    background-color: #ffd04b;
}
/* 下拉菜单 */
.el-dropdown{
    color: #fff;
    text-align: center;
    font-size: 26px;
    line-height: 50px;
    float: right;
}
.el-dropdown-link{
    cursor: pointer
}
</style>
注意看注释,上面就是Vuex的使用。我们通过点击事件@click触发mutations的change方法。改变了state里面的isCollopse。然后根据这个isCollopse我们的侧边栏就可以自由切换叠起和展开状态。
以上是routes分文件管理,模板引入,以及Vuex使用的初步体验。后序代码都是基于以上操作进行。只要运用合理。很多动态的页面都可以实现。